
Amaryllis (Hippeastrum spp.) are popular for their stunning, trumpet-shaped blooms that add vibrant color to any indoor space during the winter months. While they are traditionally grown in soil, you can also grow them in water using plastic cups. This method not only simplifies the process but also allows you to observe the fascinating root growth. In this article, we will guide you through the steps to successfully grow amaryllis in water, using plastic cups, and offer tips for maintaining healthy, blooming plants.
Introduction
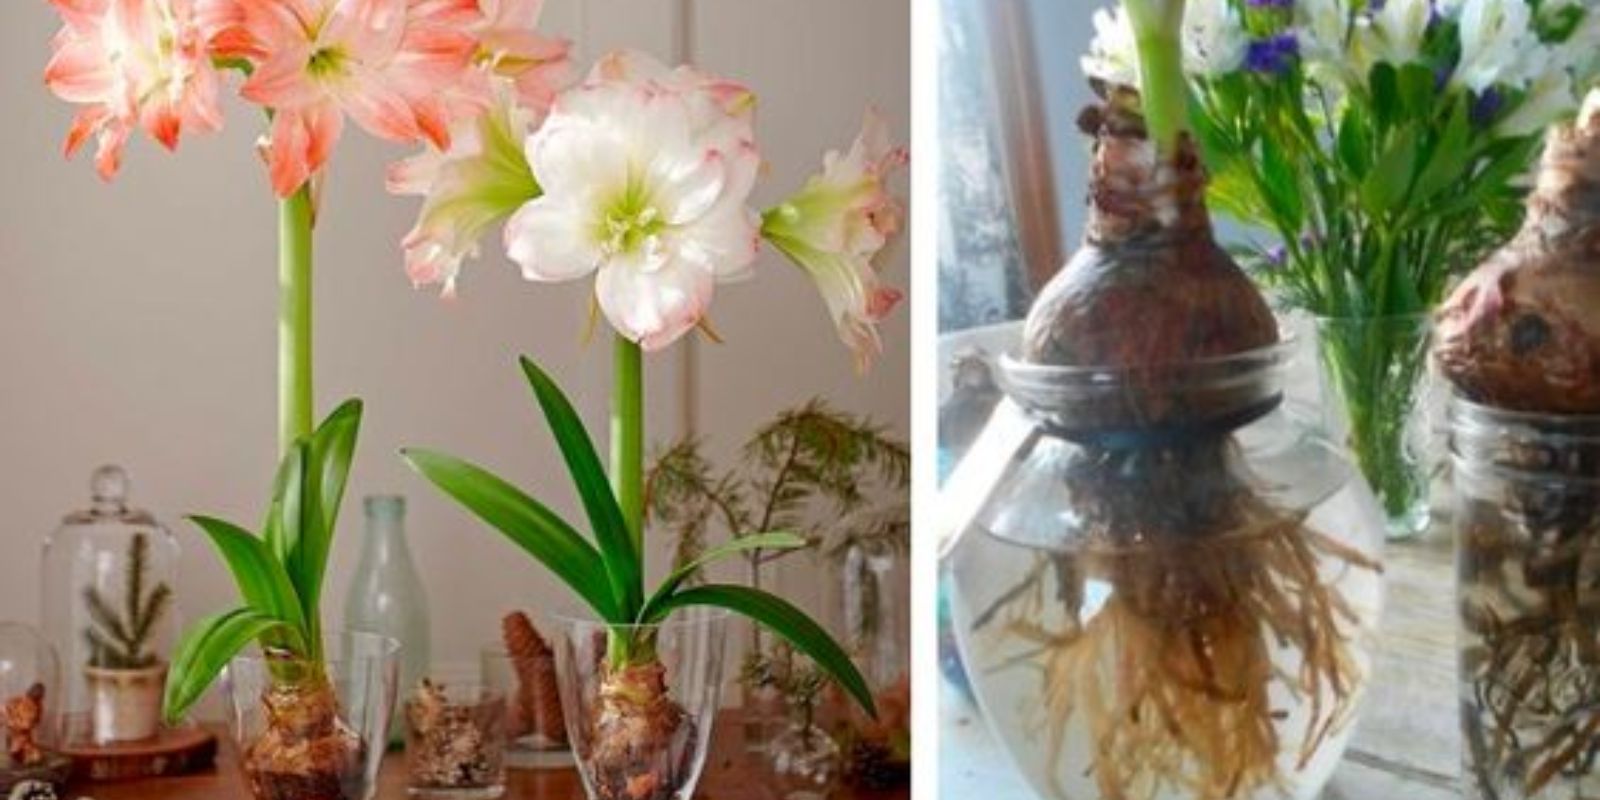
Growing amaryllis in water is an elegant and convenient way to enjoy these beautiful flowers without the mess of soil. This method is ideal for those who want to watch the growth process up close and enjoy the minimalist aesthetic of bulbs suspended in water. By following a few simple steps, you can successfully cultivate amaryllis in water and bring a touch of nature’s brilliance into your home.
Benefits of Growing Amaryllis in Water
- Mess-Free: Eliminates the need for soil, making it a cleaner process.
- Aesthetic Appeal: Provides a unique, stylish way to display the plants.
- Educational: Allows for observation of root development and plant growth.
- Space-Saving: Ideal for small spaces and indoor gardening.
Step-by-Step Guide to Growing Amaryllis in Water Using Plastic Cups
Step 1: Selecting Healthy Bulbs
- Choose Quality Bulbs: Select firm, healthy amaryllis bulbs from a reputable supplier. Avoid bulbs that are soft, shriveled, or moldy, as they are less likely to thrive.
- Inspect the Bulbs: Ensure the bulbs have intact roots and are free from visible damage or rot.
Step 2: Preparing Plastic Cups
- Select Clear Plastic Cups: Use clear plastic cups that are deep enough to support the bulb and provide space for root growth. The transparency allows you to monitor the water level and root development.
- Create a Stable Base: If the cups are lightweight, consider placing them in a more stable container to prevent tipping.
Step 3: Adding Water
- Fill the Cups: Add water to the cups until it just reaches the bottom of the bulb. The roots should be in the water, but the base of the bulb should remain dry to prevent rot.
- Check the Water Level: Ensure that the water level covers the roots but does not submerge the bulb itself.
Step 4: Positioning the Bulbs
- Place the Bulbs in Cups: Position the bulbs in the cups so that the roots are submerged in water and the base of the bulb is above the waterline. This setup helps prevent bulb rot and encourages healthy growth.
- Provide Support: If the bulbs are top-heavy, you can use stones or marbles at the bottom of the cups to provide additional support and keep the bulbs stable.
Step 5: Creating the Right Environment
- Choose a Bright Location: Place the cups in a location with bright, indirect sunlight. Amaryllis bulbs need plenty of light to grow and bloom, but direct sunlight can be too intense.
- Maintain Consistent Temperature: Keep the bulbs in a room with a consistent temperature between 65-75°F (18-24°C). Avoid placing them near drafts or heat sources.
Step 6: Monitoring and Maintenance
- Monitor Water Level: Check the water level regularly and top up as needed to ensure the roots remain submerged. Change the water every week to prevent stagnation and bacterial growth.
- Observe Root and Shoot Development: Watch for root growth from the base of the bulb and shoots emerging from the top. This process can take several weeks, so be patient.
- Rotate the Bulbs: If the shoots lean towards the light, rotate the cups every few days to encourage even growth.
Step 7: Encouraging Blooms
- Fertilize Sparingly: Once the shoots are well-established, you can add a diluted, balanced liquid fertilizer to the water every 4-6 weeks. Avoid over-fertilizing, as it can cause root burn.
- Support Flower Stalks: As the flower stalks grow, they may need support to prevent them from toppling over. Use stakes or plant ties to keep them upright.
Tips for Success
- Avoid Overwatering: Ensure the bulb’s base remains dry to prevent rot. Adjust the water level as needed to keep the roots submerged without touching the bulb’s base.
- Check for Pests: Monitor the bulbs for signs of pests, such as aphids or spider mites, and treat promptly if necessary.
- Rest Period: After flowering, allow the foliage to die back naturally. Once the foliage has yellowed, you can store the bulb in a cool, dry place for a few months before replanting.
Conclusion
Growing amaryllis in water using plastic cups is a simple and elegant way to enjoy their stunning blooms. This method offers a clean, space-saving alternative to traditional soil planting and allows you to witness the plant’s development from root to flower. By following the steps outlined in this guide and providing the right care, you can successfully cultivate healthy, blooming amaryllis plants that brighten your home.
Motivation:
Start your amaryllis water-growing project today and experience the joy of watching these beautiful flowers bloom. Share your progress and tips with other gardening enthusiasts to inspire and learn from each other. Happy growing!