
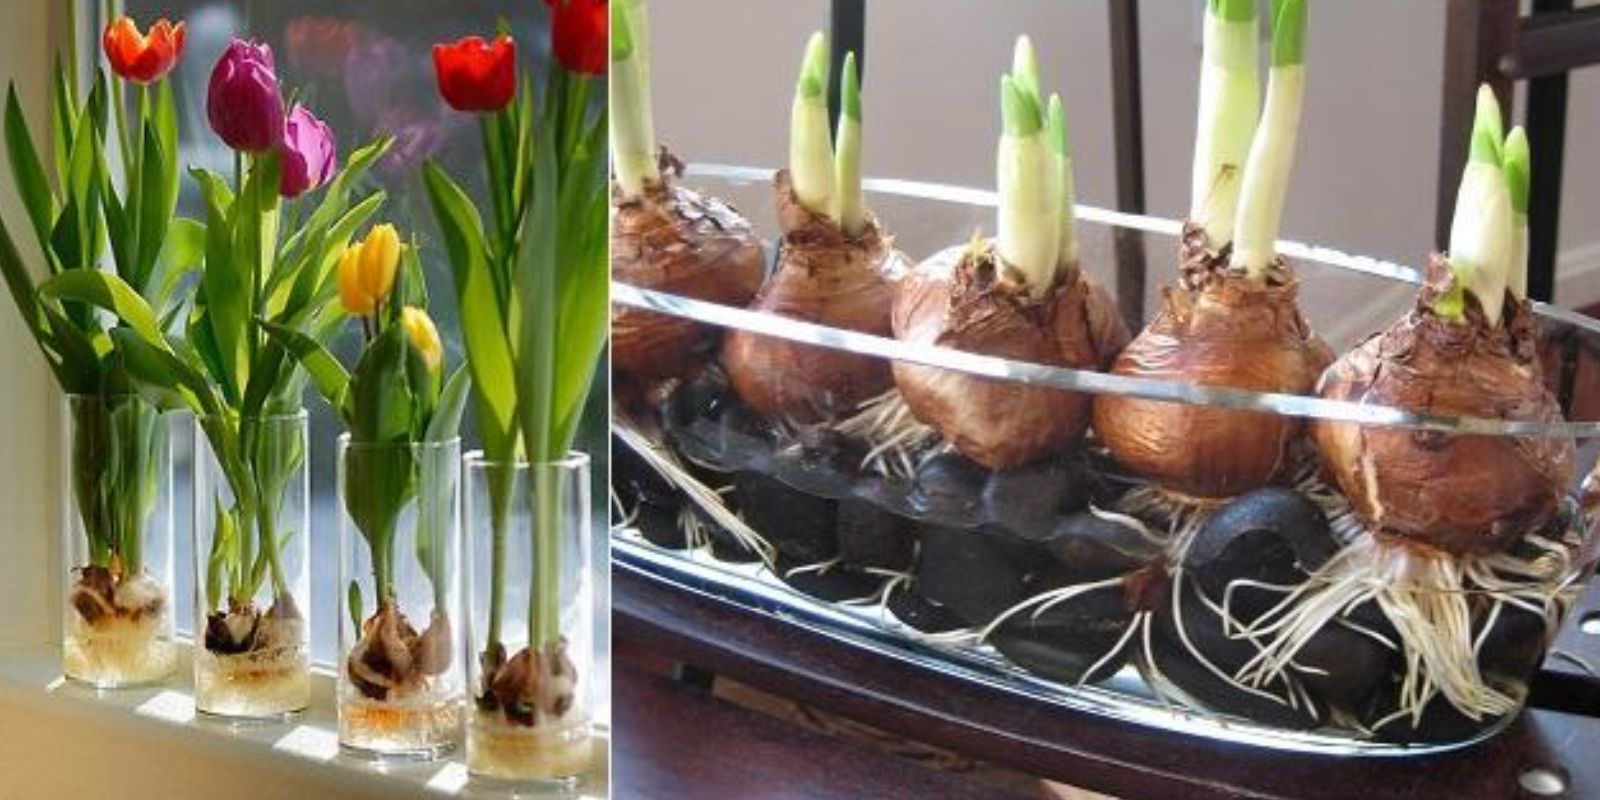
Amaryllis, with its breathtaking blossoms and easy-care nature, is a favorite among indoor gardeners. Typically grown in soil, these magnificent flowers can also thrive in water, adding an extra layer of elegance to your home décor. If you’ve ever admired the vibrant colors of amaryllis and wished to cultivate them yourself, this comprehensive guide will walk you through the process of growing amaryllis in water using simple plastic cups.
Understanding Amaryllis
Amaryllis is a bulbous perennial that belongs to the Amaryllidaceae family. Known for its large, trumpet-shaped flowers, amaryllis is often associated with the holiday season but can be enjoyed year-round. The plant produces stunning blooms in various colors, including red, white, pink, and orange, making it a popular choice for gifts and home decoration.
The Benefits of Growing Amaryllis in Water
- Simplicity: Growing amaryllis in water is straightforward and doesn’t require soil, making it an ideal option for beginners.
- Cleanliness: Water gardening is less messy than soil gardening, which can lead to a cleaner indoor environment.
- Visibility: Watching the roots develop in clear water is fascinating and allows you to monitor the plant’s growth easily.
- Decorative Appeal: The combination of a striking amaryllis bulb and the elegance of water can create a stunning centerpiece for any room.
What You’ll Need
Before you start, gather the following materials:
- Amaryllis Bulb: Choose a healthy bulb, preferably 6-8 inches in diameter.
- Plastic Cups: Clear plastic cups are ideal for visibility, but any cup will work as long as it can hold water.
- Fresh Water: Use clean, room-temperature water for the best results.
- Optional: Support: A pebble or decorative stone can help stabilize the bulb if necessary.
Step-by-Step Guide to Growing Amaryllis in Water
Step 1: Selecting the Right Bulb
Choose a plump, healthy amaryllis bulb. Look for one that feels firm to the touch and has no signs of mold or rot. Larger bulbs will typically produce more flowers, so opt for a bigger size if possible.
Step 2: Preparing the Plastic Cup
Select a plastic cup that can hold your bulb securely. If the cup doesn’t already have drainage holes, you may want to create a small hole in the bottom to allow excess water to escape. This helps prevent root rot, which can occur if the bulb sits in stagnant water.
Step 3: Adding Water
Fill the plastic cup with water, making sure it covers only the bottom inch of the bulb. The bulb should not be submerged entirely; only the roots will grow into the water. This setup encourages healthy root development and prevents the bulb from rotting.
Step 4: Placing the Bulb
Position the amaryllis bulb on the rim of the plastic cup so that the base of the bulb touches the water. The top part of the bulb should be above the water line, which allows the leaves to grow freely.
Step 5: Finding the Right Location
Place the cup in a warm, bright spot, ideally near a window with indirect sunlight. Amaryllis thrives in warm conditions, so a temperature between 65°F to 75°F (18°C to 24°C) is optimal for growth. Too much direct sunlight can scorch the leaves, while too little light can inhibit blooming.
Step 6: Maintaining the Water Level
Check the water level regularly to ensure that it remains consistent. Refill the cup as necessary to keep the water covering the bottom of the bulb. Change the water every couple of weeks to keep it fresh and prevent algae growth. If you notice any cloudiness, replace the water immediately.
Step 7: Watching for Growth
After a few weeks, you should begin to see roots developing and the emergence of leaves. As the plant grows, you’ll notice the characteristic flower stalks beginning to form. Be patient—flowering typically occurs around 6-8 weeks after planting, depending on the bulb’s condition and environmental factors.
Step 8: Supporting the Stalks
As your amaryllis grows, the flower stalks may require some support. If they appear weak or begin to lean, consider adding a pebble or decorative stone to stabilize the bulb and help keep the stalks upright. Alternatively, you can use a decorative stake or support to prop them up gently.
Step 9: Enjoying the Blooms
Once the flowers start to bloom, enjoy the vibrant colors and fragrance they bring to your home. Amaryllis blooms can last for several weeks, and if properly cared for, you can encourage reblooming in subsequent years.
Caring for Your Amaryllis Post-Bloom
After the flowers have faded, it’s essential to care for your amaryllis properly to promote future blooms. Here’s how to ensure your bulb remains healthy:
- Cutting the Stalk: After the blooms have wilted, cut the flower stalk back to the base, allowing the leaves to remain. The leaves will continue to photosynthesize and provide energy to the bulb.
- Maintaining Water Levels: Continue to keep the water level consistent, but consider reducing the frequency of water changes as the plant slows down during dormancy.
- Preparing for Dormancy: Once the leaves begin to yellow and die back, typically after several months, it’s time to let the bulb rest. Reduce watering and move the cup to a cooler, dark location for about 8-10 weeks.
- Replanting or Refreshing: After the dormancy period, you can either repot the bulb in soil or continue the water method. If using the water method again, replace the bulb with a new one or clean the existing bulb thoroughly before starting over.
Common Issues and Troubleshooting
While growing amaryllis in water is generally straightforward, you may encounter some issues. Here are some common problems and how to solve them:
- Rotting Bulb: If the bulb shows signs of rot, it may be submerged too deeply in water. Remove it from the cup, let it dry out for a few hours, and then replant it so that only the bottom is in the water.
- Weak Growth: If the plant appears weak or leggy, it may not be receiving enough light. Move it to a brighter location, but avoid direct sunlight.
- Algae Growth: If you notice algae forming in the water, replace the water immediately and consider adding a few pebbles at the bottom of the cup to prevent further growth.
Conclusion
Growing amaryllis in water is a rewarding and visually stunning project that anyone can enjoy. With just a few simple materials and a little patience, you can create a beautiful display of flowers that brighten up your home. Remember to care for your bulbs even after blooming to ensure they continue to flourish for years to come.
By embracing the beauty of amaryllis, you not only enhance your living space but also connect with nature in a meaningful way. So grab a bulb, a plastic cup, and start your journey to growing these magnificent flowers in water today!
Motivation to Interact
Have you tried growing amaryllis in water? Share your experience with us and let’s inspire each other to create beautiful indoor gardens! 🌸✨