
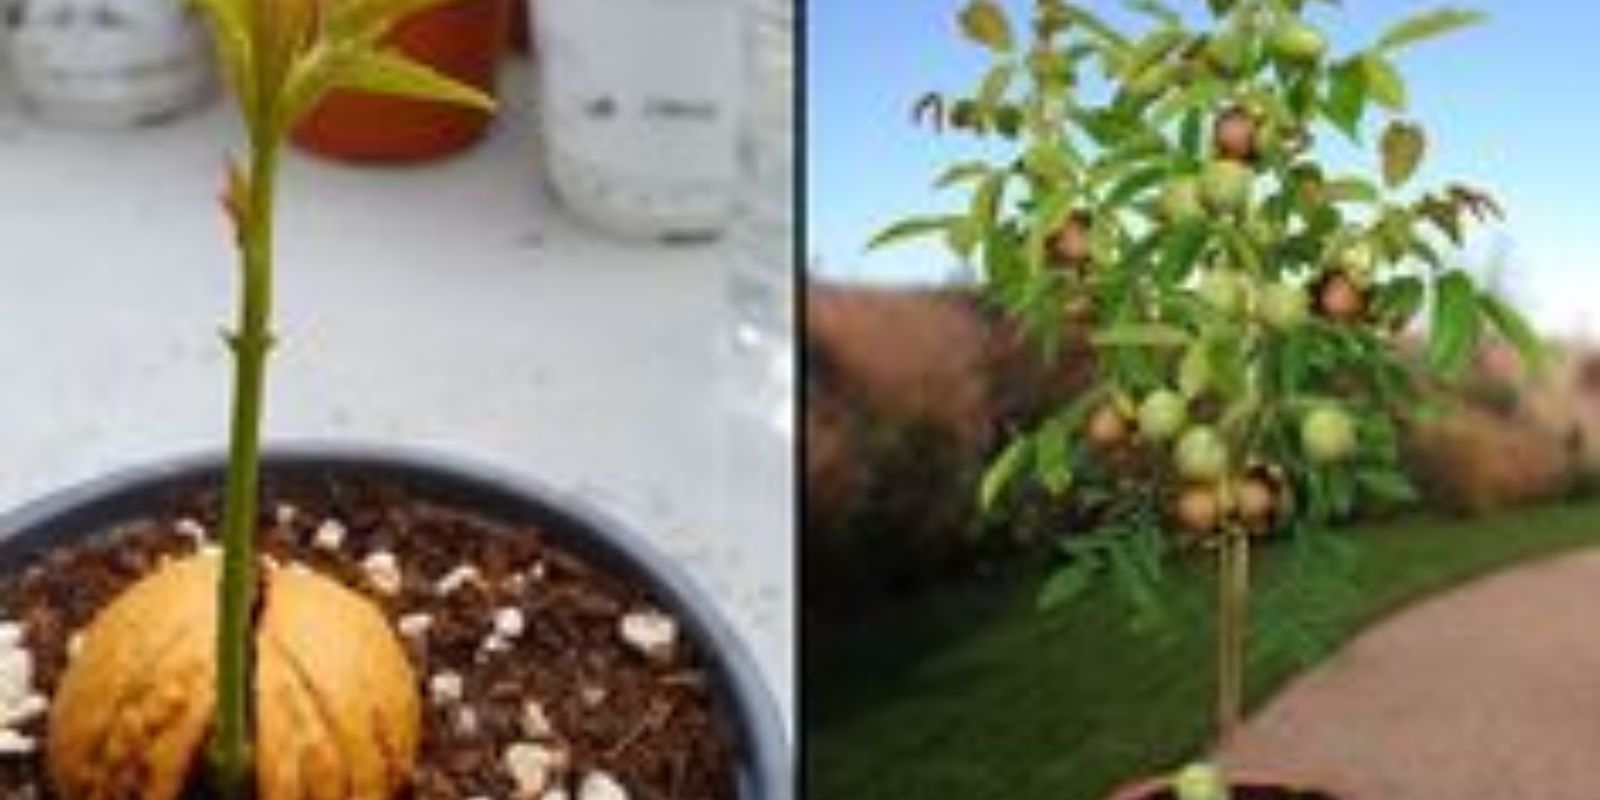
Cultivating a walnut tree from a simple walnut can be a fulfilling and educational experience. It allows you to connect with nature and witness the entire life cycle of a majestic tree. Walnut trees not only provide delicious and nutritious nuts but also add beauty and shade to your garden. This comprehensive guide will take you through the process of growing a walnut tree from a walnut, ensuring you have all the information needed to succeed.
Introduction to Walnut Trees
Walnut trees (genus Juglans) are deciduous trees known for their edible nuts and valuable wood. The most commonly grown walnut species for nuts are the English walnut (Juglans regia) and the black walnut (Juglans nigra). Both species are native to different parts of the world but share similar growing requirements.
Benefits of Growing Walnut Trees
Growing your own walnut tree has several benefits:
- Nut Production: Fresh, home-grown walnuts are more nutritious and flavorful than store-bought ones.
- Shade and Aesthetics: Walnut trees provide ample shade and enhance the landscape with their broad, leafy canopies.
- Environmental Impact: Planting trees helps combat climate change by absorbing carbon dioxide and producing oxygen.
- Educational Experience: Growing a tree from a walnut is a fascinating learning experience, especially for children.
Step-by-Step Guide to Growing a Walnut Tree
1. Collect Fresh Walnuts
The first step in growing a walnut tree is to collect fresh walnuts. Autumn is the best time to gather walnuts as they fall from the trees.
- Choose Healthy Walnuts: Look for walnuts that are intact and free from mold or damage. Freshly fallen nuts are ideal.
- Avoid Store-Bought Walnuts: Store-bought walnuts are often processed and may not germinate.
2. Soak the Walnuts
Soaking walnuts helps to soften their hard shells and prepares them for stratification.
- Soak in Water: Place the collected walnuts in a bowl of water and let them soak for 24 hours. This step ensures the walnuts are well-hydrated and ready for the next stage.
3. Stratification
Stratification is a cold treatment that mimics natural winter conditions, necessary for walnut germination.
- Prepare a Bag with Sand: Fill a plastic bag with moist sand. The sand should be damp but not waterlogged.
- Place Walnuts in the Bag: Insert the soaked walnuts into the bag, ensuring they are well-covered by the sand.
- Refrigerate: Seal the bag and place it in the refrigerator. Keep the walnuts in the fridge for 3-4 months. This period mimics the winter season, breaking the dormancy of the walnuts and preparing them for germination.
4. Plant the Walnuts
After the stratification period, it’s time to plant the walnuts.
- Choose the Right Time: Spring is the best time to plant stratified walnuts. The soil should be workable and free from frost.
- Select a Planting Site: Choose a location with well-draining soil and full sunlight. Walnut trees prefer deep, fertile soil.
- Planting Depth: Dig holes about 2 inches deep and place the walnuts in the holes. Cover them with soil and pat down gently.
5. Water Regularly
Proper watering is crucial for the successful germination and growth of walnut seedlings.
- Initial Watering: After planting, water the area thoroughly to settle the soil around the walnuts.
- Consistent Moisture: Keep the soil consistently moist but not waterlogged. Water regularly, especially during dry spells, to ensure the walnuts receive adequate moisture.
6. Protect the Seedlings
Young walnut seedlings are vulnerable to animals and harsh weather conditions.
- Use Mesh or Fences: Protect the seedlings by placing mesh or small fences around the planting area. This will keep out animals like squirrels and rabbits.
- Mulching: Apply a layer of mulch around the seedlings to retain moisture and regulate soil temperature.
7. Transplant the Young Walnut Tree
After 1-2 years, your walnut seedling will be ready to be transplanted to its final location.
- Choose the Right Spot: Select a spacious area with enough room for the tree to grow. Walnut trees can reach heights of 50-75 feet and need plenty of space for their roots to spread.
- Prepare the Transplant Site: Dig a hole that is twice the width and depth of the seedling’s root ball. Amend the soil with compost to improve fertility.
- Transplant Carefully: Gently remove the seedling from its original spot, taking care not to damage the roots. Place it in the prepared hole and backfill with soil. Water thoroughly to help the roots settle.
Long-Term Care for Walnut Trees
Watering and Mulching
- Watering: Young walnut trees need regular watering, especially during dry periods. Mature trees are more drought-tolerant but still benefit from occasional deep watering.
- Mulching: Continue to mulch around the base of the tree to conserve moisture, suppress weeds, and improve soil quality.
Pruning and Maintenance
- Pruning: Prune the tree during its dormant season (late winter) to remove dead or diseased branches and promote healthy growth. Regular pruning helps shape the tree and improve air circulation.
- Fertilizing: Walnut trees typically don’t need much fertilization, but if your soil is poor, you can apply a balanced fertilizer in early spring.
Pest and Disease Control
- Monitor for Pests: Keep an eye out for common walnut pests like aphids, caterpillars, and scale insects. Use natural or organic pest control methods to manage infestations.
- Disease Prevention: Prevent diseases by ensuring proper spacing and pruning to enhance air circulation. Remove any fallen leaves or nuts to reduce the risk of fungal infections.
Conclusion
Growing a walnut tree from a walnut is a rewarding and enriching experience. By following these steps, you can successfully nurture a walnut tree from seed to maturity. Not only will you enjoy the delicious and nutritious nuts, but you’ll also contribute to the environment by planting a tree that provides shade, beauty, and habitat for wildlife. So, get started on this exciting journey and watch your walnut tree grow from a small seed into a magnificent tree. Happy gardening! 🌰🌳