
Introduction
In a world where sustainability and self-sufficiency are becoming increasingly important, the idea of growing your own vegetables at home is both appealing and practical. One of the most innovative and eco-friendly methods to achieve this is by using plastic bottles. This approach not only allows you to cultivate fresh produce but also helps reduce waste by repurposing materials you already have. In this comprehensive guide, we’ll walk you through the process of growing vegetables in plastic bottles, providing you with all the knowledge you need to start your own home garden.
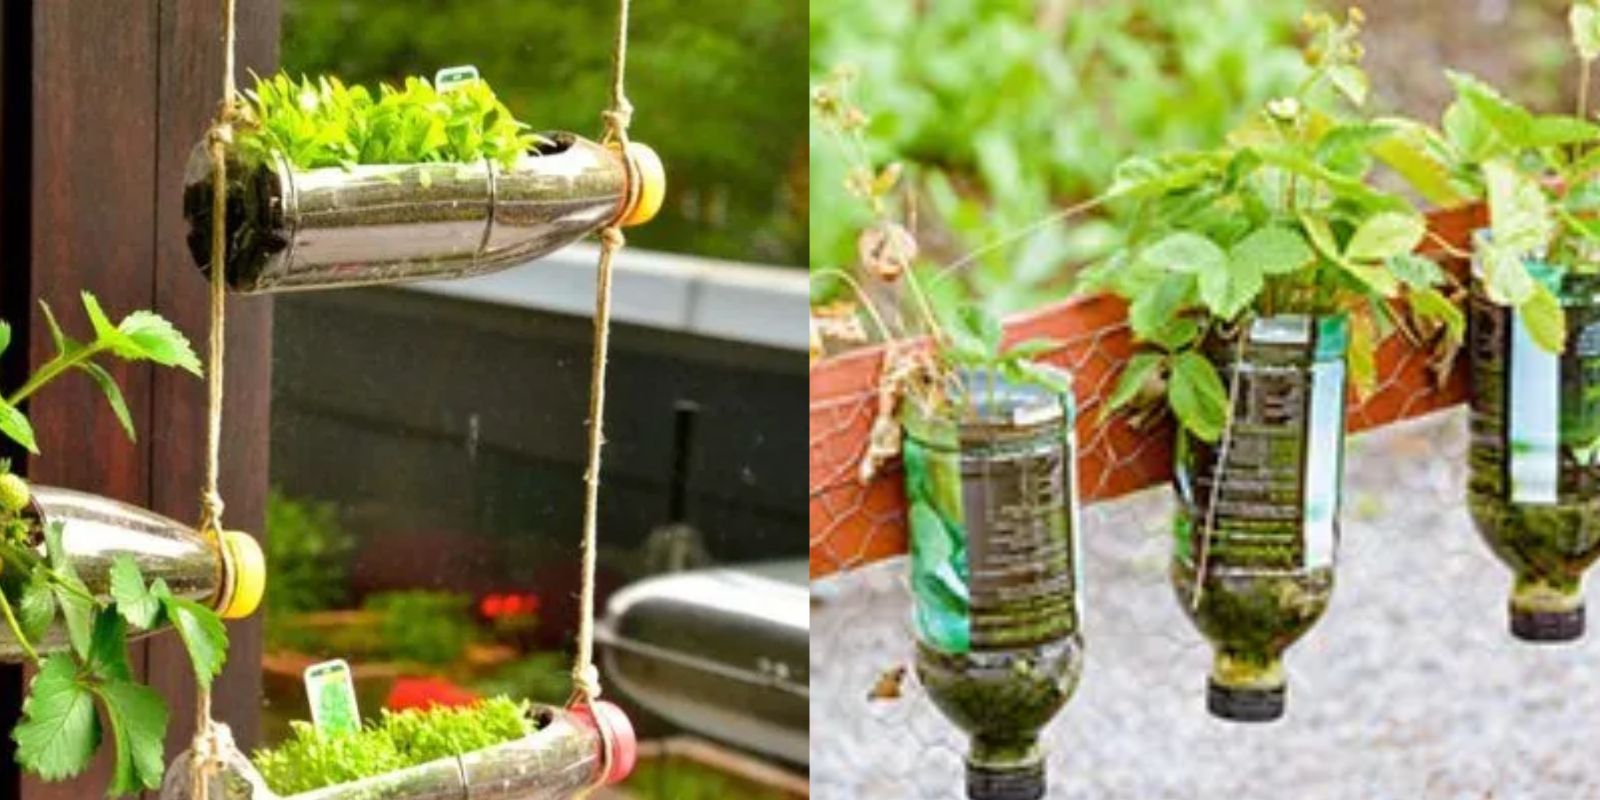
Why Plastic Bottles?
Plastic bottles are an excellent choice for container gardening for several reasons:
- Availability: Plastic bottles are easily accessible and can be repurposed from your recycling bin.
- Cost-Effective: Using bottles you already have eliminates the need for buying traditional pots and planters.
- Portability: Bottles are lightweight and can be moved easily, making them ideal for small spaces and urban gardening.
- Space Efficiency: Vertical gardening with bottles allows you to maximize your gardening space, making it perfect for patios, balconies, or even windowsills.
Materials You’ll Need
Before you start, gather the following materials:
- Clean plastic bottles (1-liter or larger)
- Potting soil
- Seeds or seedlings
- Scissors or a utility knife
- Drill or a sharp object for drainage holes
- Watering can or bottle
- Labels (optional, for identifying plants)
Step-by-Step Guide
- Prepare the Bottles
- Clean the Bottles: Ensure all bottles are thoroughly cleaned and free of any residue. Remove labels if necessary.
- Cut the Bottles: Depending on the size of the bottle and the plant, cut the bottle in half or just above the base. The top portion will serve as a funnel for watering, while the bottom part will hold the soil and plants.
- Create Drainage Holes: Use a drill or a sharp object to make small drainage holes in the bottom of the bottle. Proper drainage is crucial to prevent root rot and ensure healthy plant growth.
- Prepare the Soil
- Add Soil: Fill the bottom half of the bottle with a high-quality potting soil. For best results, use a mix that includes compost and perlite or vermiculite to improve aeration and drainage.
- Layering Soil: If you’re using a large bottle, consider layering different soil types. Start with a layer of gravel or small stones at the bottom for enhanced drainage, followed by potting soil.
- Planting
- Choose Your Seeds or Seedlings: Select vegetable seeds or seedlings that are suitable for container gardening. Ideal choices include herbs (basil, parsley), leafy greens (lettuce, spinach), and compact vegetables (cherry tomatoes, peppers).
- Sow Seeds: Plant seeds according to the depth specified on the seed packet. For seedlings, make a small hole in the soil, place the seedling in it, and gently press the soil around the base.
- Label Your Plants: If growing multiple types of vegetables, use labels to keep track of what you’ve planted where.
- Watering and Maintenance
- Watering: Water your plants through the opening at the top of the bottle. Be careful not to overwater; the soil should be moist but not soggy. A watering can or a bottle with a perforated cap works well for controlled watering.
- Sunlight: Place your bottles in a location that receives adequate sunlight. Most vegetables require at least 6 hours of direct sunlight daily. If growing indoors, consider using grow lights to supplement natural light.
- Fertilization: Depending on the type of vegetable and the soil quality, you may need to fertilize your plants periodically. Use an organic liquid fertilizer or compost tea for best results.
- Harvesting
- Monitor Growth: Keep an eye on your plants as they grow. Follow the guidelines for harvesting based on the type of vegetable you are growing. Most leafy greens can be harvested continuously, while fruiting vegetables should be picked when ripe.
- Enjoy Your Produce: Once your vegetables are ready, enjoy the satisfaction of eating home-grown produce. Fresh, organic vegetables from your own garden are not only tastier but also more nutritious.
Troubleshooting
- Yellowing Leaves: This could indicate overwatering, poor drainage, or nutrient deficiencies. Check the soil moisture and adjust your watering routine as needed.
- Pests: Keep an eye out for common pests such as aphids or spider mites. Use natural remedies like neem oil or insecticidal soap if necessary.
- Stunted Growth: Ensure that your plants are getting enough sunlight and that the soil is rich in nutrients.
Conclusion
Growing vegetables in plastic bottles is a rewarding and sustainable way to enjoy fresh produce at home. This method is perfect for those with limited space or who are looking to reduce their environmental footprint. By following the steps outlined in this guide, you can transform everyday plastic bottles into thriving mini-gardens, contributing to a greener planet and healthier lifestyle.
Motivation
Ready to take your gardening to the next level and make a positive impact on the environment? Try growing your own veggies in plastic bottles and watch your urban garden flourish! 🌱🍅 #SustainableGardening #UrbanFarming #DIYGarden #PlasticBottleGarden #GrowYourOwnVeggies