
Mini pineapples are a delightful addition to any home garden. Not only are they compact and decorative, but they also reward your patience with delicious, sweet fruit. The best part? You can grow them using the tops of store-bought pineapples! With this step-by-step guide, you’ll learn how to turn a leftover pineapple top into a thriving plant, even if you’re new to gardening.
Why Grow Mini Pineapples?
Growing pineapples at home has several advantages:
- Sustainability: Reusing the tops of store-bought fruit is an eco-friendly way to grow new plants.
- Tropical Aesthetic: Mini pineapple plants have beautiful, spiky foliage that adds a tropical vibe to your home or garden.
- Edible Reward: After months of care, your efforts are rewarded with delicious, homegrown mini pineapples.
- Low Maintenance: Pineapples are hardy and require minimal care, making them perfect for beginner gardeners.
Ready to get started? Follow these simple steps to grow your very own mini pineapples!
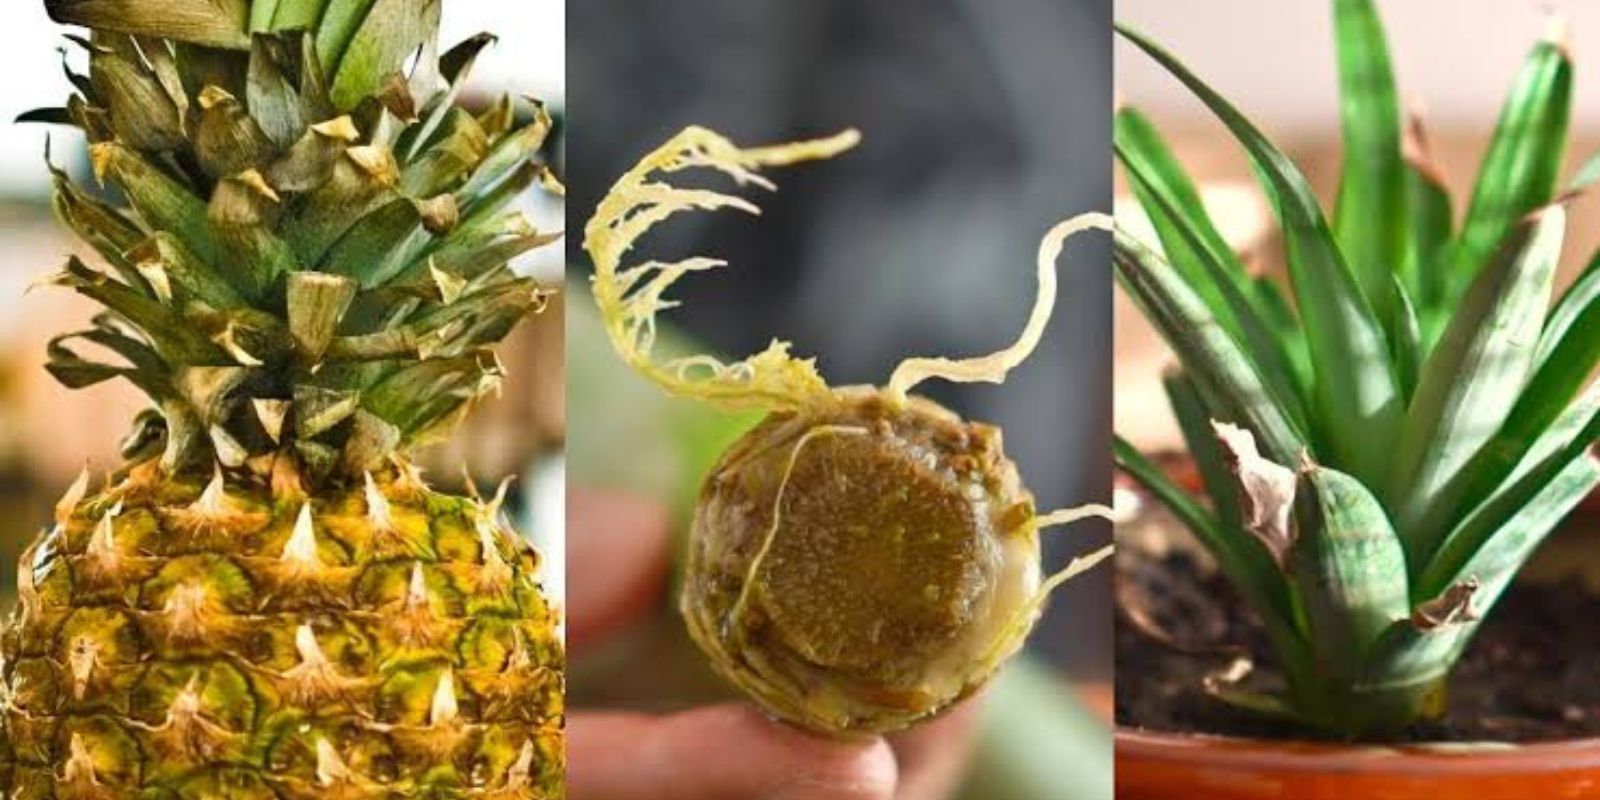
Step 1: Select a Healthy Pineapple Top
Start by choosing a fresh, ripe pineapple with a vibrant, green crown of leaves. Avoid fruit with wilting, brown, or dried-out tops. The healthier the top, the better your chances of success.
How to Remove the Top:
- Grasp the crown of the pineapple and twist it firmly until it detaches.
- Alternatively, you can cut the top off with a sharp knife, leaving no fruit attached to the base of the crown.
Step 2: Prepare the Top for Planting
Before planting, the pineapple top needs some preparation to promote rooting and prevent rot.
- Remove Lower Leaves:
- Peel away 1–2 inches of the lower leaves at the base of the crown. This exposes the small root buds underneath.
- Dry the Top:
- Allow the top to dry for 1–2 days. This step helps to seal any cuts and reduces the risk of rot when planted.
Step 3: Root the Pineapple Top in Water
Rooting your pineapple top in water gives it the best chance to grow strong, healthy roots.
- Submerge the Base:
- Place the base of the pineapple top in a glass of water. Ensure that only the bottom is submerged; the leaves should stay dry to prevent rot.
- Change the Water Regularly:
- Replace the water every 2–3 days to keep it fresh and free from bacteria.
- Monitor Root Growth:
- After 2–3 weeks, you should see small roots emerging from the base. Once the roots are about an inch long, the top is ready to plant.
Step 4: Planting the Pineapple Top
Once the roots have developed, it’s time to transfer the pineapple top to soil.
- Choose the Right Pot:
- Use a pot with good drainage holes to prevent waterlogging. A small pot is fine for starters, but you may need to repot as the plant grows.
- Prepare the Soil:
- Pineapples thrive in well-draining, sandy soil. You can use a cactus or succulent potting mix, or mix regular potting soil with sand.
- Plant the Top:
- Create a small hole in the soil and place the rooted top inside. Cover the roots and base with soil, ensuring the leaves remain above the surface.
- Water Sparingly:
- Lightly water the soil after planting. Pineapples prefer slightly dry conditions, so avoid overwatering.
Step 5: Provide Proper Sunlight and Care
Pineapples love the sun, so proper placement is crucial for growth.
- Sunlight Needs:
- Place the plant in a sunny location where it can receive at least 6 hours of direct sunlight daily. If growing indoors, a south-facing window or grow light is ideal.
- Temperature:
- Pineapples thrive in warm conditions. Maintain a temperature of 65–85°F (18–29°C). Protect the plant from frost or cold drafts.
- Watering Routine:
- Water the plant only when the top inch of soil feels dry. Overwatering can lead to root rot, so let the soil dry out between waterings.
- Fertilizing:
- Feed your pineapple plant every 6–8 weeks with a balanced, water-soluble fertilizer to encourage healthy growth.
Step 6: Patience is Key
Growing a pineapple plant takes time and dedication. While the foliage grows relatively quickly, it can take 1–2 years for the plant to produce fruit.
Signs of Progress:
- In the first few months, you’ll notice new leaves growing from the center of the crown.
- Once mature, the plant will produce a small flower stalk, which eventually develops into the mini pineapple.
Step 7: Harvesting Your Mini Pineapple
When your pineapple turns golden and smells sweet, it’s ready to harvest. Use a sharp knife to cut the fruit from the plant. Enjoy it fresh, or use it in your favorite recipes!
Bonus Tip:
After harvesting, the plant may produce “pups” or small offshoots around the base. These can be separated and planted to grow new pineapple plants!
Why Grow Mini Pineapples?
- Unique Addition to Your Garden: Mini pineapples are compact and perfect for small spaces.
- Sustainable Gardening: You’re reducing waste by repurposing a pineapple top.
- Rewarding Experience: Watching the transformation from top to fruit is deeply satisfying.
Common Mistakes to Avoid
- Overwatering: Too much water can cause root rot. Always let the soil dry out between waterings.
- Insufficient Light: Pineapples need plenty of sunlight. Without it, growth will be slow, and fruiting may not occur.
- Skipping the Drying Step: Planting a wet top increases the risk of rot.
Conclusion
Growing mini pineapples from tops is a fun and eco-friendly project that brings a touch of the tropics to your home. Whether you’re a seasoned gardener or a beginner, this easy-to-follow process is a great way to explore the joys of growing your own fruit.
Let’s hear from you! Have you tried growing pineapples at home? Share your tips, challenges, or progress in the comments!
#GrowYourPineapple #TropicalGardening #DIYGardening #SustainableGardening #MiniPineapples #HomegrownFruit #GardeningForBeginners #UrbanGardening