
Lemons are not just a refreshing addition to drinks and dishes—they are also a fantastic fruit to grow at home. Cultivating lemons in your own garden or even in a pot can provide you with a year-round supply of fresh, organic fruit. With the right care, growing lemons at home is surprisingly simple and rewarding. This guide will walk you through the process, from planting a seed to harvesting your own zesty lemons.
Why Grow Lemons at Home?
Homegrown lemons offer unparalleled freshness and flavor. Growing your own not only ensures you avoid the pesticides and chemicals often used in commercial farming but also saves money in the long run. Additionally, lemon trees add aesthetic beauty to your home and garden, with their vibrant green leaves and fragrant blossoms.
Step 1: Selecting Lemon Seeds or Saplings
You can start your lemon tree from seeds or buy a young sapling for quicker results.
- Seeds: If starting from seeds, use organic lemons. Non-organic lemons are often treated to prevent sprouting.
- Saplings: For faster fruit production, consider purchasing a dwarf lemon tree, such as Meyer lemon, which is ideal for small spaces and pots.
Step 2: Preparing the Soil
Lemon trees thrive in well-draining soil that is slightly acidic (pH 5.5-6.5).
- Use a mix of garden soil, compost, and sand to improve drainage and nutrient content.
- Add organic matter like aged manure or peat moss to enhance soil health.
Step 3: Choosing the Right Container
If growing indoors or in a small space, select a large container that’s at least 12-15 inches deep and wide.
- Ensure the pot has drainage holes to prevent waterlogging.
- Use a saucer beneath the pot to collect excess water.
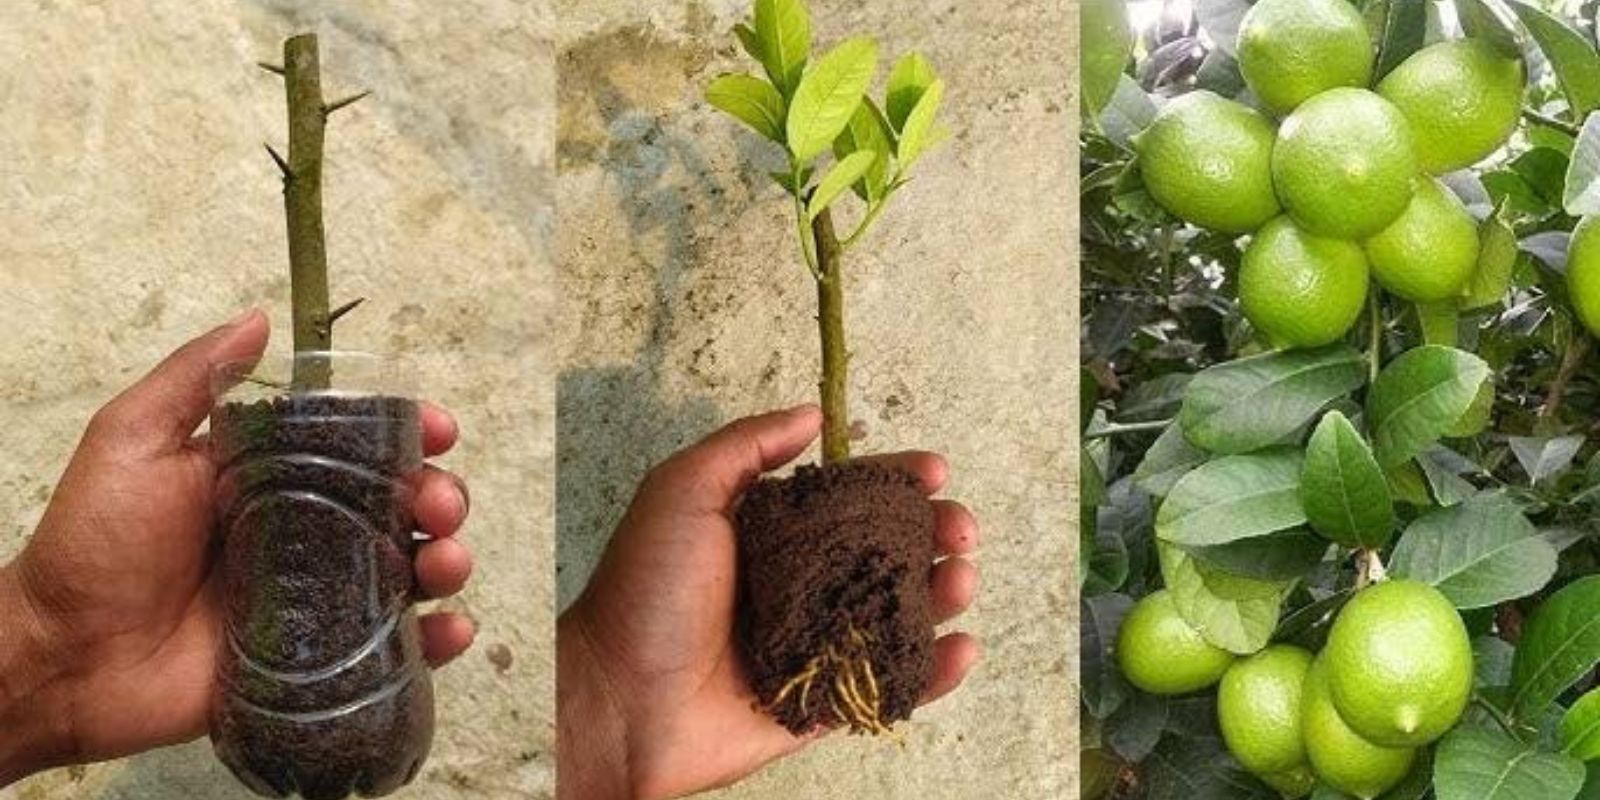
Step 4: Planting Lemon Seeds or Saplings
- Seeds:
- Rinse the seeds thoroughly to remove any pulp.
- Plant the seeds about ½ inch deep in moist soil, ensuring they are spaced apart.
- Cover with a thin layer of soil and lightly water.
- Place the container in a warm location with indirect sunlight. Germination takes 2-3 weeks.
- Saplings:
- Dig a hole in the soil deep enough to accommodate the root ball.
- Gently loosen the roots and place the sapling in the hole.
- Backfill with soil, pressing it gently around the base of the sapling.
Step 5: Providing Adequate Sunlight
Lemon trees are sun lovers and require at least 6-8 hours of direct sunlight daily.
- Place outdoor plants in a sunny spot in your garden.
- For indoor plants, position them near a south-facing window or under a grow light during winter.
Step 6: Watering Your Lemon Tree
Consistent watering is key to healthy lemon growth, but overwatering can be detrimental.
- Water deeply when the top 1-2 inches of soil feels dry.
- Avoid waterlogging by allowing excess water to drain out of the pot.
- In hot climates, increase watering frequency, while in cooler months, water sparingly.
Step 7: Fertilizing for Growth and Fruiting
Lemon trees are heavy feeders and need regular fertilization.
- Use a citrus-specific fertilizer high in nitrogen every 4-6 weeks during the growing season (spring and summer).
- Reduce feeding during the dormant period (fall and winter).
- Supplement with organic matter like compost or bone meal for additional nutrients.
Step 8: Pruning for Health and Productivity
Pruning is essential to shape your lemon tree and encourage fruiting.
- Remove dead, weak, or overcrowded branches to improve air circulation.
- Prune after the fruiting season to maintain the tree’s size and structure.
- Pinch off early flowers on young trees to allow the plant to focus on root and branch development.
Step 9: Managing Pests and Diseases
Common pests that attack lemon trees include aphids, spider mites, and whiteflies.
- Regularly inspect your tree for signs of pests or disease.
- Use organic insecticidal soap or neem oil to control infestations.
- Prevent fungal diseases by avoiding overhead watering and ensuring good airflow around the plant.
Step 10: Pollination Tips
Most lemon varieties are self-pollinating, but you can help increase fruit production by hand-pollinating.
- Use a small, soft brush to transfer pollen between flowers.
- This is particularly useful for indoor plants that lack access to natural pollinators like bees.
Step 11: Harvesting Your Lemons
Lemons are typically ready to harvest 6-9 months after flowering.
- Look for fully yellow fruits with a slightly glossy appearance.
- Gently twist or cut the fruit off the tree to avoid damaging the branches.
- Store harvested lemons in a cool, dry place or refrigerate for longer shelf life.
Bonus Tips for Thriving Lemon Trees
- Winter Care: If you live in a cold climate, move potted trees indoors during winter or cover outdoor trees with frost cloth.
- Mulching: Apply a layer of mulch around the base to retain moisture and regulate soil temperature.
- Companion Planting: Grow herbs like basil or marigold nearby to deter pests and enhance growth.
Why You’ll Love Growing Lemons at Home
Growing lemons at home is not only cost-effective but also incredibly rewarding. The fresh citrus scent of the tree adds a touch of nature to your home, and the fruit’s versatility makes it indispensable in the kitchen. From zesty desserts to refreshing beverages and natural cleaning solutions, the uses for lemons are endless.
Conclusion
By following these simple steps, you can cultivate your very own lemon tree and enjoy fresh, homegrown lemons all year round. Whether you have a sprawling garden or a small balcony, lemons adapt beautifully to various spaces. Start your lemon-growing journey today and experience the joy of harvesting your own citrus bounty!
Share your lemon-growing tips or questions below! 🍋🌱
#GrowYourOwnLemons #HomeGardening #CitrusLovers #SustainableLiving #FreshFromYourGarden