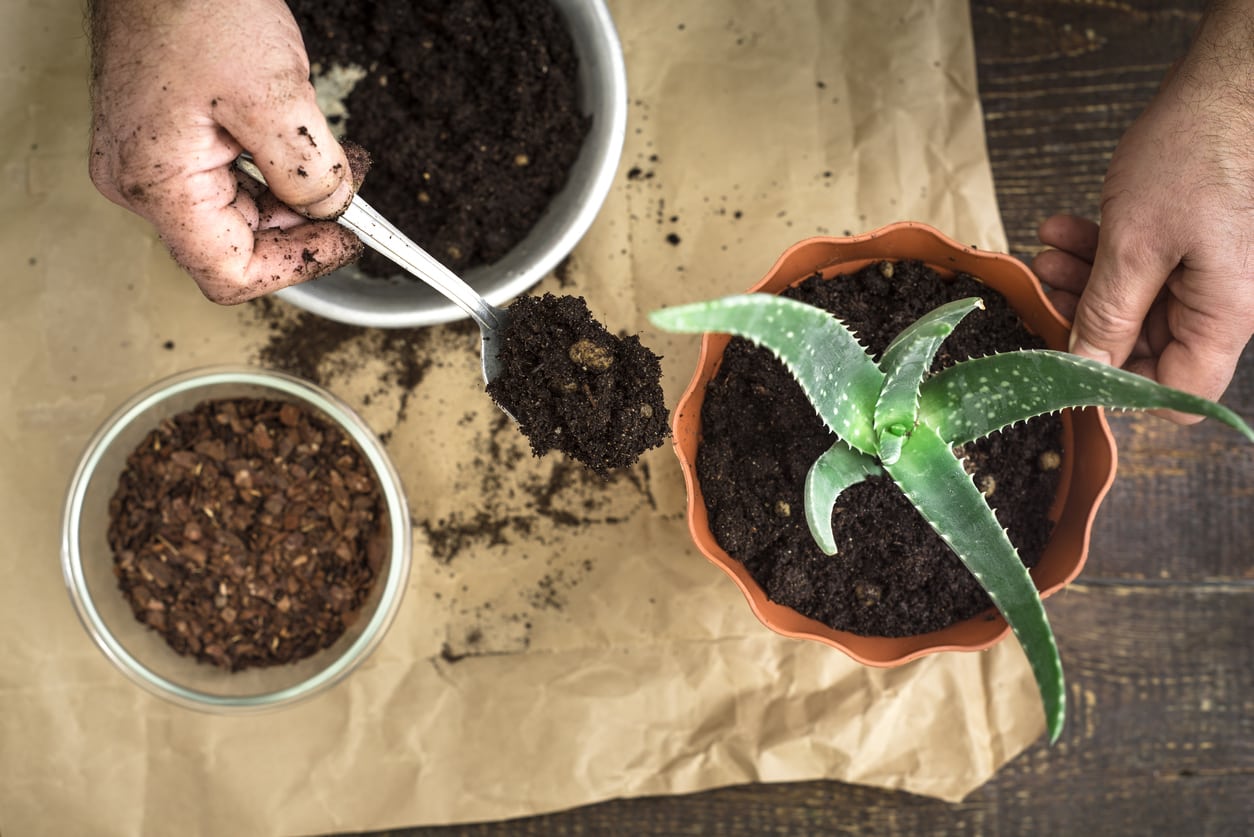
Your aloe vera plant deserves a little extra love to keep thriving — and repotting is one of the smartest ways to help it grow strong and healthy. Whether you’re refreshing an older plant or giving a new one a better home, learning how to repot an aloe vera plant correctly ensures it keeps producing those lush, juicy leaves full of natural goodness.Let’s dive into how to repot aloe vera like a pro — easily, safely, and successfully! 🌱🌞 Why Repot Aloe Vera?Repotting aloe vera isn’t just about aesthetics — it’s essential for plant health. Here’s why it matters:🌿 Prevents root crowding: Aloe roots can become cramped and tangled over time.🌱 Encourages growth: Fresh soil means more nutrients and oxygen for roots.💧 Improves drainage: Prevents rot caused by old, compacted soil.🌼 Removes offshoots (pups): Perfect time to propagate new aloe plants!If your aloe looks top-heavy, roots are poking out, or water drains slowly, it’s a sure sign it’s time to repot.🪴 What You’ll NeedHere’s your quick checklist before you start repotting:🧺 SuppliesA new pot (1–2 inches wider than the current one)Cactus or succulent potting mix (well-draining)Small trowel or spoonGloves (optional, for handling spiky leaves)Scissors or pruning shears (for removing dead roots)💡 Tip: Choose a terra cotta pot — it allows excess moisture to evaporate and keeps roots healthy.🌿 Step-by-Step: How to Repot Aloe Vera🪴 Step 1: Prepare the New PotFill the bottom with a thin layer of succulent potting mix.Make sure the pot has a drainage hole — aloe hates sitting in water!🌱 Step 2: Gently Remove the AloeHold the base of the plant and carefully slide it out of its old pot.Tap or loosen the sides if it’s stuck — don’t yank the leaves.🌼 If your aloe has baby plants (“pups”), gently separate them now — each can grow into its own pot!✂️ Step 3: Clean the RootsShake off old soil gently.Check for any soft, brown, or rotten roots and trim them with clean scissors.🌸 Step 4: Replant in Fresh SoilPlace the aloe in the center of the new pot.Fill around it with fresh soil, leaving about 1 inch from the rim.Pat gently to secure but don’t press too tightly — aloe roots like air circulation.💧 Step 5: Let It Rest Before WateringThis is the step most people skip!Wait 3–4 days before watering to allow roots to heal from any minor damage.Then, water lightly until moisture drains from the bottom.⚠️ Overwatering is the #1 aloe killer — always let soil dry between waterings!🌞 Aftercare Tips for a Healthy AloePlace your plant in bright, indirect sunlight (windowsill is perfect).Water every 2–3 weeks, depending on temperature and humidity.Wipe the leaves occasionally to remove dust and allow better photosynthesis.Fertilize once in spring or summer with a diluted succulent fertilizer.🌿 When to Repot AgainRepot your aloe every 2–3 years or when it outgrows its pot. If you see:Roots emerging from the bottomSoil that dries out too quickly or stays soggySlower leaf growth or yellowing leaves…it’s time to give your aloe a roomier home again!🌼 Bonus: How to Propagate Aloe Vera PupsOne of the best perks of repotting aloe is free new plants!Separate pups with roots attached.Let them dry for a day or two.Plant each in its own small pot with succulent soil.Water lightly after 3–5 days.Soon you’ll have a thriving aloe family — perfect for gifting or expanding your home garden! 🌿🌱 Key Takeaways: How to Repot Aloe Vera Successfully✅ Use a well-draining potting mix.✅ Choose a pot with drainage holes.✅ Handle roots carefully and remove any rot.✅ Wait a few days before watering.✅ Keep your aloe in bright, indirect sunlight.🌿 Final ThoughtsRepotting aloe vera is one of the easiest ways to keep your plant healthy, vibrant, and long-living. By giving it fresh soil and room to grow, you’re ensuring strong roots, fuller leaves, and plenty of healing gel whenever you need it.So grab your gloves, mix up that soil, and give your aloe the upgrade it deserves — you’ll see the difference in no time! 🌞💚