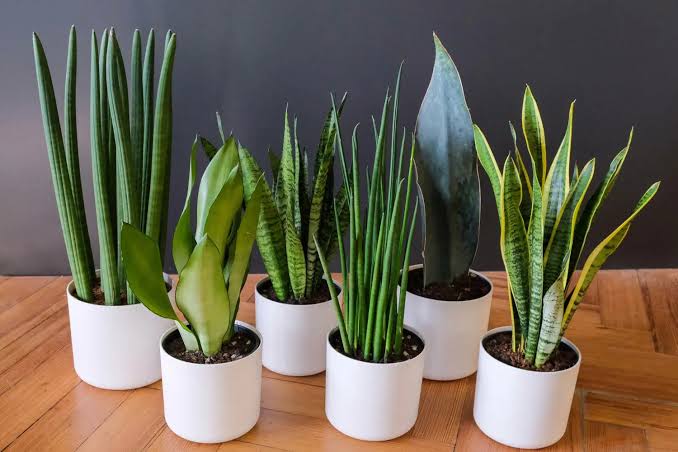
If you want a houseplant that’s nearly indestructible, air-purifying, and stylish, the snake plant (also called Sansevieria or Dracaena trifasciata) is one of the best choices for homes across the United States, United Kingdom, and Canada. But even the toughest plants need occasional care—especially when they outgrow their pots. Knowing how to repot a snake plant helps you grow smarter, keep your plant healthy, and encourage vibrant new growth.This guide breaks down everything you need to know: when to repot, the best soil to use, step-by-step instructions, common mistakes to avoid, and expert tips to help your snake plant thrive.Let’s grow smarter with how to repot a snake plant! 🌱Why Repotting a Snake Plant MattersSnake plants are slow growers, but over time their roots can become tightly packed or even push the plant upward out of the soil. Repotting:Promotes new growthPrevents root rotRefreshes nutrient-depleted soilHelps the plant stay uprightAllows room for offshoots (“pups”) to growLearning the best way to repot a snake plant ensures your plant remains strong, healthy, and beautiful all year long.Signs Your Snake Plant Needs RepottingIf you’re wondering when to take action, look for these signs:🚨 1. Crowded or Cracked PotSnake plants have powerful roots that can literally break plastic pots.🌱 2. Roots Circling the BottomIf roots escape through drainage holes, it’s time to repot.🪴 3. Soil Dries Too QuicklyOld soil becomes compacted and drains too fast.🌿 4. Plant is Tipping OverLarge, heavy leaves need a deeper and wider pot.🤏 5. Visible “Pups” Crowding the BaseThese baby plants need more space—or can be separated during repotting.If you see any of these, it’s time to grow smarter with how to repot a snake plant!What You Need Before RepottingGather these supplies to make the process simple and successful:✔ A New PotChoose one that is:1–2 inches wider than the current potHas drainage holesTerracotta is ideal (helps prevent overwatering)✔ Fresh Potting MixSnake plants prefer sandy, well-draining soil. Good options include:Cactus soilSucculent mixDIY blend (potting soil + perlite + coarse sand)✔ Optional ToolsGlovesPruning shearsA trowelNewspaper to catch spilled soilGrow Smarter with How to Repot a Snake Plant: Step-by-Step GuideFollow these easy steps to repot your plant safely and correctly.Step 1: Remove the Plant from Its Old PotGently squeeze the sides of the pot (if plastic) or tap the container to loosen the soil. Grip the base of the plant and lift it out carefully.If the plant is stuck:Slide a dull knife or spatula around the inner edge of the pot to loosen roots.Step 2: Loosen the Root BallBrush away old soil and carefully loosen any tightly wound roots with your fingers.If roots look mushy or black, trim those damaged parts using sterilized scissors.Step 3: Decide Whether to Divide the PlantIf your snake plant has multiple “pups” or clusters, you can divide it:Identify natural sections in the rhizomeCut cleanly between themRepot each section separatelyThis is a great way to grow your collection—or share plants with friends!Step 4: Add Fresh Soil to the New PotPour 1–2 inches of fresh soil into the bottom. Build a small mound so the roots sit at the right height.Step 5: Position the Snake PlantSet the plant in the center of the pot. Keep it upright—snake plants can lean if not placed securely.Fill in the sides with soil and gently press to secure (do not compact too tightly).Step 6: Water LightlySnake plants are prone to overwatering, so water sparingly after repotting.Give a small watering to settle the soilLet the plant dry before watering againStep 7: Allow Time to AdjustPlace the plant in indirect light for a week or two. Avoid intense sun while it recovers.Congratulations—you’ve just mastered how to repot a snake plant the smart way!Common Mistakes to AvoidTo grow smarter with repotting, watch out for these pitfalls:❌ Using a pot that is too bigLarge pots retain excess moisture → higher chance of root rot.❌ Using dense, heavy soilSnake plants require excellent drainage.❌ Overwatering after repottingLet roots heal before heavy watering.❌ Burying the leavesPlant only the roots—never cover the base of the leaves with soil.❌ Placing in direct sunlight too soonGive your plant a gentle recovery period.Pro Tips for Healthier, Happier Snake PlantsHere’s how to grow even smarter with how to repot a snake plant:🌞 1. Provide the Right LightBright, indirect light is ideal. Snake plants also tolerate low light but grow slower.💧 2. Water Less OftenEvery 2–6 weeks depending on climate. Drier homes (like many in Canada) require less frequent watering.🌡 3. Keep WarmSnake plants prefer 65–85°F (18–29°C) and dislike cold drafts.🌬 4. Boost AirflowPrevents mold and keeps soil from staying too wet.🪴 5. Refresh Soil YearlyEven if you don’t repot, adding fresh soil keeps nutrients replenished.When Is the Best Time to Repot a Snake Plant?The ideal time is:Spring or early summerThis is when the plant is actively growing and recovers faster.However, if your pot is breaking, roots are rotting, or the plant is unstable—you can repot immediately.Frequently Asked QuestionsShould I remove the old soil completely?No—just remove loose soil. Leaving some intact reduces plant stress.Can I repot in winter?Yes, if necessary, but expect slower recovery.Why is my snake plant drooping after repotting?This is normal! Give it time to adjust and avoid overwatering.Conclusion: Grow Smarter with How to Repot a Snake Plant!Repotting your snake plant doesn’t have to be intimidating. With the right tools, proper soil, and gentle handling, your plant will reward you with vigorous growth, strong leaves, and a long, healthy life. By following this guide, you’ve learned how to grow smarter with how to repot a snake plant, ensuring your indoor jungle remains lush and thriving.

