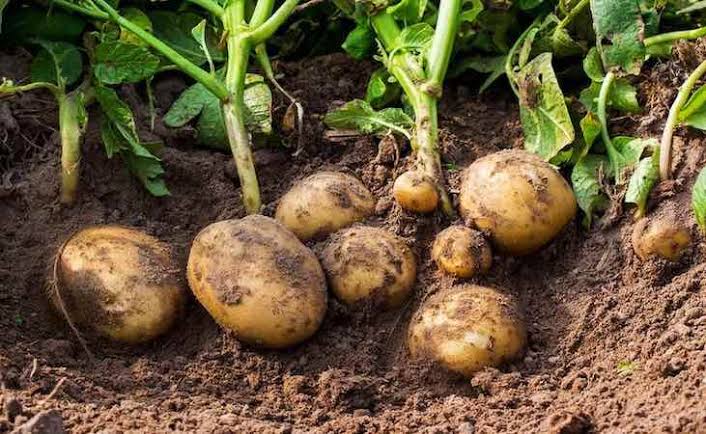
Potatoes are one of the easiest and most rewarding crops to grow — whether you have a spacious backyard, a small patio, or even a few large containers. Learning how to plant potatoes the right way can make a huge difference in your harvest quality and yield. So if you’ve ever wondered how to grow smarter with how to plant potatoes, this guide will walk you through every step — from choosing the right seed potatoes to harvesting a hearty crop.Let’s dig in (literally!) and discover how to turn a few spuds into a plentiful potato patch.Why You Should Grow Potatoes at HomeBefore diving into the “how,” it’s worth understanding why homegrown potatoes are so special. Unlike store-bought varieties that are often treated with sprout inhibitors and chemicals, your own garden-grown potatoes are:Fresher and tastier — harvested straight from the soil to your plate.Healthier — free from unnecessary additives.Cheaper — a few seed potatoes can yield several pounds of tubers.Versatile — you can grow them in gardens, raised beds, grow bags, or containers.When you grow smarter with how to plant potatoes, you’ll not only enjoy better results but also make the most of your time, space, and resources.Step 1: Choose the Right Potato VarietyThe first step in your potato-growing journey is selecting the right variety. There are three main categories of potatoes, each with different harvest times and uses.1. Early PotatoesThese varieties mature quickly—usually within 10 to 12 weeks. Early potatoes (like Yukon Gold or Red Norland) are perfect if you want a fast harvest or have a short growing season.2. Maincrop PotatoesMaincrop varieties take longer to mature, around 16 to 20 weeks, but they produce larger tubers ideal for baking, mashing, and long-term storage. Popular choices include Russet Burbank, Maris Piper, and Kennebec.3. Fingerling and Specialty PotatoesThese are smaller, gourmet varieties prized for their flavor and texture. They’re great for salads and roasting.👉 Pro Tip: Choose certified disease-free seed potatoes from a reputable supplier. Avoid using grocery store potatoes since they may carry diseases or be treated to prevent sprouting.Step 2: Prepare the SoilPotatoes thrive in loose, well-drained, and nutrient-rich soil. Heavy clay or waterlogged soil can cause rot, while compacted soil can restrict tuber growth.Location: Pick a sunny spot that gets at least 6–8 hours of direct sunlight per day.Soil pH: Aim for a slightly acidic pH of 5.5 to 6.5.Amend the Soil: Mix in compost or well-rotted manure to boost fertility and drainage.Avoid Fresh Manure: It can lead to scab disease and excessive leaf growth.To truly grow smarter with how to plant potatoes, consider rotating your crops annually. Avoid planting potatoes where other nightshades (like tomatoes or peppers) grew the previous year to prevent soil-borne diseases.Step 3: Pre-Sprout Your Seed Potatoes (“Chitting”)Chitting helps potatoes develop sturdy shoots before planting, giving them a head start in growth.How to Chit Potatoes:Timing: Start about 4–6 weeks before your last expected frost date.Method: Place your seed potatoes in an egg carton or tray with the “eyes” facing upward.Light: Keep them in a bright, cool area (around 50°F / 10°C).Shoots: Once sprouts reach about 1 inch long, they’re ready to plant.This step may seem simple, but it’s one of the secrets to growing smarter and achieving an earlier, more productive harvest.Step 4: Planting Potatoes — The Smart WayThere are several methods for planting potatoes depending on your available space and soil type. Let’s go over the most effective ones.Hilling Method (Traditional Garden Beds)Dig Trenches: Create trenches about 4 inches deep and 12 inches apart.Spacing: Place seed potatoes 12 inches apart, with the sprouts facing up.Cover: Lightly cover with 3 inches of soil.Hill Up: As plants grow, mound soil around the stems every 2–3 weeks until the mound is about 8 inches high.Raised Bed or Container MethodPerfect for small spaces or poor soil.Fill a large container, grow bag, or raised bed with 6 inches of soil.Place your seed potatoes and cover them with another 4 inches of soil.Continue adding soil as plants grow to encourage tuber formation.Straw Mulch MethodA low-effort, eco-friendly option:Lay seed potatoes on the soil surface.Cover with 6–8 inches of clean straw.Add more straw as plants grow to block sunlight from reaching developing tubers.This method makes harvesting incredibly easy — just lift the straw!Step 5: Watering and FertilizingConsistent moisture is key to a healthy potato crop. Here’s how to keep your plants thriving:Water deeply once or twice a week, ensuring the soil remains evenly moist but not soggy.Avoid overhead watering to prevent leaf diseases.Once plants begin to flower, reduce watering slightly to encourage tuber development.Fertilize with a balanced, low-nitrogen fertilizer (such as 5-10-10). Too much nitrogen promotes leafy growth at the expense of tubers.Smart tip: Mulching with straw or shredded leaves helps retain moisture, suppress weeds, and regulate soil temperature.Step 6: Managing Pests and DiseasesEven when you grow smarter with how to plant potatoes, pests can sometimes pose challenges. The good news? A bit of vigilance goes a long way.Common Pests:Colorado Potato Beetles: Handpick and destroy them, or use neem oil spray.Aphids: Encourage ladybugs or use insecticidal soap.Wireworms: Avoid planting in newly turned sod where they thrive.Common Diseases:Blight: Choose resistant varieties and ensure good air circulation.Scab: Maintain proper soil pH and avoid fresh manure.Rot: Ensure good drainage and avoid overwatering.Crop rotation and proper spacing are two of the best “smart grower” habits you can adopt.Step 7: Harvesting and Storing PotatoesThe most satisfying part of learning how to plant potatoes is, of course, the harvest!Early Potatoes: Ready when plants start flowering. Gently dig up a few to check.Maincrop Potatoes: Wait until the foliage turns yellow and begins to die back.Harvest Carefully: Use a garden fork to avoid damaging tubers.Cure Potatoes: Lay them in a dark, airy place for about 10 days to toughen the skin.Storage: Keep cured potatoes in a cool (40–50°F / 4–10°C), dark place. Avoid refrigeration, which turns starch into sugar.Properly stored potatoes can last for several months, making your effort worthwhile.Bonus Tips to Grow SmarterRotate crops yearly to prevent diseases and nutrient depletion.Save small, healthy tubers as seed potatoes for next season.Try companion planting with beans or marigolds to deter pests.Label varieties if growing more than one type, so you can track results.Remember, smart gardening is about observation and adaptation. Monitor your plants, adjust watering as needed, and enjoy the process.Conclusion: Grow Smarter with How to Plant Potatoes!Potatoes are one of the most beginner-friendly crops — but mastering the technique helps you grow smarter, not harder. From choosing the right variety and preparing nutrient-rich soil to chitting, planting, and hilling, each step plays a vital role in your success.By following these tried-and-true tips, you’ll not only enjoy a bountiful harvest but also gain confidence as a home gardener. So grab your seed potatoes, roll up your sleeves, and grow smarter with how to plant potatoes — your next delicious, homegrown meal starts right in your garden.