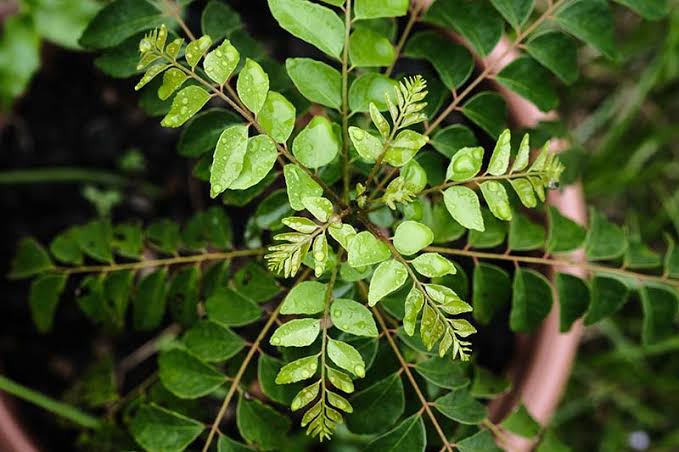
If you’ve ever tasted authentic South Asian or Mediterranean dishes, you’ve likely experienced the magic of curry leaves — those fragrant, glossy green leaves that add a burst of aroma and depth to any meal. Imagine never running out of fresh curry leaves again! With a little care and know-how, you can grow your own curry leaf plant right at home — whether in your garden, balcony, or kitchen window.In this guide, we’ll walk you through how to grow curry leaves plant successfully — from seed or stem cutting to harvesting and long-term care. 🌱🌿 Why Grow a Curry Leaves Plant?Before we dive into the “how,” let’s talk about the “why.”Fresh Flavor Anytime: Fresh curry leaves have a more intense aroma and flavor than store-bought dried ones.Easy to Grow: Once established, it’s a low-maintenance plant that thrives in pots or directly in soil.Health Benefits: Curry leaves are packed with antioxidants, vitamin C, calcium, and iron — great for digestion, hair, and skin.Beautiful & Fragrant: Its lush green foliage doubles as a decorative plant with a refreshing scent.When you grow smarter with curry leaves, you’re adding both beauty and function to your space! 🌸🌱 Step-by-Step: How to Grow Curry Leaves Plant1. Choose the Right VarietyThere are three main types of curry leaf plants:Regular curry leaf (Murraya koenigii): Common, fast-growing, aromatic.Dwarf curry leaf: Compact and bushy — perfect for pots or indoor gardens.Gamthi (miniature variety): Slow-growing but has the most intense aroma.If you’re a beginner, the regular variety is easiest to start with.2. How to Grow from SeedsGrowing curry leaf plants from seeds takes patience, but it’s rewarding.Steps:Collect fresh black curry berries (seeds from a mature plant).Remove the pulp gently and wash the seeds.Dry them in shade for a day.Sow each seed 1 inch deep in a pot filled with well-draining potting soil.Keep the soil moist (not soggy) and place the pot in a warm, sunny location.Germination takes 10–20 days in warm temperatures (around 25–30°C / 77–86°F).💡 Tip: Use a seed-starting tray or biodegradable pots for easy transplanting later.3. How to Grow from Stem CuttingsThis method is faster and more reliable than growing from seed.Steps:Take a healthy cutting (4–6 inches long) from a mature curry leaf plant.Remove lower leaves, keeping only 2–3 at the top.Dip the cut end in rooting hormone or honey (natural alternative).Plant it in a small pot with a mix of coconut coir, sand, and compost.Keep it warm and humid — cover with a clear plastic bag to create a mini greenhouse effect.After 3–4 weeks, new shoots or roots should appear.Once roots establish, transplant it into a larger pot or the garden.4. Choosing the Right SoilCurry leaf plants prefer:Well-drained soil (sandy loam is ideal)Slightly acidic pH (6.0–6.5)Organic compost or manure for nutrients💧 Avoid waterlogging — it’s the number one cause of root rot.5. Sunlight & Temperature NeedsCurry leaf plants are tropical and sun-loving.☀️ Sunlight: 6–8 hours of full sun daily.🌡️ Temperature: 20–35°C (68–95°F) is perfect.If you live in a cooler region, keep it indoors near a sunny window or under a grow light during winter.6. Watering TipsWater only when the top inch of soil feels dry.In summer: water 2–3 times a week.In winter: reduce to once a week.Avoid stagnant water — ensure your pot has drainage holes.💧 Bonus tip: Curry leaf plants love humidity! Mist the leaves occasionally to mimic tropical conditions.7. Fertilizing for Fast GrowthFeed your plant every 2–3 weeks during the growing season (spring to late summer).✅ Use:Organic compost or cow manureDiluted seaweed or fish fertilizerHomemade buttermilk spray (for extra nitrogen)🪴 Tip: Stop fertilizing in winter when growth naturally slows down.8. Pruning for Healthy GrowthTo encourage bushier growth:Pinch off the tips of young shoots regularly.Prune tall or leggy stems to promote branching.Remove yellow or dry leaves to prevent disease.This helps your curry leaf plant stay lush and full instead of tall and spindly.9. Common Problems & SolutionsProblem Cause SolutionYellow leaves Overwatering Let soil dry before watering againDrooping plant Poor drainage or root rot Repot in well-drained soilNo new growth Lack of sunlight or nutrients Move to sunnier spot, fertilize lightlyAphids or mites Pests Spray neem oil or insecticidal soap weeklyHealthy plants rarely suffer from pests if kept clean and dry. 🌿10. Harvesting Curry LeavesOnce your plant is around 6 months old and has multiple stems:Pick mature leaves (dark green, fully grown).Avoid removing more than one-third of the plant at a time.Harvest in the morning for the strongest aroma.Regular harvesting actually encourages new growth!🌼 Bonus: How to Overwinter a Curry Leaf PlantIf you live in a cold region (below 10°C / 50°F):Move your plant indoors before frost.Place it in a bright window or under grow lights.Water sparingly — just enough to keep soil slightly moist.Resume feeding and pruning once spring arrives.Your curry leaf plant will bounce back beautifully in warmer weather. 🌞🌿 Quick SummaryStep What to Do Tip1. Propagate Use seeds or cuttings Cuttings are faster2. Soil Well-drained, slightly acidic Add compost3. Sunlight 6–8 hours daily Loves heat4. Water When top soil dries Avoid soggy roots5. Feed Every 2–3 weeks Use organic fertilizer6. Prune Regularly Encourages bushiness7. Harvest After 6 months Don’t overpluck🌱 Final ThoughtsWhen you grow smarter with how to grow curry leaves plant, you’re not just cultivating a herb — you’re cultivating self-sufficiency, flavor, and wellness right at home.Whether you’re in a sunny backyard or a cozy apartment, this tropical gem will thrive with just a bit of love and light. 🌞So grab a pot, some soil, and a sprig of curry leaf magic — and start growing your fragrant little spice garden today! 🌿💚

