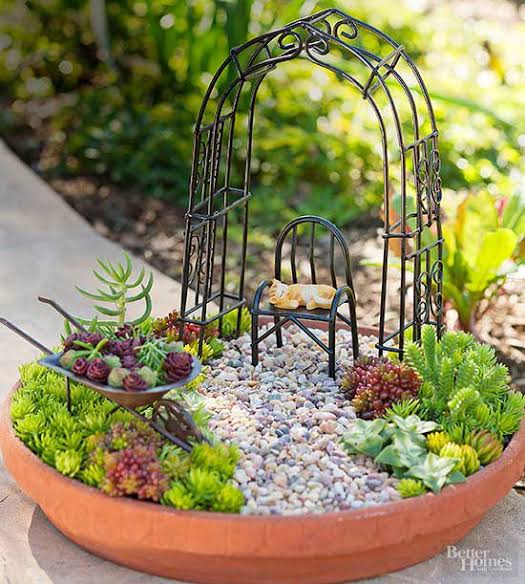
If you’ve ever wished your garden could reflect your creativity and personality, it’s time to grow smarter with Garden Art DIY! Creating your own garden art isn’t just a fun weekend project — it’s a clever way to personalize your outdoor space, repurpose materials, and add charm without breaking the bank.Whether you want to make a whimsical focal point, upcycle old items, or simply add a splash of color among your plants, DIY garden art lets you bring beauty and imagination to your backyard.Let’s dive into how you can grow smarter with Garden Art DIY, turning ordinary materials into extraordinary garden décor.🌸 Why Choose DIY Garden Art?Before you grab your tools and paintbrush, let’s explore why DIY garden art is such a rewarding idea.1. It’s Budget-FriendlyInstead of spending hundreds of dollars on store-bought sculptures or décor, you can create beautiful garden pieces using items you already have — old pots, wood scraps, bottles, or stones.2. It’s Environmentally FriendlyUpcycling and reusing materials is an eco-friendly way to reduce waste. You’re not just making art; you’re making a sustainable choice for the planet.3. It’s Uniquely YoursDIY garden art lets your creativity shine. From painted rocks to rustic trellises, your handmade pieces will be one-of-a-kind.4. It’s TherapeuticCrafting and gardening both reduce stress. Combining them creates a relaxing hobby that enhances your outdoor environment.In short, Grow Smarter with Garden Art DIY means combining creativity, sustainability, and personal style in your garden.🪴 Getting Started with DIY Garden Art1. Choose a Theme or StyleBefore you start crafting, think about your garden’s aesthetic. Do you prefer a rustic farmhouse, modern minimalist, or fairy-tale-inspired look? Choosing a theme will help guide your color palette and materials.2. Gather Your MaterialsLook around your home or local thrift shops for items you can repurpose. Some great options include:Old metal cans or teapotsGlass bottles or jarsWooden pallets or driftwoodBroken terracotta potsStones, pebbles, and shellsOld tools, ladders, or bicycle parts3. Basic Tools You Might NeedPaints and brushesStrong adhesive or glueWire cutters or pliersHammer and nailsWeatherproof sealantPro Tip: Always use outdoor-grade paint and sealants to make your artwork weather-resistant.🎨 Creative Garden Art DIY IdeasReady to get inspired? Here are some easy and beautiful ways to grow smarter with Garden Art DIY and transform your space.1. Painted Garden RocksOne of the simplest and most popular DIY ideas. Collect smooth rocks and paint them with fun patterns, flowers, or inspirational quotes. Use them as garden markers or colorful accents along your pathways.Bonus idea: Paint rocks to look like strawberries, ladybugs, or bees for a playful touch!2. Upcycled PlantersTurn almost anything into a planter — old boots, teapots, colanders, or even an old chair! Just make sure you add drainage holes.This is a great way to combine functionality and creativity while reusing old items.Example: Paint old tires in bright colors, stack them, and fill them with flowers for a vibrant focal point.3. Garden SignpostsMake personalized signs using reclaimed wood. You can write your favorite quotes, plant names, or directions like “Herb Garden →” or “Welcome to Paradise.”Coat your signs with varnish or sealant to protect them from rain and sun.4. Bottle Border or Glass ArtOld glass bottles can be turned into stunning garden edges or light-catching sculptures. Bury them neck-down along a path for a colorful border, or hang them from tree branches for a glowing effect.Safety Tip: Smooth any sharp edges and use gloves while handling glass.5. Mosaic Flower PotsBreak old tiles, mirrors, or plates into pieces and use them to decorate flower pots. The result? Shimmering, artistic containers that make your plants stand out beautifully.6. DIY Bird Bath or FeederUse a large bowl, an old dish, or even a shallow pot to create a rustic bird bath. Stack on stones or a pedestal for extra height.For feeders, hang painted tin cans or mason jars filled with seeds — your feathered friends will love them!7. Hanging Garden ArtIf you’re short on ground space, go vertical! Use macramé plant hangers, recycled wooden crates, or hanging glass jars with fairy lights.This adds texture and depth to your garden, especially for patios or small spaces.8. Wind Chimes and Garden MobilesCombine seashells, keys, driftwood, beads, or old cutlery to make charming wind chimes. Hang them from a tree or porch to enjoy gentle sounds on breezy days.This simple project brings both movement and melody to your garden.🌿 Eco-Friendly Garden Art IdeasFor those who want to grow smarter with Garden Art DIY and stay eco-conscious, here are sustainable ideas to consider:Use recycled metals for sculptures or supports.Turn broken pots into fairy gardens or tiered planters.Paint tin cans and use them as lanterns or herb containers.Create compost art: Use old wooden pallets to make compost bins decorated with stencils or patterns.Every eco-friendly project makes your garden both beautiful and sustainable.🧰 Practical Tips for DIY Garden SuccessTo make your projects last and look professional, follow these smart tips:1. Use Weatherproof MaterialsChoose paints, glues, and sealants designed for outdoor use. This ensures your art withstands rain, sun, and wind.2. Plan the PlacementBefore finalizing your design, walk around your garden. Think about sunlight, color balance, and focal points.3. Keep It BalancedMix tall art pieces like sculptures with smaller accents like painted rocks for visual harmony.4. Prioritize SafetyIf you’re working with glass or metal, wear gloves and safety glasses.5. Refresh AnnuallyRepaint or reseal your pieces every year to keep them looking vibrant and new.🌼 Small DIY Garden Art Projects for BeginnersIf you’re new to crafting, start with these quick wins:Painted Pots: A few bright colors can transform plain terracotta.Garden Stones with Words: Write “Hope,” “Grow,” or “Bloom” on stones and scatter them around your garden.Herb Markers: Use popsicle sticks, spoons, or pebbles to label your herbs.Mini Fairy Garden: Use broken pots or small planters to create a tiny world with moss and figurines.Each of these projects is easy, affordable, and adds personality instantly.🌺 Showcase Your Garden Art CreativelyOnce you’ve completed your DIY art, it’s time to display it!Use layers: Combine tall and low decorations for depth.Light it up: Add fairy lights or lanterns for magical evenings.Mix textures: Combine wood, metal, and greenery for a balanced look.Create zones: Use art pieces to define spaces like “relaxation corners” or “kids’ play areas.”Your garden will feel alive with creativity and charm.🌞 Conclusion: Grow Smarter with Garden Art DIY!There’s no better way to express your creativity outdoors than with Garden Art DIY. By reusing everyday materials and adding your artistic touch, you create a space that’s both sustainable and uniquely yours.Whether you’re painting rocks, upcycling old containers, or designing a whimsical fairy garden, every project adds heart and soul to your backyard.So grab your paintbrush, gather your tools, and grow smarter with Garden Art DIY! Your outdoor space is waiting to bloom — not just with flowers, but with imagination, color, and joy. 🌿✨✅ Meta Title:Grow Smarter with Garden Art DIY – Creative & Sustainable Backyard Ideas✅ Meta Description:Discover how to grow smarter with Garden Art DIY! Fun, affordable, and eco-friendly ideas to add personality and color to your outdoor space.