
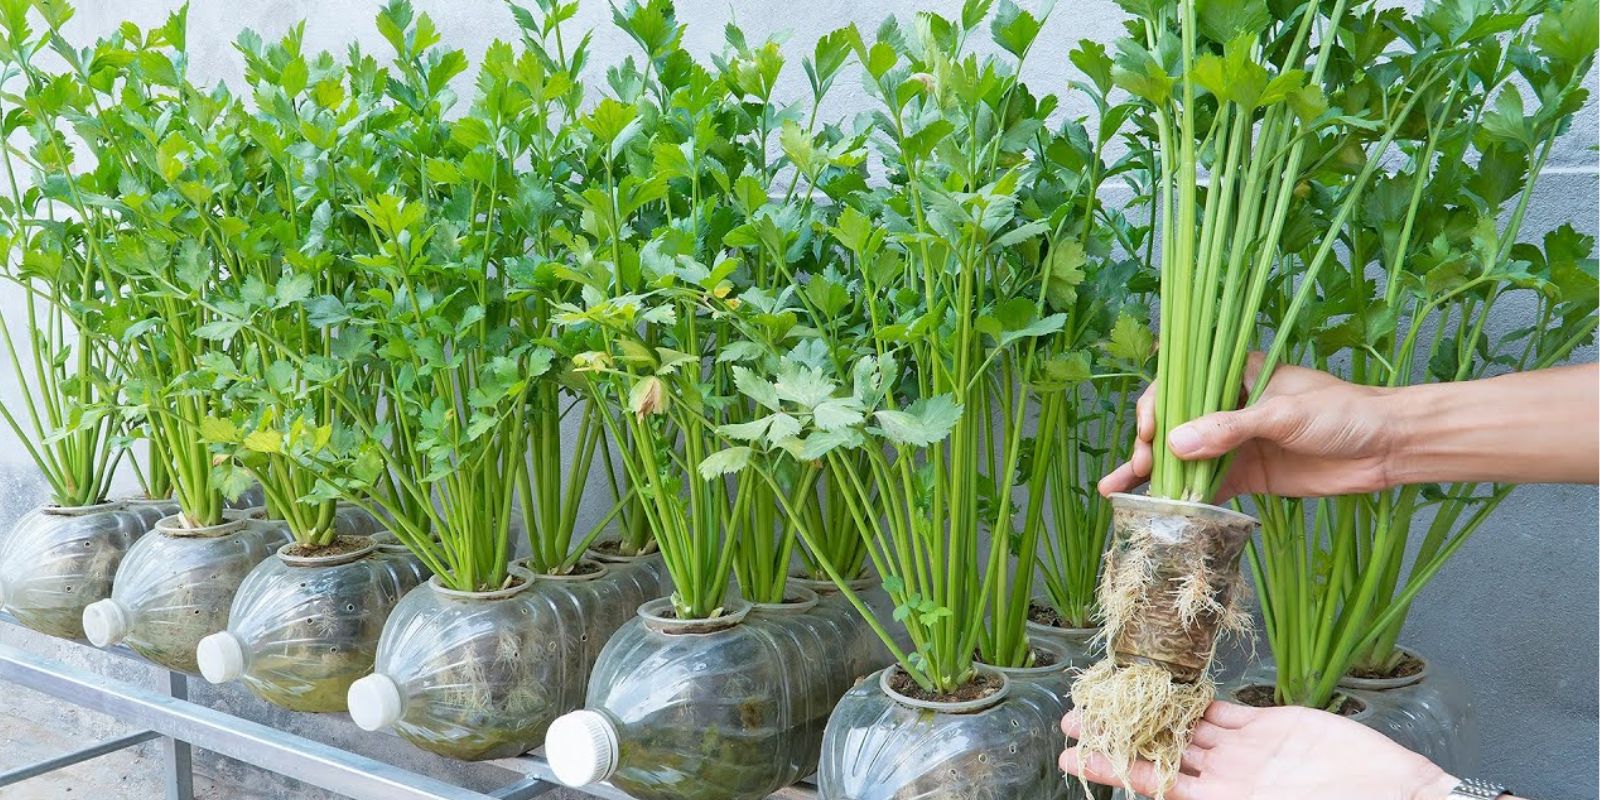
Reusing plastic bottles to grow celery is an innovative way to enjoy fresh produce while embracing sustainability. This method is perfect for urban gardeners, small-space enthusiasts, or anyone looking to make eco-friendly choices in their gardening practices. Whether you’re new to gardening or a seasoned green thumb, this project is both simple and rewarding.
Why Grow Celery at Home?
Celery is a versatile and nutrient-packed vegetable, used in everything from soups and salads to smoothies. Growing it at home allows you to enjoy chemical-free, fresh stalks while reducing your grocery bills. Moreover, reusing plastic bottles helps cut down on waste, making it an environmentally conscious choice.
Benefits of Growing Celery in Plastic Bottles
- Eco-Friendly: Repurpose plastic bottles that would otherwise end up in landfills.
- Space-Saving: Ideal for balconies, small patios, or windowsills.
- Cost-Effective: Utilize kitchen scraps to regrow celery, saving money.
- Accessible: No need for a large garden; even beginners can master this technique.
What You’ll Need
- Clean plastic bottles (2-liter soda bottles work well).
- A sharp knife or scissors.
- Well-draining potting soil.
- A celery base from store-bought celery.
- Water and a sunny location.
- Optional: Compost or liquid fertilizer.
Step-by-Step Guide to Growing Celery in Plastic Bottles
1. Prepare the Plastic Bottle
- Wash the bottle thoroughly to remove any residue.
- Use a sharp knife to cut the bottle in half. You’ll use the bottom half as the planter.
- Poke small drainage holes at the base to prevent waterlogging.
2. Create a Healthy Soil Base
- Fill the bottom half of the bottle with nutrient-rich, well-draining potting soil.
- Leave about an inch of space at the top to accommodate watering without overflow.
3. Plant the Celery Base
- Take a celery base (the bottom 2 inches of a store-bought celery stalk).
- Place it in the center of the soil with the cut side facing up.
- Gently cover the roots with a thin layer of soil, ensuring the upper part remains exposed.
4. Water Regularly
- Moisten the soil immediately after planting.
- Keep the soil consistently damp but not soggy; overwatering can cause rot.
5. Provide Ample Light
- Celery thrives in sunlight. Position the bottle in a sunny spot where it can receive 6-8 hours of light daily.
- If growing indoors, use grow lights to mimic natural sunlight.
6. Boost Growth with Fertilizer
- Add compost or organic liquid fertilizer every two weeks to replenish nutrients.
- Avoid chemical fertilizers, especially if you prefer organic produce.
7. Monitor and Maintain
- Keep an eye out for pests or yellowing leaves, which can indicate overwatering or nutrient deficiencies.
- Rotate the bottle occasionally to ensure even sunlight exposure.
8. Harvest Your Celery
- Within 3-4 weeks, you’ll notice new stalks sprouting from the base.
- Harvest individual stalks as needed by cutting them near the base.
- Leave the root intact for continuous regrowth.
Tips for Success
- Choose the Right Celery: Organic celery bases are more likely to regrow successfully than conventional ones.
- Water Quality Matters: Use filtered or rainwater to avoid chlorine buildup, which can hinder growth.
- Prune Regularly: Trim off any yellow or withered leaves to encourage healthy growth.
- Recycle More: Use the top half of the bottle as a water reservoir for other plants.
Why This Method Stands Out
Growing celery in reused plastic bottles not only yields delicious, fresh produce but also serves as a hands-on lesson in sustainability. This project reduces waste, utilizes kitchen scraps, and saves money—all while providing a satisfying gardening experience. Plus, it’s a great activity to involve kids in gardening and teach them about recycling and plant care.
Creative Uses for Homegrown Celery
- Add a crisp touch to salads.
- Blend into green juices for a detoxifying boost.
- Incorporate into hearty soups and stews.
- Use the leaves as a flavorful garnish.
Addressing Common Challenges
1. Slow Growth: If growth is sluggish, check light exposure and soil nutrients. Adding compost can help.
2. Root Rot: Overwatering is the main culprit. Ensure your bottle has proper drainage.
3. Pest Problems: Common pests include aphids and slugs. Use neem oil or organic sprays to keep them at bay.
4. Weak Stalks: Insufficient sunlight or overcrowding can lead to weak growth. Ensure proper spacing and light.
Conclusion
Growing celery in reused plastic bottles is a sustainable, space-saving, and rewarding gardening project. It transforms kitchen scraps into thriving plants while promoting eco-conscious practices. With minimal effort, you can enjoy fresh, homegrown celery year-round—perfect for enhancing your meals and reducing your carbon footprint.
💬 Have you tried this method or any other creative gardening hacks? Share your tips or photos below—we’d love to hear from you!
Hashtags:
#SustainableGardening #GrowYourOwnFood #PlasticBottleGardening #EcoFriendlyLiving #UrbanGardening #CeleryGrowing #GardeningTips #RecycleAndGrow #GardeningHacks