
Roses have long been cherished for their timeless beauty and enchanting fragrance. However, the art of grafting roses opens up a world of possibilities, allowing gardeners to create a single rose bush that blooms in multiple colors. Imagine a vibrant display of red, pink, white, and yellow roses, all thriving on the same plant. This article will guide you through the process of grafting roses of different colors, providing detailed steps and tips to help you master this fascinating horticultural technique.
Understanding Rose Grafting
Grafting is a horticultural method that involves joining two plants together so that they grow as one. In rose grafting, a scion (a stem or bud from a rose plant) is grafted onto a rootstock (a healthy, established rose bush). The rootstock provides the root system and base, while the scion determines the flower’s color and characteristics. By grafting scions of different-colored roses onto a single rootstock, you can create a multi-colored rose bush that is both unique and stunning.
Why Graft Roses?
Grafting roses offers several benefits:
- Variety on a Single Plant: Instead of planting multiple bushes, grafting allows you to enjoy various rose colors on one plant.
- Improved Plant Health: Grafting onto a robust rootstock can enhance the overall vigor and disease resistance of the rose bush.
- Cost-Effective: Grafting can be a more economical way to grow multiple rose varieties without purchasing several plants.
- Creative Gardening: It adds a creative aspect to gardening, allowing you to experiment with different color combinations and patterns.
Materials Needed
Before you start grafting, gather the following materials:
- Rootstock: A healthy, disease-free rose bush.
- Scions: Fresh cuttings from the rose varieties you wish to graft.
- Grafting knife: A sharp knife for making precise cuts.
- Grafting tape or rubber bands: To secure the graft in place.
- Pruners: For cutting the scions and rootstock.
- Rooting hormone (optional): To encourage the scion’s growth.
Step-by-Step Guide to Grafting Roses
- Select Healthy Rootstock
The first step in grafting roses is choosing a suitable rootstock. The rootstock should be a healthy, well-established rose bush with a strong root system. It’s essential to select a rootstock that is compatible with the scions you intend to graft. Popular choices for rootstock include ‘Dr. Huey’ or ‘Fortuniana,’ known for their disease resistance and vigorous growth. - Prepare the Scion
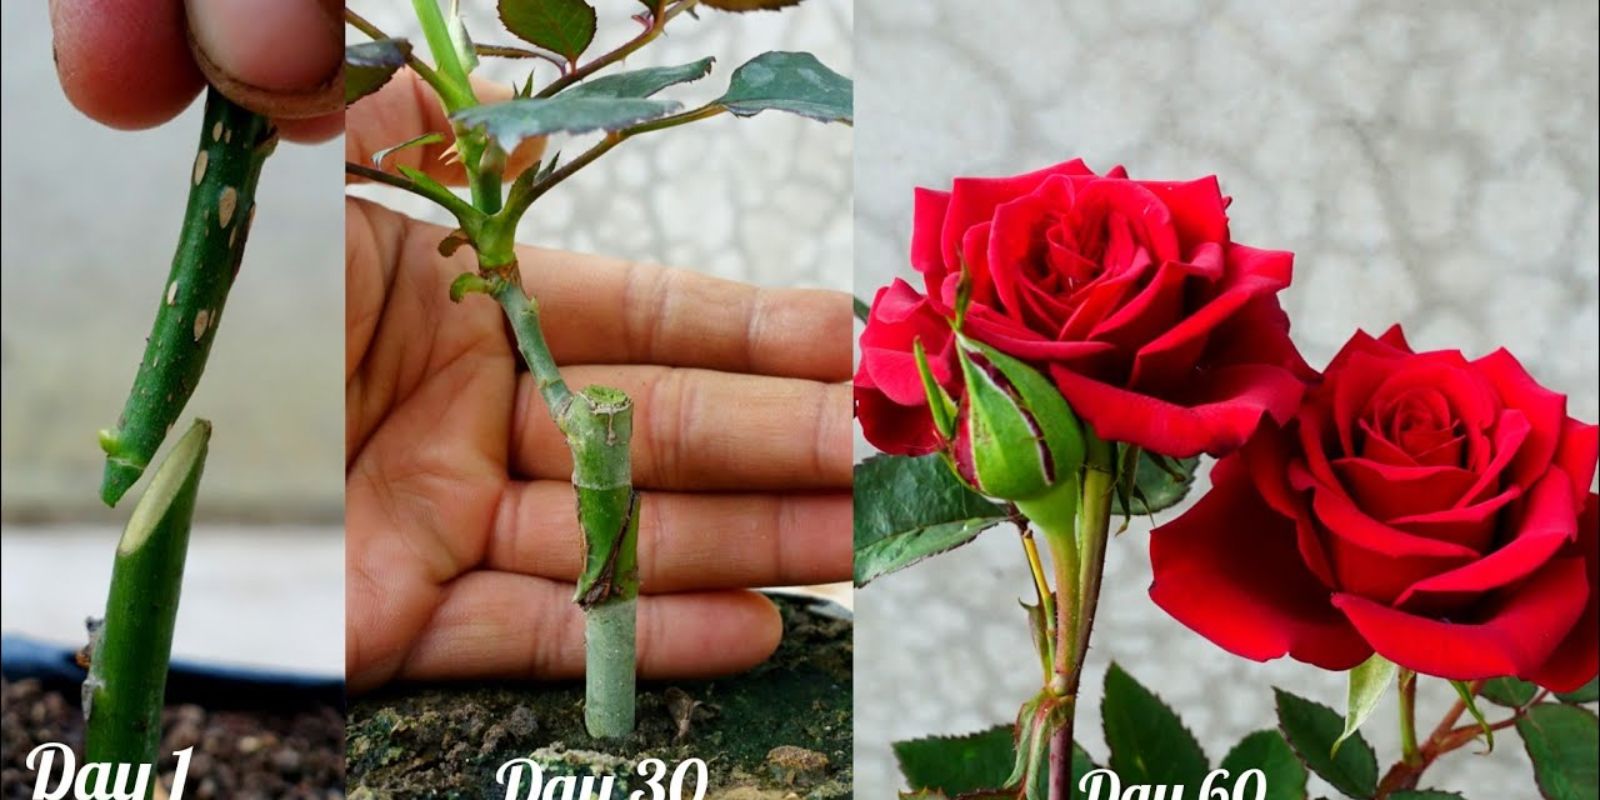
The scion is the part of the rose plant that will be grafted onto the rootstock. Select a healthy stem from the rose variety you wish to propagate, ensuring that it has at least one bud. The scion should be about 4-6 inches long and taken from the current season’s growth. Trim off any leaves or thorns from the scion to make it easier to handle. - Make the Graft Cut
The next step is to make a T-shaped cut on the rootstock. Using a sharp grafting knife, make a horizontal cut about 1 inch long on the stem of the rootstock. Then, make a vertical cut starting from the middle of the horizontal cut, about 1 inch long. This T-shaped incision will create a flap of bark that can be lifted to insert the scion. - Insert the Scion
Carefully insert the scion into the T-shaped cut on the rootstock. The cut end of the scion should fit snugly under the flap of bark, ensuring that the cambium layers (the green tissue beneath the bark) of both the scion and rootstock are in contact. The cambium layers must align correctly, as this is where the graft will heal and fuse. - Secure the Graft
Once the scion is in place, secure it by wrapping the grafted area with grafting tape or a rubber band. This tape will hold the scion firmly in place and protect the graft from drying out or becoming dislodged. Ensure that the graft is snug but not too tight, as excessive pressure can damage the plant. - Care for the Graft
After grafting, it’s crucial to provide the plant with proper care to ensure the graft takes successfully. Keep the plant well-watered, but avoid overwatering, which can cause rot. Place the grafted plant in a location with indirect sunlight and protect it from strong winds or harsh weather. Within a few weeks, you should start to see new growth emerging from the scion, indicating that the graft has taken. - Monitor and Prune
As the grafted rose bush grows, monitor the grafted areas to ensure they are healing well. If necessary, prune any shoots that emerge from the rootstock below the graft, as these can divert energy away from the scion. Regularly check the grafts for signs of disease or damage, and remove any dead or unhealthy growth. - Enjoy Your Multi-Colored Rose Bush
With proper care, your grafted rose bush will produce blooms in multiple colors, creating a stunning visual display. Each year, you can enjoy the beauty of your multi-colored rose bush, knowing that you created it with your own hands. Grafting roses is not only a rewarding gardening project but also a way to cultivate a unique and personalized garden space.
Tips for Successful Rose Grafting
- Timing is Key: Graft roses in the early spring or late winter when the plant is still dormant. This timing increases the chances of a successful graft.
- Keep it Clean: Use clean, sharp tools to make precise cuts and reduce the risk of introducing disease to the plant.
- Be Patient: Grafting is a delicate process that requires patience. Don’t rush the healing process, and give your plant time to recover and grow.
Conclusion
Grafting roses of different colors onto a single bush is a creative and fulfilling way to enhance your garden’s beauty. With the right techniques and a little patience, you can create a stunning rose bush that blooms in a variety of colors, all on one plant. Whether you’re a seasoned gardener or a beginner, this step-by-step guide provides all the information you need to successfully graft roses and enjoy a vibrant, multi-colored garden.
By following these steps and tips, you’ll be well on your way to creating a unique and eye-catching rose bush that will be the envy of your neighborhood. So, why not give it a try? Graft your roses today and watch your garden transform into a kaleidoscope of colors! 🌹