
Geraniums are among the most popular flowering plants, cherished not only for their vibrant blooms but also for their fragrant foliage and ease of care. They are perfect for both novice gardeners and seasoned horticulturists. If you’re looking to expand your garden or share your love of geraniums with friends, propagating them from cuttings is a simple and rewarding process. This comprehensive guide will walk you through the steps of propagating geraniums, ensuring that you can enjoy these beautiful plants year-round.
Understanding Geraniums
Before diving into the propagation process, it’s essential to understand what geraniums are. Often confused with pelargoniums, true geraniums (commonly referred to as cranesbills) are perennial plants that thrive in various garden settings. Their vibrant flowers and aromatic leaves come in various colors, from rich reds and pinks to soft whites and purples. They can be grown in pots, hanging baskets, or directly in the ground, making them versatile additions to any garden.
Why Propagate Geraniums?
- Cost-Effective: Growing your own geraniums from cuttings saves money compared to buying new plants from a nursery.
- Personalization: By propagating your geraniums, you can create a garden that reflects your style and preferences, experimenting with different varieties and colors.
- Gift Sharing: Propagated geraniums make excellent gifts for friends and family, spreading joy and beauty.
- Sustainable Gardening: Propagation promotes sustainability by reducing the need to purchase new plants and fostering a healthy gardening ecosystem.
- Plant Health: Healthy cuttings from your own plants are likely to adapt better to your local environment, ensuring robust growth.
The Propagation Process
Now that you’re motivated to propagate your geraniums, let’s get started with the step-by-step process.
Step 1: Selecting Healthy Cuttings
The first step in propagating geraniums is to select healthy stems from an existing plant. Look for stems that are firm, green, and free of disease or pests. Ideally, you want to choose stems that are 4-6 inches long and have several leaf nodes. These nodes are essential as they are the areas from which new roots will grow.
Step 2: Making the Cut
Once you’ve chosen your stems, it’s time to make the cut. Use sterilized scissors or pruning shears to create a clean cut just below a leaf node. This minimizes damage to the plant and helps prevent diseases. It’s important to use sterilized tools to reduce the risk of introducing pathogens that can harm both the parent plant and the cuttings.
Step 3: Preparing the Cuttings
After cutting, you’ll want to prepare your cuttings for propagation:
- Remove Lower Leaves: Strip off the lower leaves from the cutting, leaving only a few leaves at the top. This prevents rot when planted and allows the cutting to focus energy on root development.
- Let Cuttings Callus: Place the cuttings in a dry, shaded area for a few hours or overnight to allow the cut ends to callus. This step is crucial as it helps prevent rot when the cuttings are placed in soil.
Step 4: Choosing the Right Medium
Geraniums thrive in well-draining soil, so it’s essential to choose the right potting mix. A mix of potting soil and perlite or vermiculite works well. This combination ensures adequate drainage while retaining some moisture, creating an ideal environment for root growth.
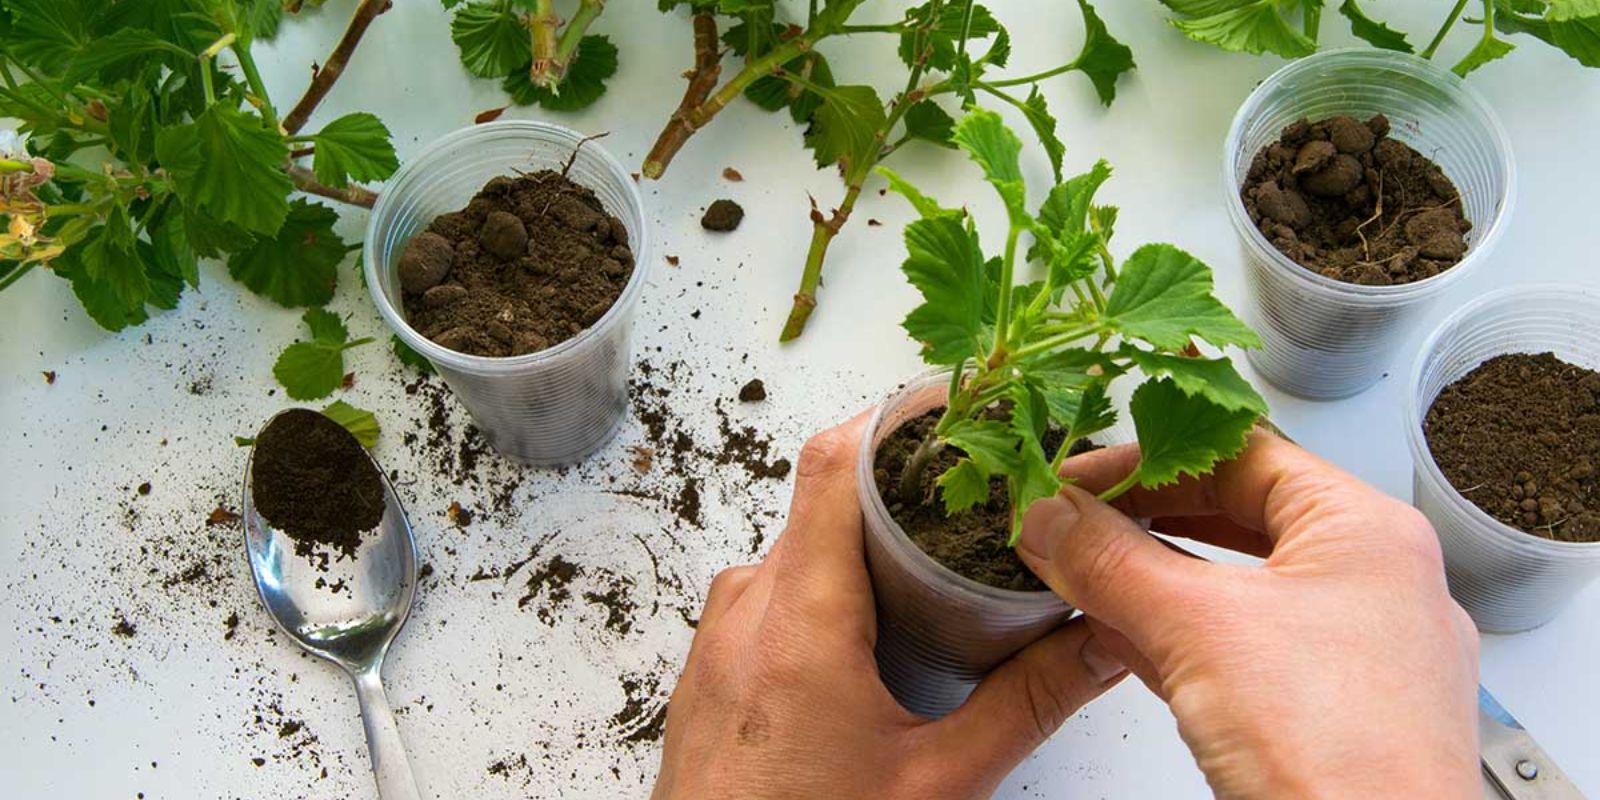
Step 5: Planting the Cuttings
Once your cuttings have callused, it’s time to plant them:
- Prepare Small Pots: Fill small pots (3-4 inches in diameter) with your potting mix, leaving some space at the top.
- Insert the Cuttings: Make a small hole in the soil and insert the callused end of the cutting into the soil. Firmly pack the soil around the base to secure it in place. Aim to have at least one leaf node buried in the soil, as this is where the roots will emerge.
Step 6: Watering the Cuttings
After planting the cuttings, water them lightly. Ensure the soil is moist but not soggy, as excessive moisture can lead to rot. The goal is to create a conducive environment for root development. Be mindful of the watering schedule, allowing the top layer of soil to dry slightly between waterings.
Step 7: Creating a Humid Environment
To encourage rooting, it’s beneficial to maintain high humidity around the cuttings. You can do this by covering the pots with plastic bags or placing them in a mini greenhouse. If using plastic bags, ensure there’s some airflow to prevent mold growth. Remove the cover occasionally to allow fresh air in and check for any signs of rot or disease.
Step 8: Providing Adequate Light
Place the pots in a warm, bright location with indirect sunlight. Direct sunlight can scorch the delicate cuttings, so ensure they receive filtered light. A south or east-facing window is often ideal. If natural light is insufficient, consider using grow lights to provide the necessary illumination.
Step 9: Monitoring Growth
Keep an eye on your cuttings as they begin to root. This process usually takes 2-4 weeks. Look for new growth as an indication that the cuttings are establishing roots. If you see any yellowing leaves or signs of rot, remove the affected cuttings to prevent the spread of disease.
Step 10: Transplanting
Once the cuttings have rooted and you notice new growth, it’s time to transplant them into larger pots or directly into your garden.
- Prepare Larger Pots: Choose pots that are 6-8 inches in diameter filled with quality potting mix.
- Gently Remove the Cuttings: Carefully remove the rooted cuttings from their smaller pots, taking care not to damage the roots.
- Transplant into Larger Pots: Place the rooted cuttings in their new pots, ensuring the root ball is covered with soil and firming it around the base.
- Water Well: After transplanting, give them a good drink of water to help settle the soil around the roots.
- Care for Your New Geraniums: Keep the newly transplanted geraniums in a warm, bright location and continue to monitor their water needs.
Conclusion
Propagating geraniums from cuttings is a straightforward and rewarding process. By following these steps, you can easily grow beautiful geraniums to enhance your garden, share with friends, or create a lovely display in pots around your home. With patience and proper care, your cuttings will flourish, providing you with vibrant blooms and fragrant foliage.
Get Started Today!
Now that you have all the knowledge to propagate geraniums, it’s time to put it into action! Start your propagation journey and watch your garden flourish. Don’t forget to share your experiences and successes with fellow gardening enthusiasts! 🌿✨
Join the Gardening Community!
Share your geranium propagation stories and connect with fellow plant lovers! Use the hashtags below to join the conversation: #Geraniums #PlantPropagation #GardeningTips #GreenThumb #GardenInspiration #FlowerPower #EasyGardening #GardenLife #PlantLovers #DIYGardening