
Gardening enthusiasts constantly seek innovative and cost-effective solutions to enhance their gardening experience. PVC pipes, a versatile and inexpensive material, offer a range of possibilities for DIY garden projects. From creating efficient irrigation systems to stylish vertical planters, PVC pipes can transform your garden in practical and creative ways. This article will explore various DIY PVC pipe garden projects, providing step-by-step instructions and tips to help you get started.
Why Use PVC Pipes in Gardening?
PVC (polyvinyl chloride) pipes are popular in gardening due to their affordability, durability, and ease of use. They are lightweight, resistant to rot, and can be easily cut and assembled. Additionally, PVC pipes are weather-resistant and can handle various environmental conditions, making them ideal for outdoor use.
Benefits of Using PVC Pipes:
- Cost-Effective: PVC pipes are relatively inexpensive compared to other materials.
- Durable: They are resistant to rust, decay, and pests.
- Customizable: PVC can be cut and shaped to fit specific needs and designs.
- Low Maintenance: PVC requires minimal upkeep and cleaning.
1. Creating a PVC Pipe Irrigation System
An efficient irrigation system is crucial for maintaining a healthy garden. PVC pipes can be used to create a custom irrigation setup that delivers water directly to your plants.
Materials Needed:
- PVC pipes (various lengths)
- PVC connectors (elbows, tees, caps)
- PVC primer and cement
- Drill with hole saw attachment
- Pipe cutter or saw
Steps:
- Plan Your Design: Determine the layout of your irrigation system. Decide where you need water and how you want to distribute it. Common designs include drip irrigation systems or soaker hoses.
- Measure and Cut Pipes: Measure the lengths of PVC pipes needed for your design. Use a pipe cutter or saw to cut the pipes to the desired lengths.
- Assemble the System: Connect the pipes using PVC connectors. Apply PVC primer to the ends of the pipes and connectors to prepare them for gluing. Apply PVC cement to the primed areas and connect the pieces, ensuring a secure fit.
- Drill Holes for Water Flow: Use a drill with a hole saw attachment to make small holes in the pipes where water will be distributed. Space the holes according to your needs.
- Install the System: Place the assembled irrigation system in your garden. Connect it to a water source and test the flow to ensure even distribution.
- Adjust as Needed: Make any necessary adjustments to improve water distribution or address any issues with leaks.
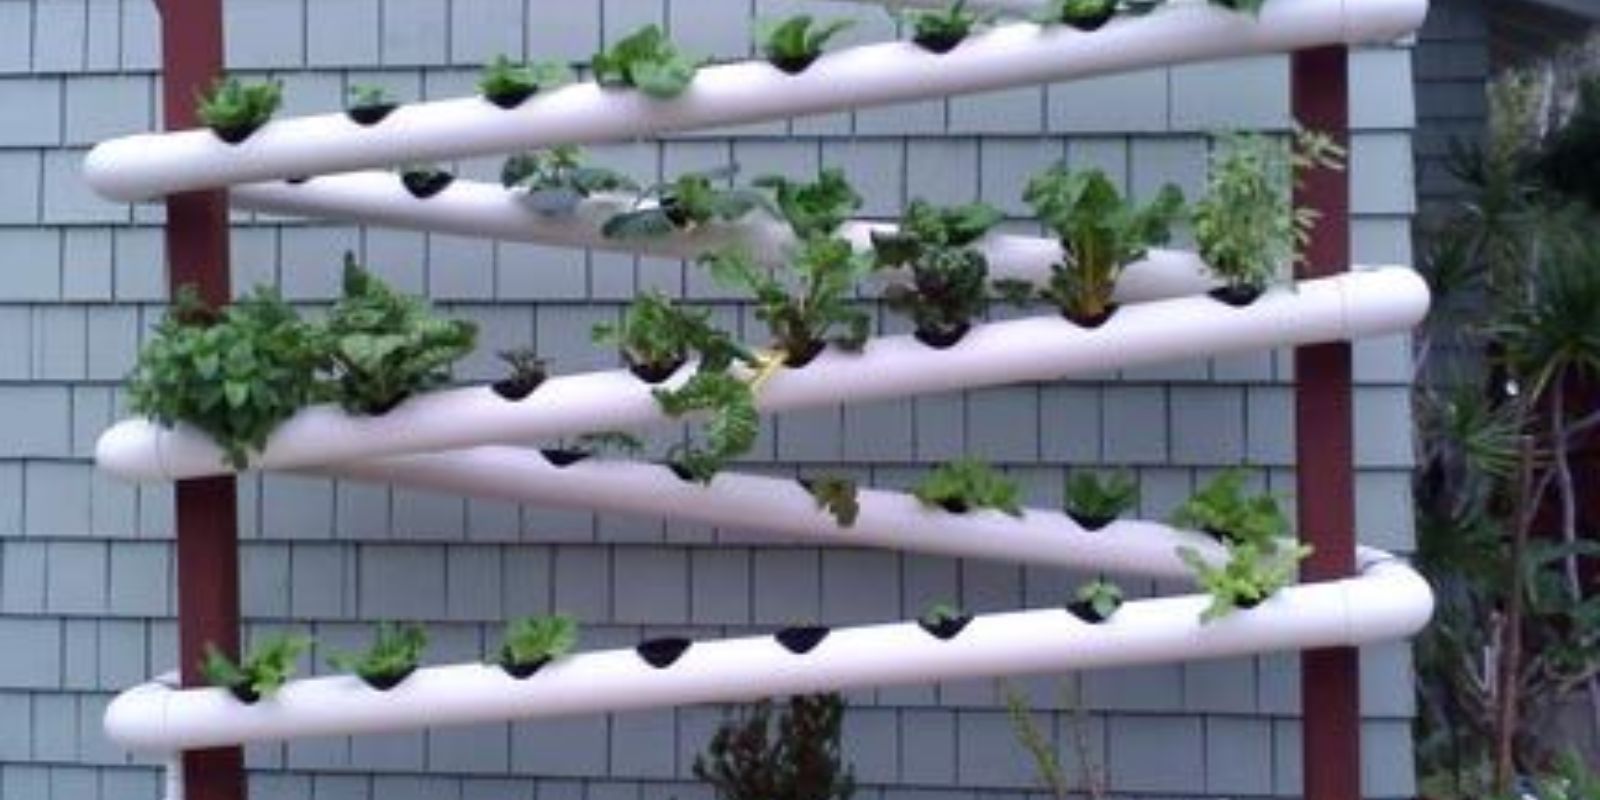
2. Building a PVC Pipe Vertical Planter
Vertical planters are an excellent way to save space and add visual interest to your garden. PVC pipes can be used to create a vertical planter that holds multiple plants in a compact area.
Materials Needed:
- PVC pipes (lengths as desired)
- PVC connectors (elbows, tees)
- Drill with hole saw attachment
- Potting soil
- Plants or seedlings
- PVC primer and cement
Steps:
- Plan Your Design: Decide the height and width of your vertical planter. Determine how many tiers or sections you want for planting.
- Cut and Assemble Pipes: Cut the PVC pipes to the desired lengths for the vertical planter. Assemble the pipes using PVC connectors to create the structure. Secure the connections with PVC primer and cement.
- Drill Holes for Planting: Drill holes in the sides of the PVC pipes where you will insert plants. The size and spacing of the holes will depend on the types of plants you plan to grow.
- Assemble the Planter: Stack the sections or tiers of the vertical planter, securing them in place. Ensure that the planter is stable and upright.
- Fill with Soil and Plants: Fill each section with potting soil. Insert your plants or seedlings into the holes, making sure they are well-supported.
- Place and Maintain: Position the vertical planter in a suitable location with adequate sunlight. Water the plants as needed and monitor their growth.
3. Making a PVC Pipe Greenhouse Frame
PVC pipes can be used to construct a simple and affordable greenhouse frame. This project is perfect for extending the growing season and protecting plants from harsh weather.
Materials Needed:
- PVC pipes (various lengths)
- PVC connectors (elbows, tees)
- PVC primer and cement
- Greenhouse plastic or fabric
- Pipe cutter or saw
Steps:
- Design the Greenhouse: Plan the size and shape of your greenhouse. A simple design includes a rectangular frame with a peaked roof.
- Cut and Assemble the Frame: Cut the PVC pipes to the required lengths for the greenhouse frame. Connect the pipes using PVC connectors to form the structure. Secure the joints with PVC primer and cement.
- Attach the Covering: Drape greenhouse plastic or fabric over the frame and secure it in place. Use clips or ties to keep the covering tight and prevent it from flapping in the wind.
- Secure the Structure: Anchor the greenhouse frame to the ground using stakes or weights to prevent it from tipping over.
- Ventilation and Access: Add ventilation openings or doors as needed to regulate temperature and provide access to the plants.
4. Creating a PVC Pipe Compost Bin
A compost bin made from PVC pipes can be an effective and tidy way to manage garden waste and create nutrient-rich compost.
Materials Needed:
- PVC pipes (various lengths)
- PVC connectors (elbows, tees)
- PVC primer and cement
- Drill with hole saw attachment
- Compost materials (kitchen scraps, yard waste)
Steps:
- Plan the Compost Bin: Determine the size and shape of your compost bin. A simple rectangular or square design is effective.
- Cut and Assemble the Bin: Cut the PVC pipes to the desired lengths for the compost bin frame. Assemble the frame using PVC connectors and secure the joints with primer and cement.
- Drill Air Holes: Drill holes in the sides of the PVC pipes to allow for ventilation. Proper airflow is essential for effective composting.
- Assemble and Position: Assemble the compost bin and position it in a convenient location in your garden. Ensure it is easy to access for adding and turning compost materials.
- Start Composting: Add compost materials to the bin, turning them regularly to promote decomposition. Monitor moisture levels and adjust as needed.
Conclusion
DIY PVC pipe projects offer a range of practical and creative solutions for enhancing your garden. From efficient irrigation systems to space-saving vertical planters, PVC pipes provide a versatile and affordable option for gardeners. By following the steps outlined above, you can embark on your own PVC pipe garden projects and enjoy the benefits of customized, functional garden features.
Call to Action
Ready to try your hand at PVC pipe gardening projects? Share your ideas, completed projects, or questions in the comments below, and join the conversation on innovative and practical gardening solutions!