
Introduction
Raised bed gardening has become increasingly popular among gardeners of all skill levels, and for good reason. This method of gardening offers numerous benefits, including improved soil quality, better drainage, easier weed control, and more accessibility for planting, tending, and harvesting. Whether you have a small backyard or a large plot of land, raised beds can maximize your gardening space and yield abundant harvests. Plus, building your own raised bed is a straightforward DIY project that can be tailored to your needs and preferences. In this article, we’ll walk you through a step-by-step guide to creating your own raised bed garden, from choosing the right location to planting your garden.
Why Choose Raised Bed Gardening?
Before diving into the steps, let’s explore the benefits of raised bed gardening and why it might be the perfect solution for your gardening needs.
- Improved Soil Quality: Raised beds allow you to control the soil composition, which is especially important if your native soil is poor or contaminated. By filling your raised bed with high-quality soil and organic matter, you create an ideal growing environment for your plants.
- Better Drainage: Raised beds provide excellent drainage, preventing water from pooling around your plants’ roots. This is particularly beneficial in areas with heavy clay soil or during periods of heavy rainfall.
- Ease of Access: The elevated height of raised beds makes gardening easier on your back and knees, reducing the need to bend or kneel as much. This accessibility is especially helpful for elderly gardeners or those with physical limitations.
- Extended Growing Season: The soil in raised beds warms up faster in the spring and retains heat longer into the fall, extending your growing season. You can start planting earlier and continue harvesting later in the year.
- Weed and Pest Control: Raised beds are less prone to weeds and pests. The contained environment makes it easier to manage and control these garden nuisances, leading to healthier plants and a more productive garden.
Step 1: Choose the Right Location
The first step in creating a successful raised bed garden is choosing the right location. Consider the following factors when selecting a spot:
- Sunlight: Most vegetables and flowers require at least 6-8 hours of direct sunlight per day. Choose a location that receives ample sunlight throughout the day to ensure your plants thrive.
- Drainage: Ensure the area has good drainage. Avoid low-lying spots where water tends to pool, as this can lead to waterlogged soil and root rot.
- Accessibility: Place your raised bed in an area that’s easy to access for planting, watering, and harvesting. If possible, position it near a water source to make irrigation more convenient.
- Level Ground: A flat, level surface is ideal for a raised bed. If your yard has a slope, you may need to level the ground or build the bed with one side higher than the other to create an even surface.
Step 2: Gather Your Materials
Once you’ve chosen the location, it’s time to gather the materials you’ll need to build your raised bed. Here’s what you’ll need:
- Lumber: The most common material for raised beds is untreated wood, such as cedar or redwood, which are naturally resistant to rot. You can also use pressure-treated wood, composite materials, or even recycled materials like bricks or stones. The dimensions of the wood will depend on the size of your raised bed, but 2×6 or 2×8 boards are commonly used.
- Screws or Nails: Use galvanized or stainless steel screws or nails to assemble the frame. These are rust-resistant and will hold up well in outdoor conditions.
- Drill: A power drill will make it easier to assemble the frame and secure the boards together.
- Landscaping Fabric or Cardboard: To prevent weeds from growing up into your raised bed, you can line the bottom with landscaping fabric or a layer of cardboard.
- Soil: You’ll need a mix of high-quality garden soil, compost, and organic matter to fill your raised bed. The amount of soil required will depend on the size of your bed.
- Measuring Tape and Level: These tools will help ensure your raised bed is square and level, resulting in a sturdy and attractive structure.
Step 3: Build the Frame
Now that you have your materials, it’s time to build the frame for your raised bed. Follow these steps:
- Measure and Cut the Lumber: Measure and cut the boards to the desired length. A common size for raised beds is 4 feet wide by 8 feet long, but you can adjust the dimensions based on your available space. The width of 4 feet is ideal because it allows you to reach the center of the bed from either side without stepping into it.
- Assemble the Frame: Lay out the boards on the ground in the shape of your raised bed. Use the drill to secure the corners with screws or nails, creating a sturdy rectangle or square. Check that the corners are square and the frame is level before tightening all the screws.
- Prepare the Ground: Clear the area where your raised bed will be placed, removing any grass, weeds, or debris. If desired, lay down landscaping fabric or cardboard on the ground to create a barrier against weeds.
- Position the Frame: Place the assembled frame on the prepared ground. Double-check that it’s level and adjust if necessary.
Step 4: Fill the Bed with Soil
With the frame in place, it’s time to fill your raised bed with soil. The quality of the soil is crucial to the success of your garden, so don’t skimp on this step.
- Create a Soil Mix: A good soil mix for raised beds includes garden soil, compost, and organic matter. A typical ratio is 60% topsoil, 30% compost, and 10% organic matter like peat moss or aged manure. This blend provides the nutrients and drainage your plants need.
- Fill the Bed: Start by adding the soil mix to the raised bed, filling it to about 1-2 inches below the top of the frame. This allows room for watering and adding mulch later on.
- Level the Soil: Use a rake to level the soil, ensuring an even surface for planting. Gently firm the soil, but avoid compacting it too much, as loose soil promotes healthy root growth.
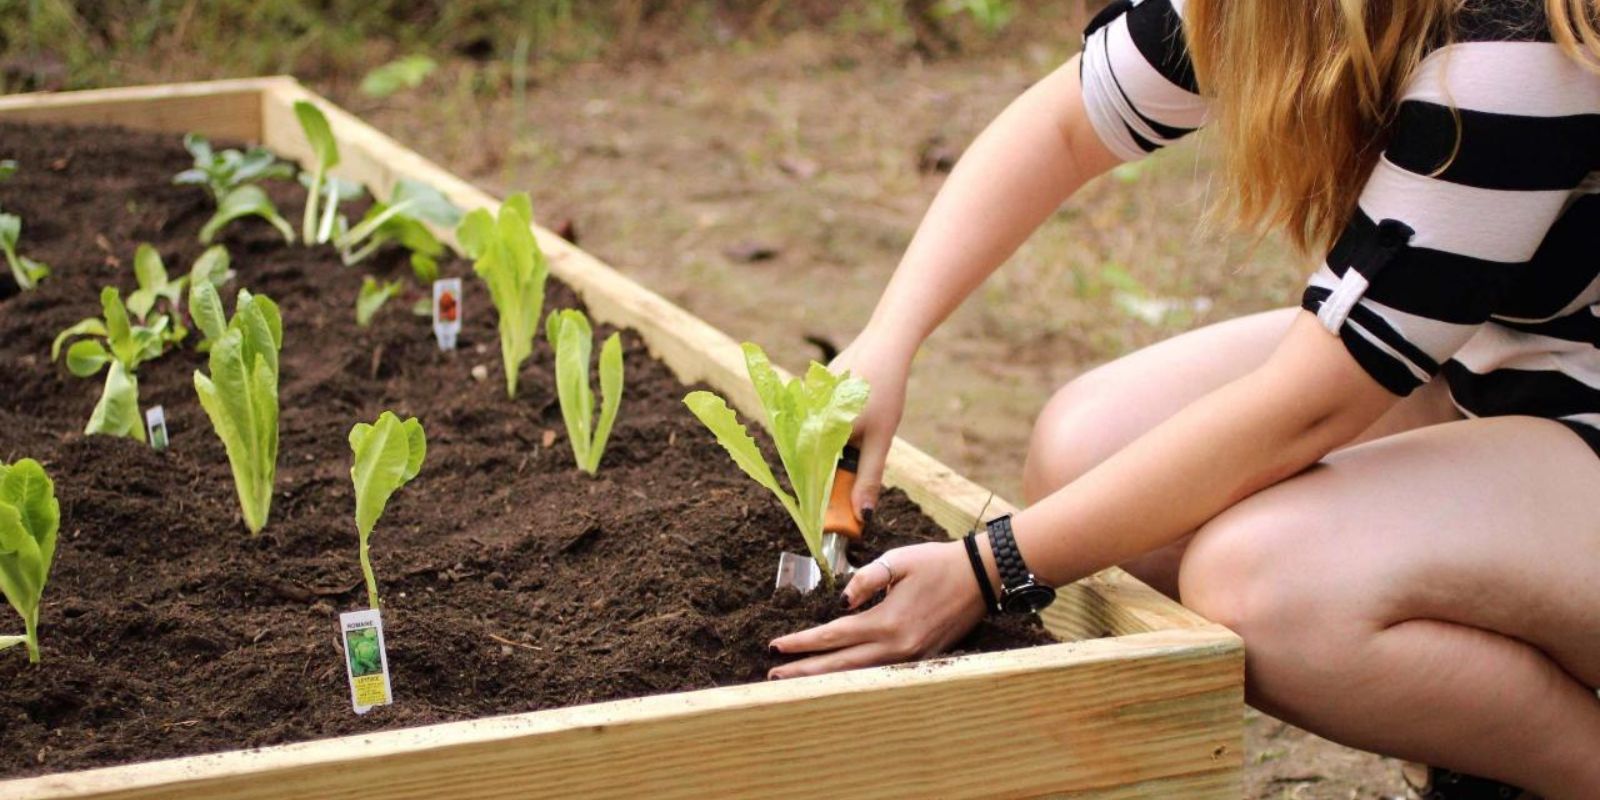
Step 5: Plant Your Garden
Now that your raised bed is built and filled with soil, it’s time for the fun part—planting! Consider the following tips for a successful planting:
- Plan Your Layout: Plan your garden layout based on the size and growth habits of your plants. Place taller plants like tomatoes and corn toward the back or center of the bed and shorter plants like lettuce and herbs toward the front or edges.
- Follow Spacing Guidelines: Pay attention to the recommended spacing for each plant to avoid overcrowding. Proper spacing allows for adequate airflow and reduces the risk of disease.
- Water Consistently: Raised beds tend to dry out faster than in-ground gardens, so consistent watering is essential. Water deeply and regularly, especially during hot weather.
- Mulch the Surface: Apply a layer of mulch on top of the soil to help retain moisture, suppress weeds, and regulate soil temperature. Organic mulches like straw, wood chips, or shredded leaves work well in raised beds.
Conclusion
DIY raised bed gardening is a rewarding and practical way to grow your own vegetables, herbs, and flowers. By following these steps, you can create a productive and attractive garden space that offers all the benefits of raised beds—better soil quality, improved drainage, and easier access. Whether you’re a beginner or an experienced gardener, a raised bed can elevate your gardening experience and help you achieve a bountiful harvest.
So why wait? Start planning your DIY raised bed today, and enjoy the satisfaction of growing your own fresh, healthy produce. What will you plant in your raised bed this season? Share your ideas and gardening tips with us! 🌱