
Introduction:
In the world of gardening, the container your plants grow in can be just as important as the plant itself. Cement flower pots are a growing trend among gardening enthusiasts for their durability, sleek aesthetic, and ability to enhance any space—whether indoors or out. These pots not only add a modern, minimalist vibe to your garden but also provide a fun and creative DIY project for gardening lovers. Best of all, making your own cement pots is easier than you think!
In this detailed guide, we’ll take you through each step of creating cement flower pots, from gathering materials to finishing touches. By the end, you’ll have a set of sturdy, beautiful, custom pots to showcase your favorite plants. Let’s dive into the process!
Materials You’ll Need:
Before you start, gather the following items:
- Cement mix
- Water
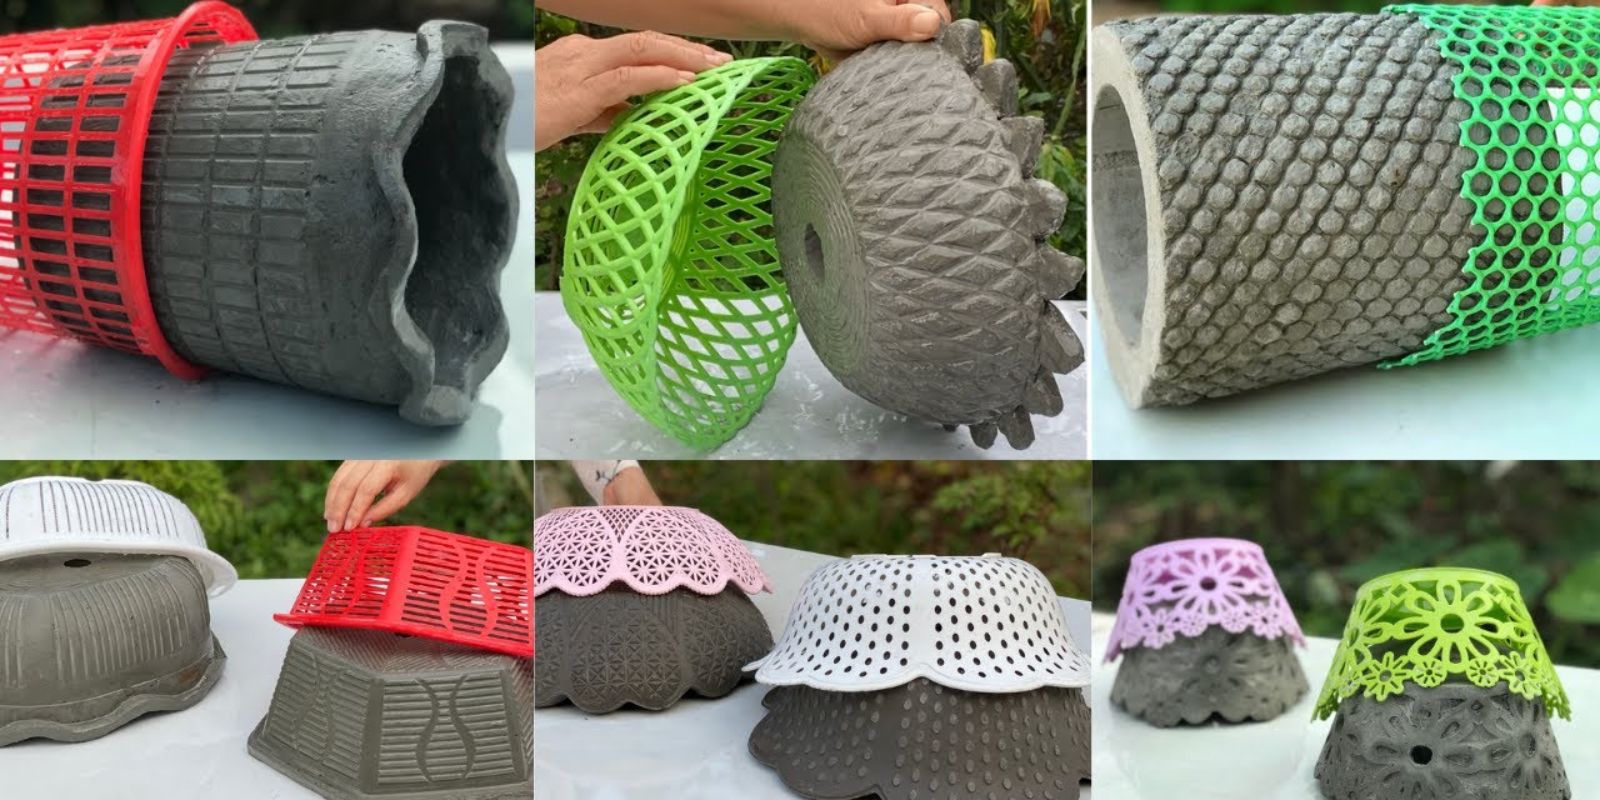
- Containers for molds (such as plastic bowls, yogurt containers, or cardboard boxes)
- Plastic wrap or oil (for mold release)
- Mixing bucket and stirring tool
- Gloves and protective eyewear
- Fine sandpaper (optional)
- Dowel rods or straws (for drainage holes)
These basic materials can be found at any hardware store or repurposed from household items, making this an affordable project. The flexibility of cement as a material allows you to choose molds in all sorts of sizes and shapes, letting your creativity take the lead.
Step 1: Preparing Your Workspace
Cement is messy, so it’s essential to set up a workspace that you can easily clean. Working outside or in a well-ventilated area is recommended. Lay down plastic sheets or newspaper to protect surfaces, and wear gloves and protective eyewear to shield yourself from dust and debris.
You’ll also want to prepare your molds by lining them with plastic wrap or applying oil to the interior surface. This step ensures that your cement pot will release from the mold easily once it has dried.
Step 2: Mixing the Cement
Now that your workspace is ready, it’s time to mix the cement. In a large bucket, combine the cement mix with water according to the instructions on the packaging. The consistency should be similar to pancake batter—not too thick but not too runny. Make sure to stir thoroughly, ensuring there are no lumps or dry pockets in the mixture.
The type of cement mix you choose will determine the final texture and color of your pot. Some mixes include sand, which will give the pot a rougher texture, while others create a smoother surface. You can experiment with different types to find the finish that suits your style.
Step 3: Pouring the Cement Into the Molds
Once your cement mix is ready, carefully pour it into the prepared molds. Fill each mold about halfway, then tap the sides gently to remove any trapped air bubbles. This will help ensure a smooth and even finish.
If you’re making larger pots or want thicker walls, you can insert a smaller container inside the mold to create a hollow center. Just make sure the inner container is well-coated with oil or lined with plastic to prevent it from sticking to the cement.
For smaller or shallow pots, you can skip this step and simply fill the mold to your desired depth.
Step 4: Creating Drainage Holes
Drainage is essential for any plant pot to prevent water from sitting at the bottom and rotting the roots. To create drainage holes, insert dowel rods or straws into the bottom of the mold. Position them where you want the drainage holes to be, ensuring they remain vertical and in place while the cement dries.
For larger pots, you can add multiple drainage holes. If you’re making pots for succulents or plants that require minimal watering, one hole may suffice.
Step 5: Letting the Cement Cure
Patience is key during the curing process. Cement takes time to dry and harden fully, so allow at least 24 to 48 hours for your pots to cure. The exact drying time will depend on the size of your pots and the weather conditions. Drying times may be shorter in warm weather and longer in cooler or humid environments.
Avoid moving or disturbing the molds while they are drying to prevent cracks or deformations in the pots.
Step 6: Removing the Pots from the Molds
After the cement has cured, carefully remove your pots from the molds. If you used plastic wrap or oil, this process should be straightforward. Gently pull the pot out of the mold, taking care not to damage the edges.
Once the pot is free, you can use fine sandpaper to smooth any rough spots or imperfections. You can also round off sharp edges for a softer look. This step is optional but adds a polished finish to your final product.
Step 7: Decorating Your Cement Pots (Optional)
If you want to take your DIY pots to the next level, consider adding some artistic flair. Cement is a versatile material that can be painted or decorated in various ways:
- Painting: Use acrylic paints to add color or designs. You can opt for bold, solid colors or create intricate patterns.
- Stenciling: Apply a stencil to create shapes, designs, or words on the surface of the pot.
- Texturizing: Add texture by pressing leaves, shells, or other objects into the wet cement before it dries. This gives your pot a unique, organic look.
- Sealing: If you plan to use the pots outdoors, apply a water-resistant sealant to protect them from the elements.
The possibilities are endless, and this is where you can truly let your creativity shine!
Step 8: Planting in Your New Cement Pots
Now that your pots are complete, it’s time to plant your favorite flowers, herbs, or succulents. Cement pots are excellent for a wide variety of plants due to their durability and ability to withstand outdoor conditions.
Choose plants that thrive in the size and style of the pot you’ve made. For smaller pots, succulents, cacti, or herbs are great options. For larger pots, you can plant flowers, small shrubs, or even indoor plants like ferns or pothos.
Make sure to place your new plants in an area where they will receive the appropriate amount of sunlight and water for their needs.
Advantages of Cement Flower Pots
Cement flower pots offer several benefits that make them an excellent choice for both novice and experienced gardeners:
- Durability: Cement is a tough material that can withstand weather conditions like rain, wind, and heat without deteriorating.
- Versatility: You can customize the size, shape, and style of the pots to suit any space, whether it’s a small windowsill or a large patio.
- Affordability: Making your own pots is cost-effective, especially if you repurpose materials for molds.
- Aesthetics: Cement pots provide a sleek, modern look that complements any plant or garden style.
Conclusion:
Creating your own cement flower pots is a fun and rewarding DIY project that allows you to express your creativity while enhancing your gardening experience. With just a few materials and some time, you can craft beautiful, durable pots that will last for years.
Whether you’re looking to add some charm to your indoor space or revamp your outdoor garden, cement flower pots offer a practical and stylish solution. Ready to try it out? Share your creations with the world using the hashtags below!
#CementFlowerPots #DIYGardenDecor #PlantLovers #GardeningInspiration #GardenCrafts #ModernGardening #DIYPlanters #GreenThumbGoals