
Gardening can be a rewarding yet labor-intensive hobby, especially when it comes to watering your plants. With the right tools, however, you can simplify your gardening routine. One innovative solution is an automatic vegetable waterer made from a simple plastic bottle. This system helps ensure your plants receive a steady supply of moisture without the hassle of daily watering. In this article, we will guide you through creating this eco-friendly watering system, exploring its benefits, and providing tips for optimal use.
Introduction: The Importance of Proper Watering in Gardening
Watering is one of the most critical aspects of successful gardening. Plants need water not only for survival but also for healthy growth and productivity. However, inconsistent watering can lead to various problems, such as root rot, wilting, or stunted growth. As busy gardeners, we often struggle to maintain a consistent watering schedule, especially during hot weather or while juggling multiple responsibilities.
This is where the automatic vegetable waterer comes in handy. Using a plastic bottle, you can create a simple and effective watering system that ensures your plants receive the moisture they need, even when you’re not around. Let’s dive into the step-by-step process of making your own automatic vegetable waterer.
Why Choose an Automatic Waterer?
Before we get into the how-to, let’s discuss some of the advantages of using an automatic vegetable waterer:
1. Time-Saving:
An automatic waterer reduces the time spent on daily watering, allowing you to focus on other gardening tasks or simply enjoy your outdoor space.
2. Consistent Moisture:
This system provides a steady supply of water to your plants, helping to prevent over- or under-watering. Plants benefit from consistent moisture levels, promoting healthy growth.
3. Eco-Friendly:
Using a recycled plastic bottle reduces waste and helps you make the most of materials you already have at home.
4. Cost-Effective:
Creating your own watering system is budget-friendly. Instead of purchasing expensive irrigation systems, a simple bottle can do the trick.
5. Customizable:
You can adjust the number of bottles or the size of the holes based on your specific gardening needs, making this system adaptable to various plant types and conditions.
Materials Needed
To create your automatic vegetable waterer, gather the following materials:
- Empty Plastic Bottle: A 1- or 2-liter bottle works best. Ensure it is clean and free from any food residue.
- Nail or Drill: For making holes in the bottle cap.
- Scissors: To cut the bottle if needed.
- Garden Trowel: For digging holes in the soil.
- Water: To fill the bottle.
Step-by-Step Instructions
Step 1: Prepare the Plastic Bottle
Begin by rinsing your plastic bottle thoroughly to remove any leftover residue. This step is crucial, as you want to prevent any harmful chemicals from leaching into the soil.
Step 2: Create Holes in the Cap
Using a small nail or a drill, carefully make several small holes in the bottle cap. The number and size of the holes will determine how quickly the water will drip out. Typically, 3-5 holes, each about 1/8 inch in diameter, work well.
Step 3: Fill the Bottle with Water
Once the cap is ready, fill the bottle with clean water. Make sure not to overfill it, as this could cause spillage when you screw the cap back on.
Step 4: Secure the Cap
Screw the cap back onto the bottle tightly. Ensure that it is secure to prevent leaks.
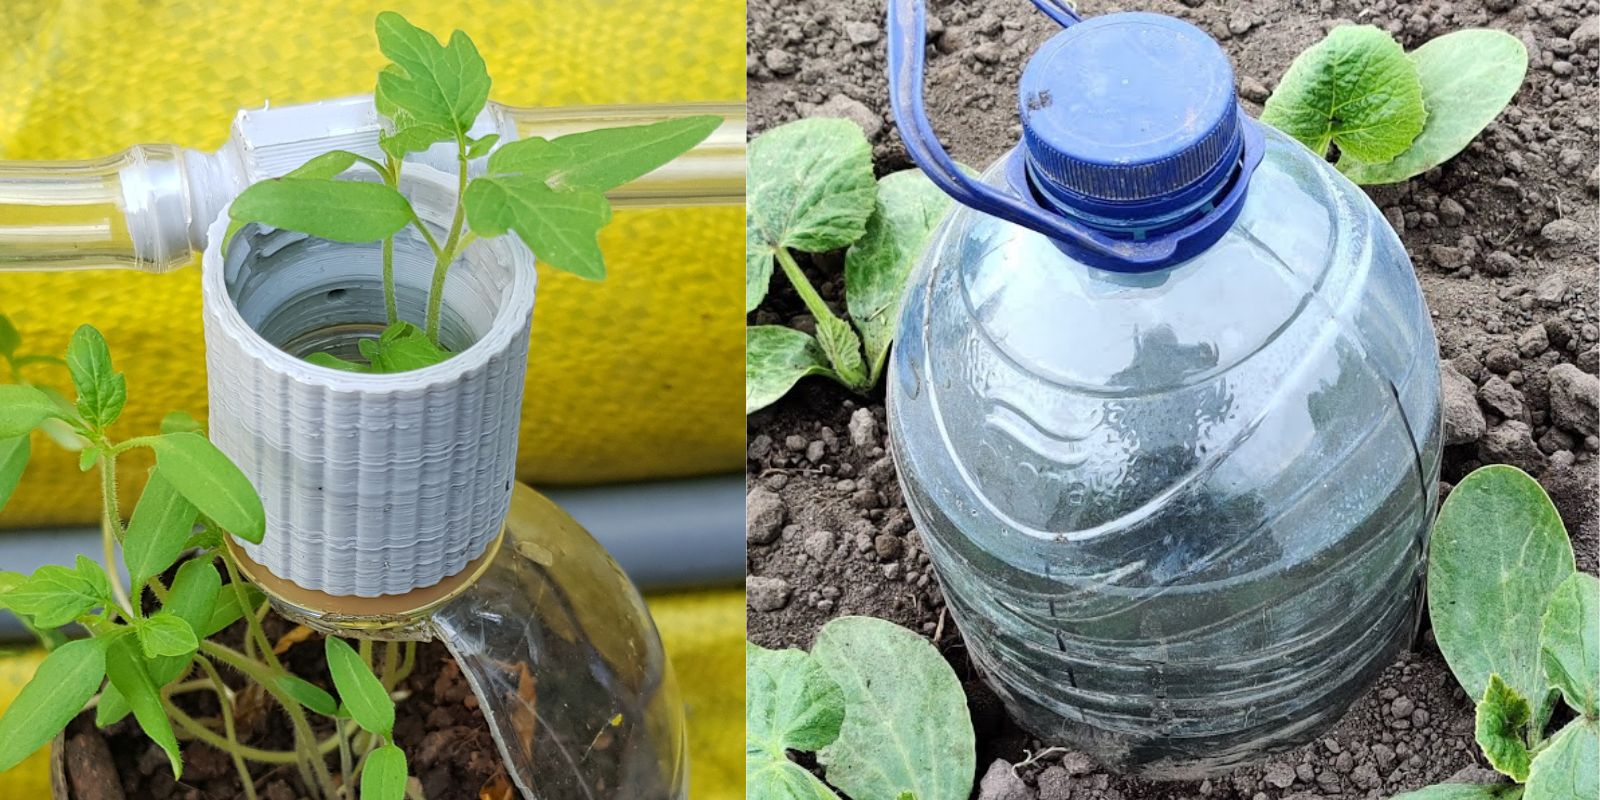
Step 5: Bury the Bottle
Using a garden trowel, dig a small hole next to the base of your vegetable plants. Bury the bottle upside down, leaving the cap exposed above the soil surface. Make sure the holes in the cap are facing downward so that the water can flow freely into the soil.
Step 6: Monitor and Adjust
After setting up your automatic waterer, monitor it for a few days to observe how quickly the water drains. Depending on the soil type and moisture levels, you may need to adjust the number of holes or add additional bottles for larger plants or during hotter weather.
Tips for Optimal Use
1. Positioning:
Place the waterer close to the roots of your plants, as this is where moisture is needed most. Avoid placing it too far from the base.
2. Multiple Bottles:
For larger garden beds or areas with many plants, consider using multiple bottles to ensure even watering. You can space them out evenly throughout your garden.
3. Adjusting Water Flow:
If the water drains too quickly, try reducing the number or size of the holes in the cap. Conversely, if it drains too slowly, you can widen the holes to allow more water to flow.
4. Regular Maintenance:
Check the bottles periodically to ensure they are still providing water and not clogged with soil or debris. Clean them as necessary to maintain their effectiveness.
5. Seasonal Considerations:
During hotter months, you may need to refill the bottles more frequently, while in cooler months, the water may last longer. Adjust your watering schedule accordingly.
Common Mistakes to Avoid
While setting up your automatic vegetable waterer is simple, there are a few common mistakes you should avoid:
1. Using Non-Recyclable Bottles:
Always use recyclable plastic bottles. Avoid using bottles with labels or coatings that may leach chemicals into the soil.
2. Overfilling the Bottle:
Make sure not to overfill the bottle before capping it, as this can lead to messy spills when you turn it upside down.
3. Neglecting Soil Conditions:
Remember that soil type and moisture retention will affect how well this system works. Sandy soils drain quickly, while clay soils retain moisture. Adjust your setup accordingly.
4. Ignoring Plant Needs:
Different plants have varying water requirements. Be mindful of your specific plants’ needs and adjust the number of bottles or the watering frequency as necessary.
Conclusion: Transform Your Gardening Experience
Creating an automatic vegetable waterer using a plastic bottle is a simple, cost-effective way to improve your gardening experience. By ensuring your plants receive a steady supply of moisture, you can save time, promote healthy growth, and reduce the stress of daily watering.
As you embark on your gardening journey, remember the importance of adapting your watering methods to suit your plants’ specific needs. With a little creativity and resourcefulness, you can create an efficient watering system that benefits both your garden and the environment.
Ready to Get Started?
Try making your own automatic vegetable waterer today! Share your experiences and modifications with fellow gardeners, and let’s continue to inspire one another to create thriving, sustainable gardens. Happy gardening! 💚