
In today’s world, where sustainability is becoming more important than ever, incorporating eco-friendly practices into our daily lives is essential. One creative way to do this is by repurposing common household items, such as plastic bottles, into functional garden decor. Not only does this reduce waste, but it also adds a touch of charm and innovation to your outdoor space. A perfect example is crafting a DIY garden windmill using a plastic bottle. This project not only upcycles plastic waste but also offers a delightful decorative piece that’s both practical and beautiful. In this article, we’ll explore the step-by-step process of creating your very own garden windmill from a plastic bottle, highlighting the benefits of sustainable gardening and the joy of DIY projects.
Why Choose a DIY Garden Windmill?
Windmills have long been a symbol of functionality in the garden. They harness wind energy to power small mechanisms, scare off birds, and add visual interest. A windmill made from a plastic bottle is a simple, affordable, and eco-conscious alternative to traditional store-bought options. It’s a fun way to engage with recycling while giving your garden a personal, handcrafted touch.
Materials You’ll Need:
Creating your garden windmill requires minimal materials, most of which you can easily find around the house. Here’s what you’ll need:
- Plastic bottle (1-liter or 2-liter): Any plastic bottle will work, but the larger the bottle, the larger the windmill.
- Scissors or a utility knife: To cut the bottle and create the blades.
- A wooden stick or dowel: This will serve as the windmill’s axis.
- String or wire: For securing the bottle to the stick.
- Paint or markers (optional): If you want to add color and design to your windmill.
- Glue (optional): To ensure the blades stay in place or to attach decorative elements.
Step-by-Step Guide to Crafting Your DIY Windmill
Step 1: Clean and Prepare the Bottle
Before starting your project, make sure your plastic bottle is thoroughly clean. Remove any labels or adhesive residue from the exterior. This ensures that the bottle is ready for cutting and that the finished windmill will look neat and polished. If you plan to paint or decorate the bottle later, now is the perfect time to give it a coat of primer or base paint to set the foundation.
Step 2: Cut the Blades
Next, take your scissors or utility knife and carefully slice the bottle’s body vertically. You want to create long, even strips that will serve as the windmill’s blades. Depending on the size of the bottle, you can make anywhere from 6 to 8 strips. Each strip should run from the bottom of the bottle up to just below the neck. Be sure not to cut through the top of the bottle, as you’ll need this intact to secure the windmill to the axis later.
Step 3: Shape the Blades
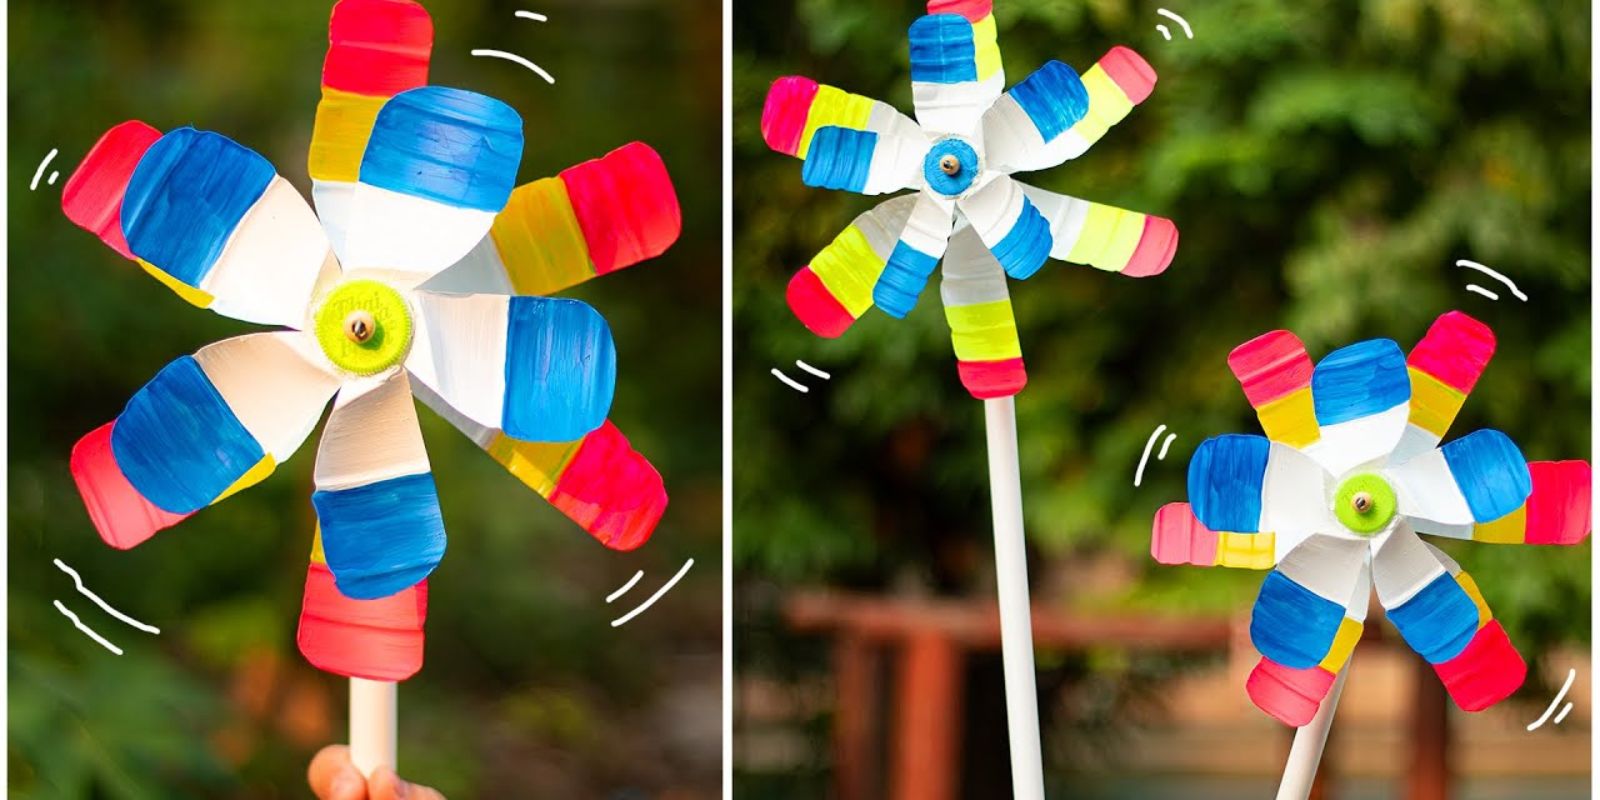
Once you have your strips cut, it’s time to shape the blades. Gently twist each strip so that it resembles the blades of a fan. The key here is to create enough curve for the wind to catch each blade, allowing the windmill to spin effectively. You can experiment with the angles of the blades to find what works best in your garden’s wind conditions.
Step 4: Attach the Windmill to the Stick
Now that your blades are shaped, it’s time to attach the bottle to the wooden stick or dowel. Insert the stick into the neck of the bottle and secure it with string, wire, or glue, depending on what’s available. Make sure the bottle can spin freely around the stick without being too tight or too loose. The stick will act as the windmill’s axis, allowing it to rotate when the wind blows.
Step 5: Test the Windmill
Before placing your windmill in the garden, it’s essential to test it. Take it outside on a windy day and see how well the blades catch the wind. If the windmill spins smoothly, it’s ready to be planted in your garden. If not, adjust the angle of the blades or ensure the stick is properly secured to the bottle. You want to create the perfect balance for optimal rotation.
Step 6: Place the Windmill in Your Garden
Once everything is working correctly, find the perfect spot in your garden to plant your new windmill. Choose an area where it will catch the most wind, such as an open space with few obstacles like trees or tall plants. You can stick the windmill directly into the ground or place it in a pot, depending on your garden setup.
Step 7: Add Personal Touches (Optional)
If you enjoy adding a personal touch to your projects, this is where you can get creative. Consider decorating the bottle with paint, markers, or stickers. You could also add beads or small charms to the bottle to enhance the windmill’s decorative appeal. This step is entirely optional but can be a fun way to express your creativity and make your windmill stand out.
Benefits of Creating a Plastic Bottle Windmill
There are several benefits to crafting a DIY garden windmill from a plastic bottle. These include:
- Eco-friendly gardening: By recycling plastic bottles, you’re reducing waste and keeping materials out of landfills.
- Bird deterrent: Windmills can help scare away birds and pests that may otherwise damage your plants.
- Cost-effective: This project requires very little investment, using materials you likely already have at home.
- Customizable decor: You can personalize your windmill with designs, colors, and decorations that match your garden’s aesthetic.
- Educational and fun: If you have children, this is an excellent opportunity to involve them in a fun, educational project that teaches sustainability and creativity.
Why Plastic Bottle Windmills Are the Future of Garden Decor
With growing awareness about environmental conservation and the importance of reducing plastic waste, DIY garden projects like the plastic bottle windmill are becoming increasingly popular. Not only does this project address a significant environmental issue, but it also offers a creative solution to enhance your outdoor space. By using everyday items that would otherwise be discarded, you’re contributing to a more sustainable future while adding beauty and functionality to your garden.
Final Thoughts: A Simple Yet Impactful Garden Addition
Creating a garden windmill from a plastic bottle is a simple, rewarding project that aligns with sustainable gardening practices. Whether you’re a seasoned gardener looking to add some eco-friendly decor or a DIY enthusiast wanting to try something new, this project is perfect for all skill levels. Plus, it’s a fantastic way to teach others—especially kids—about recycling and the value of turning trash into treasure.
Get started today and share your windmill creations with the gardening community!