
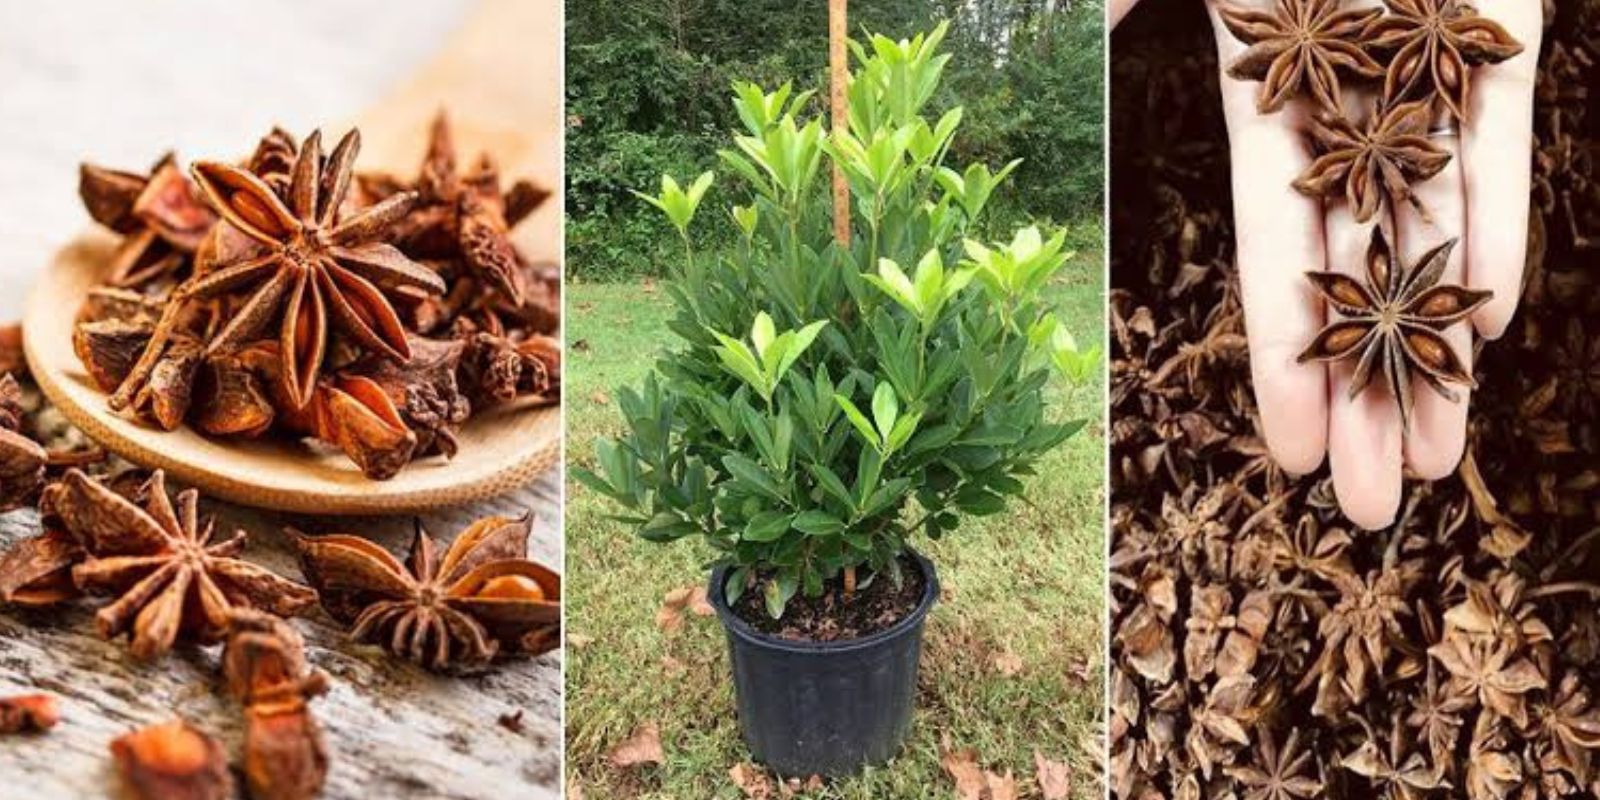
Star anise (Illicium verum), with its unique star-shaped pods and licorice-like flavor, is a prized spice in global cuisines and traditional medicine. Growing star anise in pots is a fantastic way to cultivate this exotic plant at home, especially if you live in a temperate or cooler climate. In this guide, we’ll explore everything you need to know to grow star anise successfully in containers, from preparing seeds to harvesting aromatic pods.
Why Grow Star Anise?
Star anise is more than just a culinary delight. It’s packed with health benefits, being a rich source of antioxidants and essential oils. By growing it at home, you not only save money but also ensure access to fresh, organic star anise pods free from additives. Potted star anise plants are also a beautiful addition to patios, balconies, or indoor spaces, thanks to their lush green foliage and fragrant flowers.
1. Choosing Quality Star Anise Seeds
Your journey begins with selecting the right seeds. Fresh, high-quality seeds are critical for successful germination. Here’s how to choose and prepare them:
- Source: Purchase seeds from a reputable supplier or harvest them from fresh, organic star anise pods. Avoid seeds from dried pods, as these are often roasted and lose viability.
- Check for Viability: Select plump, dark seeds with a glossy appearance. Avoid seeds that look shriveled or pale.
2. Preparing the Seeds for Germination
To improve the germination rate, follow these preparation steps:
- Soak the Seeds: Place the seeds in warm water for 24 hours. This softens the seed coat, stimulating sprouting.
- Optional Scarification: For tougher seeds, lightly nick the seed coat with a knife or sandpaper to help water penetrate.
3. Selecting the Right Pot and Soil
Star anise thrives in well-draining, loamy soil and requires adequate space for its root system to grow.
- Pot Selection: Choose a pot that is at least 12 inches (30 cm) deep and wide, with drainage holes. A larger pot is recommended if you plan to keep the plant for several years.
- Soil Mixture: Prepare a soil mix consisting of equal parts compost, peat moss, and perlite or sand. The soil should be slightly acidic to neutral, with a pH between 6.0 and 7.5.
4. Sowing the Seeds
Once your seeds and pot are ready, it’s time to plant:
- Planting Depth: Sow the seeds about ½ inch (1.3 cm) deep in the soil, ensuring they are covered lightly with soil.
- Spacing: If planting multiple seeds in one pot, space them at least 2 inches (5 cm) apart to avoid overcrowding.
- Watering: Gently water the soil to keep it moist but not waterlogged.
5. Providing Optimal Growing Conditions
Star anise plants thrive in tropical and subtropical climates. If you’re growing them in cooler regions, adjust their environment accordingly.
- Light Requirements: Place the pot in a location with partial shade or filtered sunlight. Avoid direct, harsh sunlight, which can scorch the leaves.
- Temperature: Maintain a temperature between 68-86°F (20-30°C). Star anise is sensitive to frost, so bring the plant indoors during colder months.
- Humidity: Keep the surrounding environment humid by misting the plant or using a humidity tray.
6. Watering and Fertilizing
Proper hydration and nutrition are crucial for healthy growth:
- Watering: Keep the soil consistently moist, especially during the growing season. Allow the top inch of soil to dry out slightly between waterings to avoid root rot.
- Fertilizing: Apply a balanced, water-soluble fertilizer every 4-6 weeks. Alternatively, enrich the soil with organic compost or well-rotted manure.
7. Caring for the Growing Plant
Once the plant begins to grow, it requires regular maintenance:
- Weeding: Remove any weeds that compete with the plant for nutrients.
- Mulching: Add a layer of mulch around the base of the plant to retain soil moisture and regulate temperature.
- Pruning: Trim off dead or damaged leaves to encourage healthy growth and improve air circulation.
8. Pollination and Flowering
Star anise plants produce small, fragrant flowers that eventually turn into the star-shaped pods. If growing outdoors, pollination usually occurs naturally with the help of insects. For indoor plants, you can use a soft brush to transfer pollen between flowers manually.
9. Harvesting Star Anise
Patience is key, as star anise plants take time to mature:
- Timeframe: Star anise is typically ready to harvest after 6 years. The plant will produce star-shaped pods once it reaches maturity.
- Signs of Ripeness: Harvest the pods when they turn from green to brown and become woody. Fully ripened pods have a rich aroma.
- Harvesting Method: Use garden shears to snip the pods off the plant carefully. Avoid pulling them by hand, as this can damage the plant.
10. Post-Harvest Care
Proper handling after harvest ensures the longevity of your star anise pods:
- Drying: Sun-dry the harvested pods until they turn dark brown and feel crisp. This enhances their flavor and shelf life.
- Storage: Store the dried pods in an airtight container in a cool, dry place. When stored properly, they retain their flavor and aroma for up to two years.
Bonus Tips for Growing Star Anise in Pots
- Pest Control: Watch out for common pests like aphids and spider mites. Use neem oil or insecticidal soap to address infestations.
- Repotting: As the plant grows, it may outgrow its pot. Repot every 2-3 years into a larger container with fresh soil.
- Propagation: Once established, you can propagate star anise through cuttings or layering to grow additional plants.
The Benefits of Growing Star Anise at Home
Growing star anise in pots offers numerous advantages:
- Convenience: Potted plants are easy to move, allowing you to control their exposure to sunlight and temperature.
- Freshness: Enjoy freshly harvested, organic star anise pods with superior flavor and aroma.
- Aesthetic Appeal: The lush foliage and fragrant flowers make star anise a beautiful addition to your home garden.
Conclusion
Cultivating star anise in pots is a long-term but rewarding project that pays off with fragrant pods and a stunning tropical plant. By following this step-by-step guide, you’ll be well on your way to growing your own star anise, adding a touch of exotic flavor and beauty to your home.
Share your gardening journey in the comments! Have you tried growing star anise, or do you have tips to add? Let’s grow together!