
Cardamom is not only one of the most expensive spices but also one of the most cherished in culinary and medicinal use worldwide. Known as the “Queen of Spices,” cardamom adds a unique, aromatic flavor to dishes and offers numerous health benefits. While it’s native to the tropical rainforests of India and Sri Lanka, cardamom can be successfully grown at home with a bit of patience and attention to its specific needs. This guide explores everything you need to know to grow, care for, and eventually harvest your own cardamom plant.
Understanding Cardamom: Botanical Basics
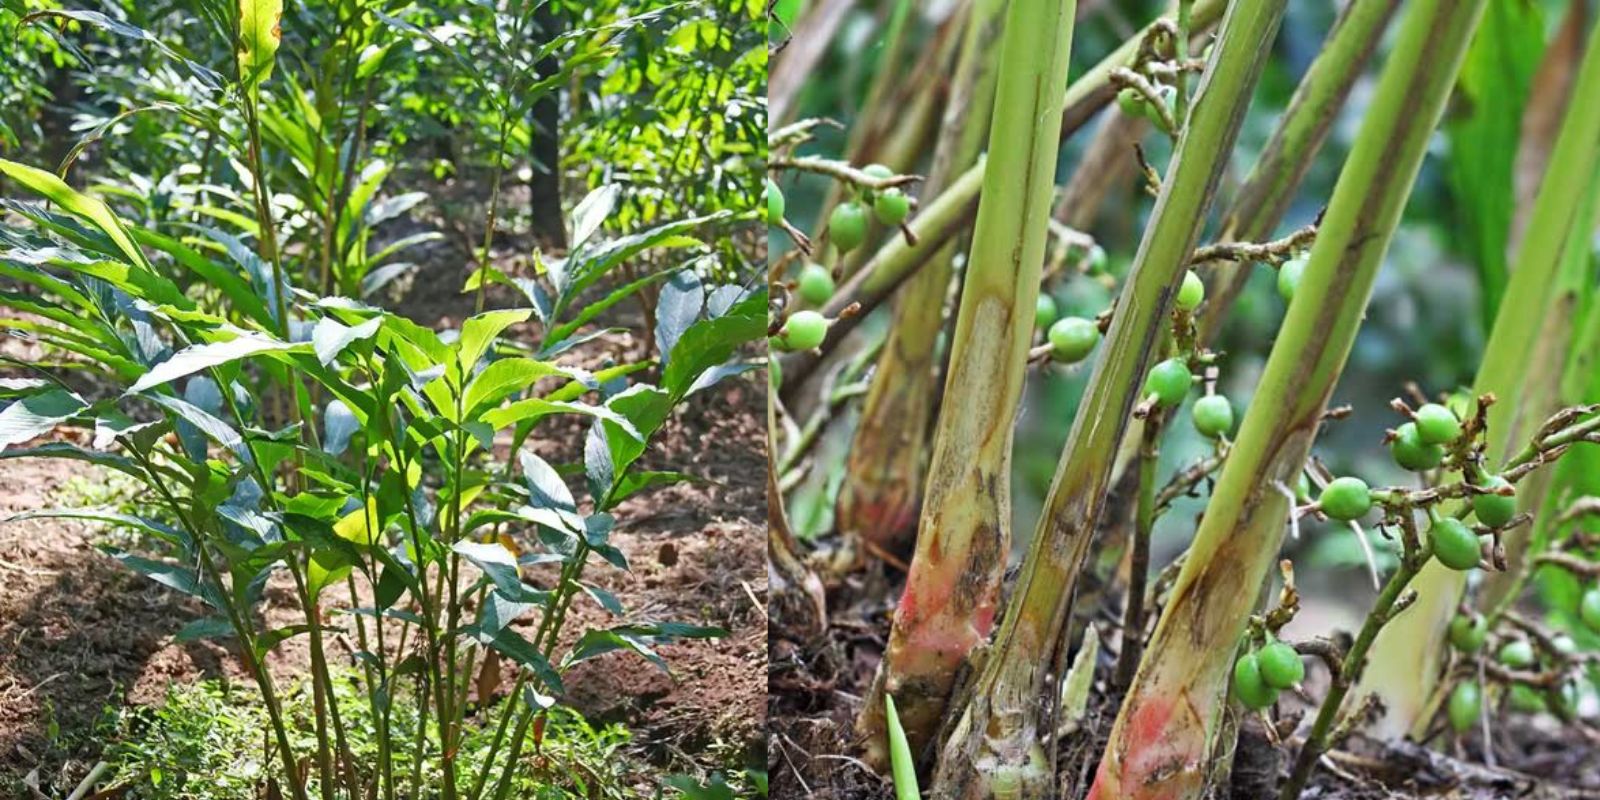
Cardamom (scientific name Elettaria cardamomum) is a member of the ginger family, Zingiberaceae. It grows as a tall, leafy plant with shoots reaching heights of 5 to 10 feet in ideal outdoor conditions, though indoor plants are typically smaller. The plant’s prized feature is its seed pods, which contain tiny black seeds that are highly aromatic and flavorful. The plant takes two to three years to mature and begin producing pods, but the lush foliage makes it an appealing houseplant in the meantime.
1. Choose the Right Cardamom Seeds or Rhizomes
Starting with fresh, viable seeds or rhizomes is key to successfully growing cardamom. If you’re planting seeds, ensure they’re fresh, as old seeds have a low germination rate. You can purchase seeds from a reputable nursery or gardening store, as culinary cardamom may be dried or treated, reducing its viability. Rhizomes (similar to ginger root) can also be used, and these tend to establish faster than seeds.
2. Provide Ideal Growing Conditions
Cardamom thrives in humid, tropical conditions, making it essential to mimic this environment for successful growth.
- Temperature: Keep cardamom plants in a warm environment between 65°F to 95°F (18°C to 35°C). They can’t tolerate frost, so if you’re in a cooler climate, it’s best to grow cardamom indoors or in a greenhouse.
- Humidity: Cardamom requires high humidity, which can be challenging in some indoor settings. Use a humidifier, pebble tray, or misting to maintain moisture levels around the plant.
- Light: This plant does best in partial shade, avoiding direct sunlight, which can scorch its leaves. A spot with indirect sunlight is ideal, or a lightly shaded area if planted outdoors.
3. Prepare the Right Soil
Cardamom needs rich, well-draining soil that retains moisture without becoming soggy. A potting mix made for tropical plants, enriched with compost or organic matter works well. Ensure the soil has good aeration to support healthy root development and prevent fungal issues.
- Soil pH: A neutral to slightly acidic soil pH of 6.0-6.8 is optimal.
- Drainage: Use pots with drainage holes and add a layer of small stones or perlite to promote good drainage.
4. Start the Germination Process
If using seeds, soak them overnight in warm water to improve germination rates.
- Sow seeds in small pots filled with moist potting soil, covering them lightly with a thin layer of soil.
- Water the pots gently, ensuring the soil stays moist but not overly saturated.
- Temperature: Maintain a consistent temperature of 75°F to 85°F (24°C to 29°C) for best results.
- Germination may take 20-40 days, so be patient, keeping the soil consistently moist.
5. Transplanting Seedlings
Once the seedlings reach 2-4 inches in height, they are ready for transplanting.
- Select a larger pot to allow for root expansion or a suitable garden location if outdoors in a tropical climate.
- Carefully transplant the seedlings, ensuring the roots are undisturbed. Cardamom plants have delicate root systems, so handle them gently.
6. Watering Essentials
Watering cardamom plants requires a careful balance. These plants need consistently moist soil but cannot tolerate waterlogged roots.
- Water deeply and regularly, especially during warmer months, but allow the top inch of soil to dry between waterings.
- Humidity: Increase humidity by misting the leaves regularly or placing a water tray nearby.
7. Feeding and Fertilizing
Cardamom plants benefit from regular feeding, particularly as they mature. Use a balanced, slow-release fertilizer every 6-8 weeks during the growing season (spring and summer).
- Organic options like compost tea or diluted fish emulsion work well.
- Avoid over-fertilizing, which can damage the plant’s roots and stunt growth.
8. Provide Regular Maintenance and Pruning
Although cardamom doesn’t require extensive pruning, some basic maintenance keeps it healthy.
- Remove dead leaves and spent flower stalks to keep the plant tidy and reduce the risk of pests.
- Prune lightly if the plant becomes too dense, allowing light to reach all parts.
9. Controlling Pests and Diseases
Like other indoor plants, cardamom may attract pests like aphids, spider mites, and scale insects.
- Inspect regularly for signs of pests, particularly on the underside of leaves.
- Treat infestations with natural insecticidal soap or neem oil.
- Avoid overwatering to prevent fungal diseases, which can affect cardamom in humid environments.
10. Harvesting Cardamom Pods
Cardamom plants generally take 2-3 years to produce flowers and seed pods, but the wait is worth it for fresh, aromatic pods.
- Wait for the flowers to form, typically during the plant’s second or third growing season.
- Harvest the pods once they’re green but fully formed, as mature pods have the strongest flavor.
- Dry the pods or use them fresh in cooking, beverages, and spice blends.
Benefits of Growing Cardamom
Growing your own cardamom offers numerous benefits beyond the convenience of fresh pods:
- Culinary use: Fresh cardamom elevates sweet and savory dishes with its unique flavor.
- Medicinal properties: Cardamom is known for aiding digestion, reducing inflammation, and providing antioxidant benefits.
- Ornamental appeal: The cardamom plant is a beautiful addition to indoor and outdoor gardens with its lush, tropical foliage.
Troubleshooting Common Issues
- Yellowing leaves: This can be a sign of overwatering or inadequate humidity.
- Slow growth: Cardamom is a slow-growing plant, but a lack of new growth may indicate nutrient deficiencies or insufficient light.
- Dry, crispy leaves: Low humidity or direct sunlight may cause leaf burn. Increase humidity or relocate the plant to a shadier spot.
Final Thoughts on Growing Cardamom
Growing cardamom at home can be a rewarding experience, adding a tropical touch to your garden and fresh flavors to your kitchen. With patience and the right care, you’ll soon have a thriving cardamom plant that produces fragrant leaves and, eventually, precious pods.
🌱 Ready to try growing cardamom? Share your progress and questions below! 🌱 #CardamomGrowing #TropicalSpices #IndoorGardenTips #QueenOfSpices #HomeHerbs