
Peach Hawaiian Plumeria is one of the most beloved tropical plants, admired for its stunning peach-colored blooms and intoxicating fragrance. Originating from the Pacific Islands, this plant has become a favorite among gardeners looking to add a touch of paradise to their homes and gardens. While it may seem like a challenge to grow, propagating Peach Hawaiian Plumeria from cuttings is a relatively straightforward process that even novice gardeners can accomplish. In this article, we’ll explore the step-by-step method to propagate this beautiful plant, as well as tips for ensuring your cutting thrives.
Understanding the Beauty of Peach Hawaiian Plumeria
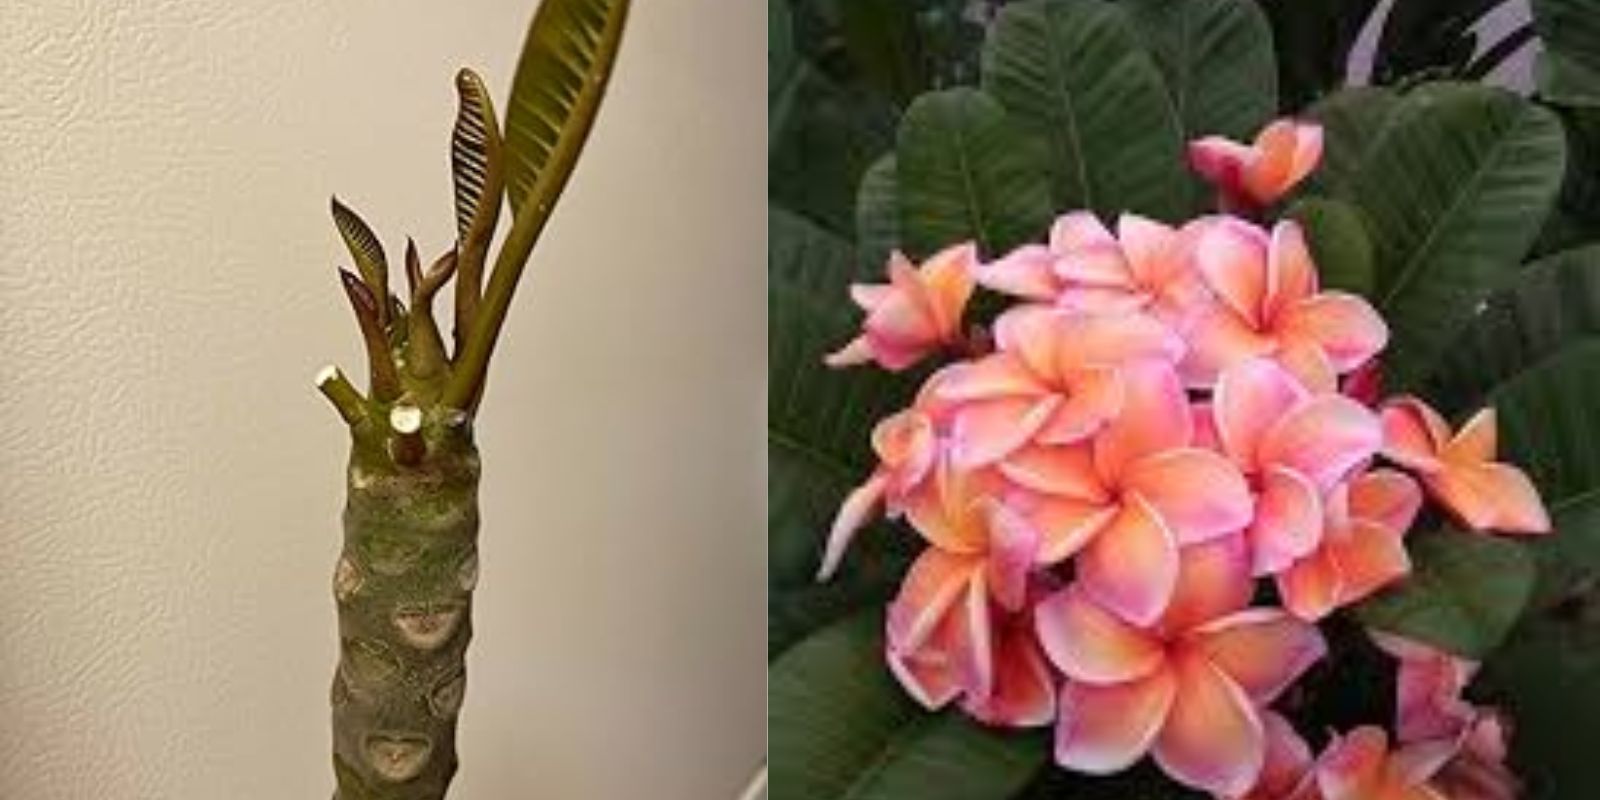
Before diving into the propagation process, it’s important to understand why Peach Hawaiian Plumeria is so special. Plumeria plants, also known as Frangipani, are tropical trees known for their large, fragrant flowers. The Peach Hawaiian variety is particularly prized for its warm, peach-colored petals that fade into a creamy white center. These flowers are often used in traditional Hawaiian leis, symbolizing love and friendship.
The plant itself is relatively low maintenance, especially when grown in warm climates. It can be grown both in the ground and in containers, making it a versatile addition to any garden or indoor space. With the right care, Peach Hawaiian Plumeria can bloom profusely, offering a stunning display of color and fragrance.
Why Propagate from Cuttings?
Propagating Plumeria from cuttings is one of the most popular methods for several reasons:
- Consistency: Cuttings produce plants that are genetically identical to the parent plant, ensuring that you get the same beautiful flowers.
- Speed: Compared to growing from seeds, cuttings grow faster and are more likely to bloom sooner.
- Simplicity: The process is relatively simple and requires minimal equipment, making it accessible to gardeners of all levels.
Step-by-Step Guide to Propagating Peach Hawaiian Plumeria
1. Selecting a Healthy Cutting
The first step in propagating your Plumeria is to select a healthy cutting from a mature plant. The best time to take a cutting is during the plant’s dormant season, which typically falls in late winter or early spring.
- How to Choose: Look for a branch that is about 12-18 inches long and free from any signs of disease or damage. The branch should be mature but not too old; it should be firm and slightly flexible.
2. Preparing the Cutting
Once you’ve selected a branch, it’s time to prepare it for planting.
- Remove Leaves: Carefully remove all the leaves from the lower half of the cutting. This helps the cutting focus its energy on root development rather than sustaining foliage.
- Let It Dry: Allow the cutting to dry in a shaded area for a few days. This drying process, also known as “curing,” helps to prevent the cut end from rotting when planted.
3. Applying Rooting Hormone
To encourage root growth, it’s recommended to use a rooting hormone, although some gardeners skip this step with success.
- How to Apply: Dip the cut end of the Plumeria cutting into rooting hormone powder. This step is optional, but it can significantly increase your chances of successful rooting.
4. Planting the Cutting
Now that your cutting is prepared, it’s time to plant it.
- Choose the Right Soil: Plumeria cuttings require well-draining soil to prevent root rot. A cactus or succulent potting mix works well. Alternatively, you can create your own mix by combining equal parts of perlite, sand, and peat moss.
- Planting: Fill a pot with the prepared soil mix and make a hole in the center. Insert the cut end of the Plumeria cutting about 2-3 inches deep into the soil. Gently firm the soil around the base to ensure stability.
5. Watering the Cutting
Watering is crucial for the success of your cutting, but it’s important not to overdo it.
- Initial Watering: After planting, water the soil lightly to settle it around the cutting. Ensure the soil is moist but not waterlogged.
- Ongoing Care: Keep the soil slightly moist, watering only when the top inch feels dry. Too much water can lead to rot, so it’s better to err on the side of caution.
6. Providing the Right Environment
Peach Hawaiian Plumeria thrives in warm, sunny conditions.
- Sunlight: Place the pot in a location where it will receive plenty of sunlight, ideally at least 6-8 hours of indirect sunlight each day. A south-facing window or a spot in a bright, sunny room works well if you’re growing the plant indoors.
- Temperature: Plumeria cuttings prefer temperatures between 65°F and 85°F (18°C – 29°C). If you live in a cooler climate, consider using a heat mat to maintain consistent warmth, especially at night.
7. Patience: Waiting for Roots to Develop
Root development can take several weeks, so patience is key.
- Signs of Growth: You’ll know the cutting has started to root when you see new leaf growth. This typically occurs within 4-8 weeks, depending on the conditions.
8. Transplanting and Long-Term Care
Once the cutting has established roots and new growth is visible, it can be transplanted into a larger pot or, if your climate allows, directly into the garden.
- Transplanting: If you’re transplanting into a larger pot, ensure it has good drainage. For garden planting, choose a sunny spot with well-draining soil.
- Watering and Feeding: As your Plumeria grows, continue to water it regularly, allowing the soil to dry out slightly between waterings. During the growing season (spring and summer), feed the plant with a balanced fertilizer every 2-4 weeks to promote healthy blooms.
Troubleshooting Common Issues
Even with the best care, you may encounter some challenges when propagating Plumeria. Here are a few common issues and how to address them:
- Rotting: If your cutting starts to rot, it’s usually due to overwatering or poor drainage. Ensure that the soil is well-draining and that you’re not watering too frequently.
- Lack of Root Growth: If roots aren’t forming, the cutting may not be receiving enough warmth or light. Try moving it to a warmer, sunnier spot.
- Pests: Keep an eye out for common pests like aphids or spider mites. If you notice any, treat the plant with an insecticidal soap or neem oil.
Conclusion: Enjoying the Fruits (and Flowers) of Your Labor
Propagating Peach Hawaiian Plumeria from cuttings is a rewarding process that allows you to grow a beautiful, fragrant plant with relatively little effort. By following the steps outlined in this guide, you can successfully grow your own Plumeria and enjoy its stunning blooms year after year.
Call to Action:
Have you tried propagating Plumeria from cuttings? Share your tips, tricks, and experiences with us in the comments below! 🌺