
Introduction
Vertical gardening has become an increasingly popular trend among gardeners, especially those with limited space. By growing plants upwards instead of outwards, you can maximize your garden’s potential, enhance its visual appeal, and create a lush, green environment in even the smallest of spaces. One of the key components of a successful vertical garden is the trellis—a structure that supports climbing plants, allowing them to grow vertically. In this article, we will explore various DIY trellis ideas that are not only functional but also add an aesthetic touch to your garden. Whether you’re a seasoned gardener or a beginner, these creative trellis ideas will inspire you to take your garden to new heights.
1. Bamboo Trellis: Rustic Charm Meets Functionality
Bamboo is a popular material for garden trellises due to its natural look, strength, and sustainability. Creating a bamboo trellis is simple and cost-effective, making it a great option for gardeners of all skill levels.
How to Create a Bamboo Trellis:
- Gather Materials: You will need several bamboo stakes, garden twine or wire, and a pair of garden shears.
- Build the Frame: Insert bamboo stakes into the ground at intervals, forming the basic shape of your trellis. The shape can be triangular, square, or rectangular, depending on your preference.
- Connect the Stakes: Use garden twine or wire to tie the stakes together at the top and middle. This will create a sturdy structure for your climbing plants.
- Add Crossbars: For additional support, tie horizontal bamboo stakes across the frame. These crossbars will provide extra places for your plants to latch onto as they grow.
Benefits:
- Natural Aesthetic: Bamboo blends seamlessly into any garden, adding a rustic charm.
- Sustainability: Bamboo is a fast-growing, renewable resource, making it an eco-friendly choice.
- Versatility: Bamboo trellises can be customized to fit any garden size or shape.
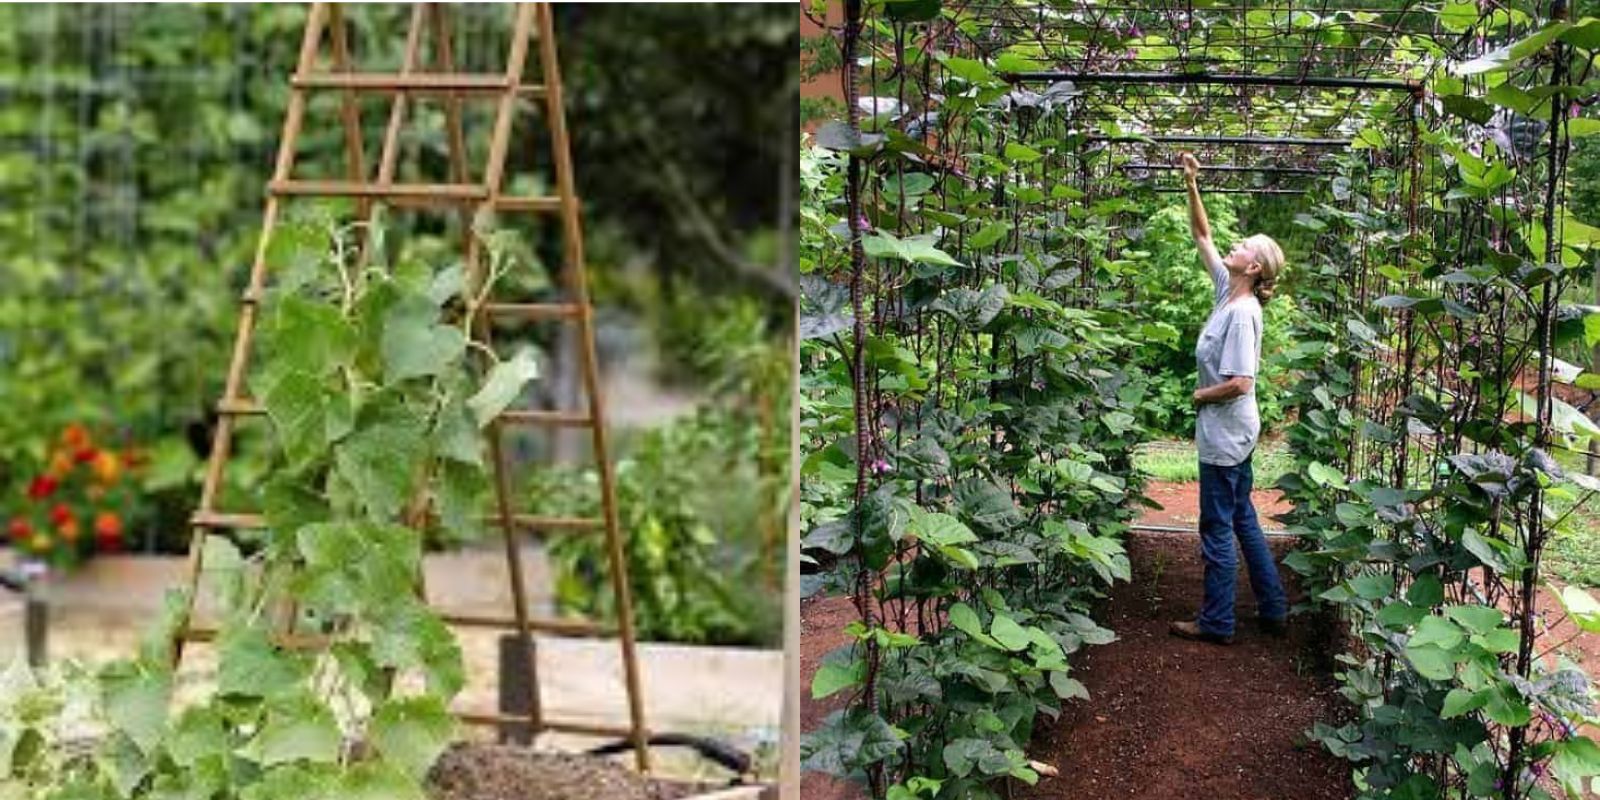
2. Wooden Ladder Trellis: Repurposing with Style
If you have an old wooden ladder lying around, don’t throw it away! Instead, repurpose it into a unique and stylish trellis for your vertical garden. This idea is perfect for adding a touch of vintage charm to your outdoor space.
How to Create a Wooden Ladder Trellis:
- Prepare the Ladder: Start by cleaning the ladder and applying a coat of weather-resistant paint or sealant to protect it from the elements.
- Position the Ladder: Place the ladder in your garden, leaning it against a wall, fence, or garden bed. Make sure it is stable and secure.
- Plant Selection: Choose climbing plants such as clematis, ivy, or beans that will readily climb the rungs of the ladder.
- Training the Plants: As your plants grow, gently guide them onto the rungs of the ladder, allowing them to weave through the structure.
Benefits:
- Repurposing: This project gives new life to an old item, reducing waste and adding character to your garden.
- Ease of Use: The ladder’s rungs provide natural support for climbing plants, making it easy for them to grow vertically.
- Mobility: A ladder trellis can be easily moved to different locations in your garden as needed.
3. String and Nails Trellis: Minimalist and Modern
For those who prefer a minimalist approach, a string and nails trellis is a perfect choice. This simple, cost-effective trellis can be customized to fit any space, making it ideal for small gardens or patios.
How to Create a String and Nails Trellis:
- Materials Needed: Gather nails, string or twine, a hammer, and a measuring tape.
- Plan Your Design: Decide on the pattern you want for your trellis. A diagonal crisscross pattern is popular, but you can also create vertical, horizontal, or grid patterns.
- Hammer in the Nails: Using the measuring tape, mark where you want to place the nails. Hammer the nails into a wall, fence, or wooden frame, leaving enough space between them for your chosen pattern.
- Weave the String: Tie the string to one of the nails and start weaving it around the other nails according to your pattern. Make sure the string is taut enough to support the plants.
Benefits:
- Customizable: You can create any design or pattern that suits your garden space.
- Cost-Effective: This trellis requires minimal materials, making it an affordable option.
- Modern Aesthetic: The simple design adds a sleek, modern touch to your garden.
4. PVC Pipe Trellis: Lightweight and Durable
PVC pipes are lightweight, durable, and easy to work with, making them an excellent material for a DIY trellis. A PVC pipe trellis is particularly useful for supporting heavier plants, such as cucumbers or squash.
How to Create a PVC Pipe Trellis:
- Materials Needed: You will need PVC pipes, PVC pipe connectors (elbows, tees), a PVC cutter, and adhesive if needed.
- Design Your Trellis: Plan the shape and size of your trellis. A simple rectangular or fan-shaped design works well for most gardens.
- Cut the PVC Pipes: Use the PVC cutter to cut the pipes to the desired lengths. Make sure to measure carefully for a precise fit.
- Assemble the Trellis: Connect the PVC pipes using the connectors to form your trellis shape. You can use adhesive at the joints for added stability.
- Install the Trellis: Place the trellis in your garden, securing it firmly in the ground.
Benefits:
- Durability: PVC is resistant to weather, rot, and insects, ensuring a long-lasting trellis.
- Lightweight: The lightweight nature of PVC makes the trellis easy to move and install.
- Adaptability: PVC pipes can be cut and assembled in various configurations to fit your garden’s needs.
5. Wire Mesh Trellis: Simple and Effective
Wire mesh or chicken wire is an inexpensive and versatile material that can be used to create a strong and effective trellis. This type of trellis is ideal for supporting lightweight climbing plants such as peas, beans, and small flowers.
How to Create a Wire Mesh Trellis:
- Materials Needed: Gather wire mesh, wooden stakes or a wooden frame, wire cutters, and staples or nails.
- Prepare the Frame: If using wooden stakes, hammer them into the ground at the desired height and width. If using a wooden frame, construct it to the size you need.
- Attach the Wire Mesh: Cut the wire mesh to the appropriate size using wire cutters. Attach the mesh to the stakes or frame using staples or nails.
- Position the Trellis: Place the trellis in your garden where you want your climbing plants to grow.
Benefits:
- Strength: Wire mesh provides strong support for climbing plants, ensuring they grow upright and healthy.
- Affordability: This is one of the most cost-effective trellis options, requiring minimal investment.
- Ease of Installation: The wire mesh is easy to install and can be shaped to fit various garden spaces.
Conclusion
Creating your own DIY trellis is a fantastic way to enhance your vertical garden and make the most of your available space. Whether you prefer the rustic charm of a bamboo trellis, the repurposed style of a wooden ladder, the minimalist look of string and nails, the durability of PVC pipes, or the simplicity of wire mesh, there’s a trellis idea to suit every gardener’s taste and needs.
Not only do these trellis ideas provide essential support for your climbing plants, but they also add an aesthetic element to your garden, making it more visually appealing. Plus, building your own trellis allows you to customize the size, shape, and style to perfectly fit your garden space.
So why not start your next garden project today? Get creative with these DIY trellis ideas and watch your garden flourish. Don’t forget to share your gardening success with the world using viral gardening hashtags like #VerticalGarden, #DIYTrellis, #GardeningHacks, and #GreenThumb. Your garden will not only grow vertically but also gain admiration from fellow gardening enthusiasts. Happy gardening!