
Introduction
Bringing a touch of nature indoors can transform any space, and there’s no easier or more stylish way to do this than by creating your own plant centerpieces. With just a few basic supplies—cut plants, a glass vase, and a wire fixing kit—you can propagate plants and design unique, eye-catching decorations for your home. In this article, we’ll guide you through the process of cutting plants, waiting for roots to develop, and assembling a beautiful centerpiece.
1. Cutting the Plants
The first step in creating your centerpiece is to select and cut your plants. Choose healthy, robust plants to ensure successful propagation. Here’s how you can do it:
- Choose the Right Plants: Not all plants are suitable for propagation in water, but many popular houseplants are. Consider using plants like pothos, philodendrons, and ivy. These species are known for their ability to thrive in water and develop roots relatively quickly.
- Make the Cut: Use clean, sharp scissors or pruning shears to take cuttings from the parent plant. Aim for cuttings that are about 4-6 inches long, making the cut just below a leaf node (the spot on the stem where leaves are attached). This node is where roots will eventually emerge.
- Prepare the Cuttings: After cutting, remove any leaves from the lower part of the stem to avoid them sitting in the water, which can lead to rot. Ensure that only the bare stem and leaf nodes are submerged in water.
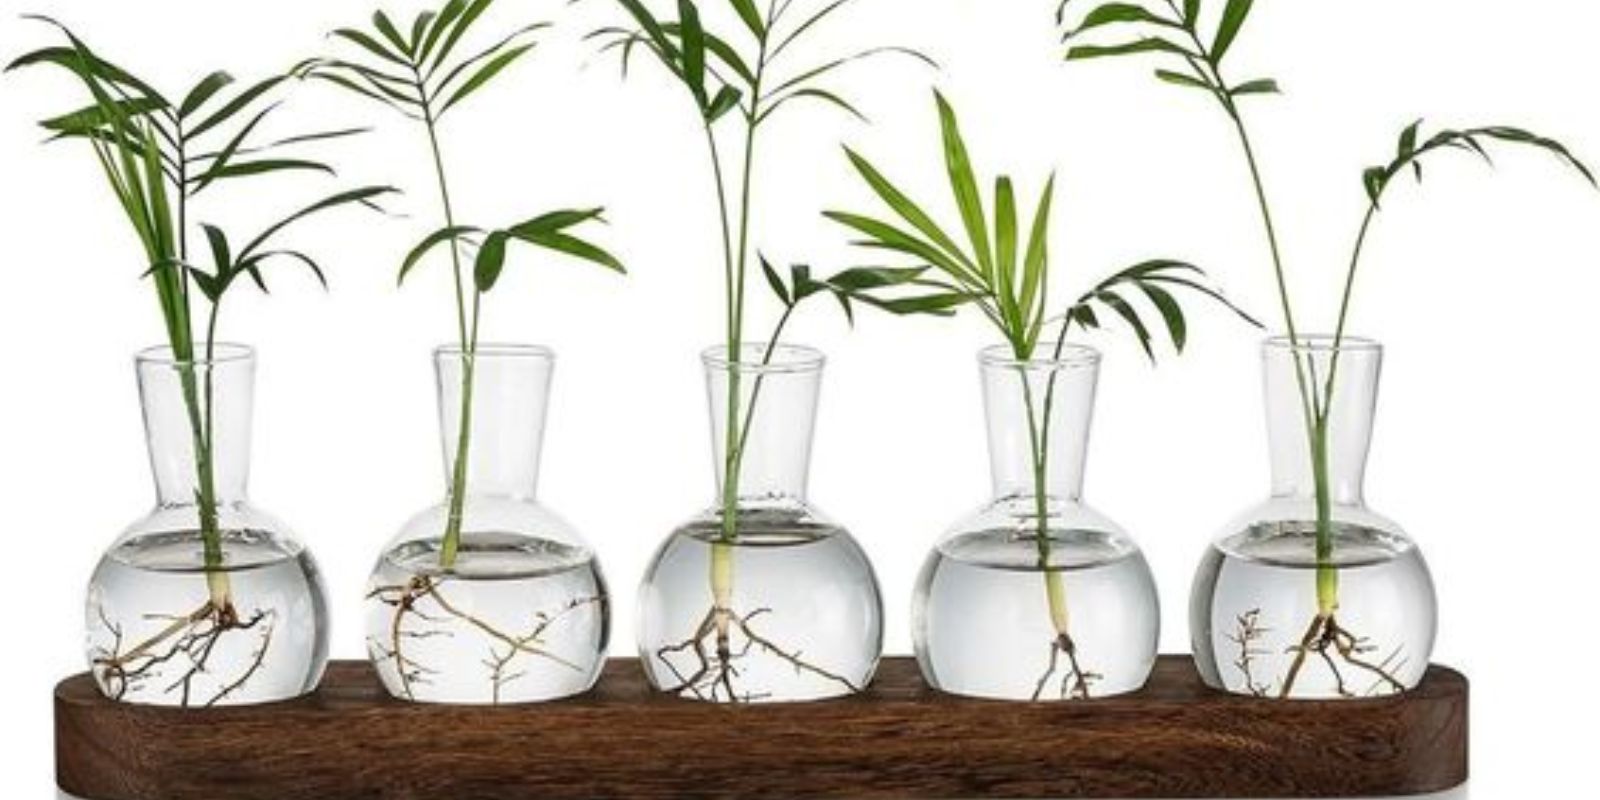
2. Preparing the Cuttings
Once you have your cuttings, it’s essential to prepare them properly to encourage healthy root growth:
- Submerge the Cuttings: Place the prepared cuttings in a glass vase filled with clean water. Make sure the leaf nodes are submerged but the leaves are above the waterline. The water level should be high enough to cover the nodes, but not so high that it risks rotting the leaves.
- Optimal Placement: Position the vase in a bright spot with indirect sunlight. Direct sunlight can cause algae growth or damage to the cuttings, while too little light can slow down root development.
- Change the Water: To prevent stagnation and rot, change the water every few days. This keeps the water fresh and helps the cuttings grow strong, healthy roots.
3. Waiting for Roots
Root development is a crucial stage in the propagation process. Here’s what to expect and how to manage this phase:
- Root Formation: In a few weeks, you should start to see small roots emerging from the leaf nodes. The speed of root growth varies depending on the plant species and environmental conditions. Be patient and avoid disturbing the cuttings too much during this period.
- Monitoring Growth: Regularly check the cuttings for signs of healthy root growth. Roots should be white and firm. If you notice any signs of rot or discoloration, trim away the affected areas and change the water.
4. Using a Wire Fixing Kit
Once your cuttings have established roots, it’s time to use a wire fixing kit to stabilize them and enhance the visual appeal of your centerpiece:
- Secure the Cuttings: If your cuttings are large or have multiple stems, the wire fixing kit can help keep them in place. Gently twist the wire around the stems to stabilize them without causing damage.
- Add Decorative Elements: The wire kit can also be used to attach decorative elements like pebbles, stones, or colored glass beads to the base of the vase. These additions can help anchor the cuttings and add visual interest to your arrangement.
5. Assembling the Centerpiece
With your rooted cuttings and decorative elements in place, you can now assemble your centerpiece:
- Arrange the Cuttings: Position the cuttings in the glass vase, ensuring they are visually appealing and balanced. If you’re using multiple cuttings, arrange them in a way that creates a cohesive and aesthetically pleasing design.
- Incorporate Additional Decor: Enhance your centerpiece with additional decorative items such as floating candles, small figurines, or seasonal decorations. This adds a personal touch and makes the arrangement fit the theme of your space.
- Final Touches: Adjust the water level if needed, and ensure the vase is clean and free of any smudges or fingerprints. Place your completed centerpiece in a prominent location where it can be admired and enjoyed.
Motivation
Creating your own plant centerpieces is not only a fun and creative activity but also a way to bring a touch of nature into your home. By propagating plants and designing with glass vases, you can enjoy the beauty of fresh greenery year-round. Experiment with different plant varieties and decorative elements to create unique arrangements that reflect your personal style. Share your creations with friends and family, and inspire others to start their own indoor gardening projects. Happy decorating!
Feel free to share your plant centerpiece projects and any tips you’ve discovered along the way. Engage with others in the gardening community and showcase how simple materials can be transformed into stunning decor. 🌿🌟