
Introduction
Herb spirals are a brilliant and efficient way to cultivate a variety of herbs in a small space. Whether you’re an experienced gardener or a beginner, a herb spiral can add beauty and functionality to your garden. It not only maximizes growing space but also creates different microclimates within a small area, allowing you to grow a diverse range of herbs with varying moisture and sunlight needs. In this article, we’ll guide you through the process of building your own herb spiral and provide tips on maintaining it to ensure your herbs thrive year-round.
Why Build a Herb Spiral?
Herb spirals are designed to mimic natural ecosystems, offering several benefits:
- Space Efficiency: The vertical design of a herb spiral allows you to grow more plants in a smaller footprint compared to traditional flat garden beds.
- Microclimates: The height and structure of the spiral create different microclimates, with the top being drier and sunnier and the bottom more shaded and moist, catering to different herb preferences.
- Aesthetics: A well-constructed herb spiral is not only functional but also an attractive feature in your garden.
Step 1: Choosing the Right Location
The first step in creating a herb spiral is selecting the perfect location. Choose a sunny spot in your garden, as most herbs require at least 6-8 hours of sunlight each day. The location should be easily accessible for watering and harvesting. If possible, position the spiral so that it is oriented north to south, with the taller end of the spiral at the north side, allowing for maximum sunlight exposure.
Step 2: Designing Your Herb Spiral
Before you start building, it’s essential to plan the size and shape of your spiral. Typically, a herb spiral has a diameter of 1 to 2 meters (3 to 6 feet), with a height of about 1 meter (3 feet) at the center. You can adjust the size based on the space available in your garden.
Use a rope or garden hose to outline the spiral on the ground. Start from the center and work your way outwards, gradually widening the spiral as you move. This outline will serve as your guide when building the structure.
Step 3: Building the Base
Once you’ve marked the outline, it’s time to prepare the base. Lay down a layer of cardboard, old newspapers, or a weed barrier across the entire spiral area. This will help prevent grass and weeds from growing up through your herb spiral. The barrier will eventually decompose, enriching the soil, but it will serve its purpose in the meantime.
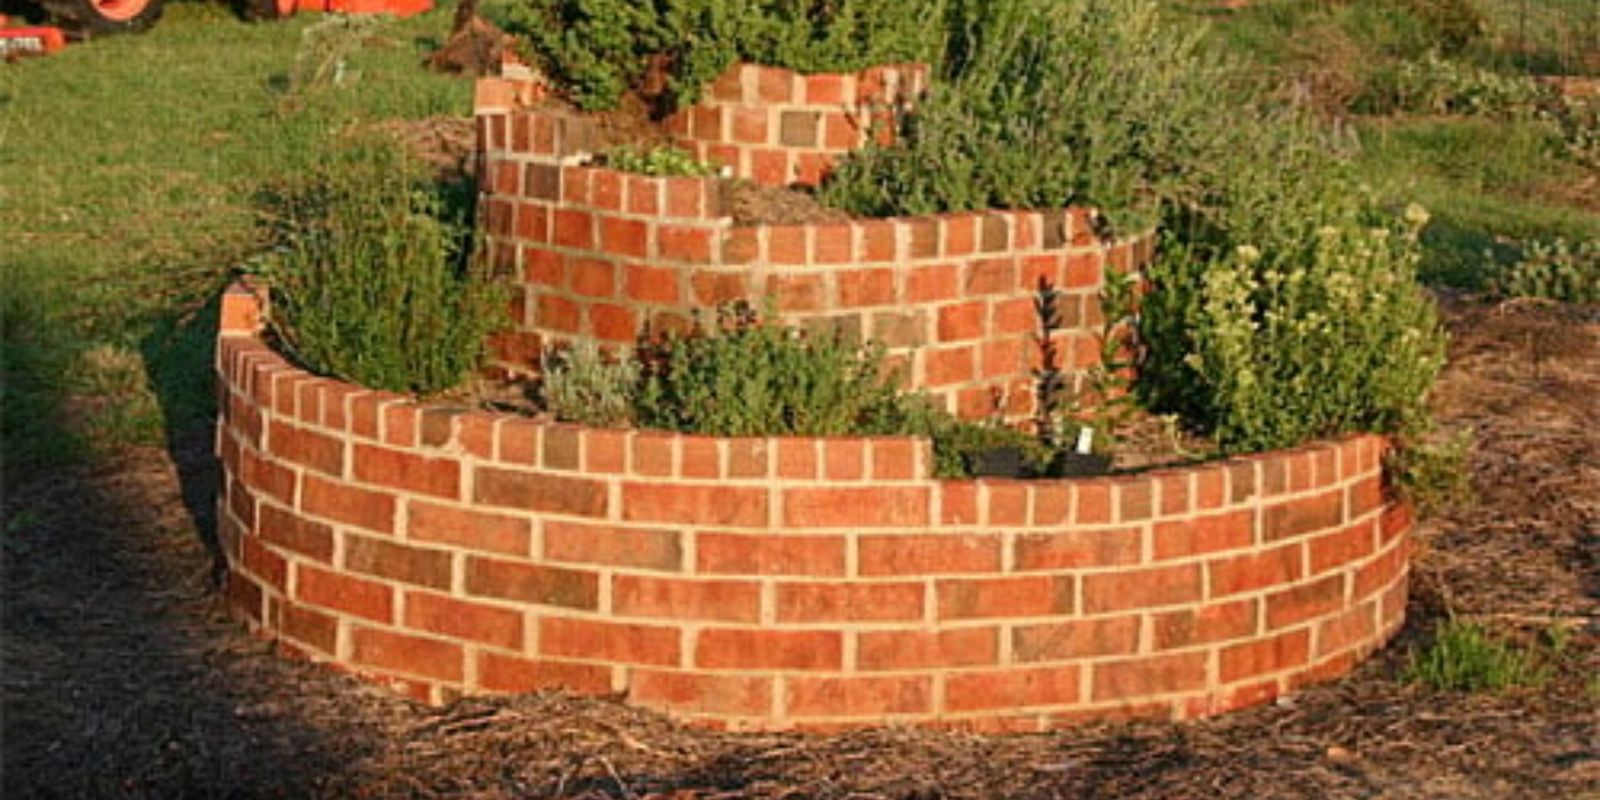
Step 4: Constructing the Spiral Structure
Now comes the fun part—building the spiral! You can use a variety of materials to create the structure, such as rocks, bricks, or logs. These materials will form the walls of your spiral, holding the soil in place as you build upwards.
- Start at the Center: Begin by placing the largest rocks or bricks at the center of the spiral, where it will be the tallest. As you work your way outwards, gradually decrease the size of the rocks or bricks.
- Build Upwards: Continue to build the walls of the spiral, ensuring that each layer is slightly higher than the previous one. The spiral should gradually slope downwards from the center to the outer edge.
- Ensure Stability: As you build, make sure the structure is stable by packing the rocks or bricks tightly together. You can also reinforce the structure with additional soil or gravel if needed.
Step 5: Filling the Spiral with Soil
Once the structure is complete, it’s time to fill the spiral with soil. Start by adding a base layer of coarse gravel or broken pottery to improve drainage, especially at the bottom of the spiral. Then, fill the spiral with a mixture of high-quality garden soil and compost. The soil should be rich in organic matter to provide the nutrients your herbs need to thrive.
- Layering the Soil: As you fill the spiral, consider the moisture needs of the herbs you plan to plant. Add more compost to the soil in the lower, wetter areas of the spiral, and use a lighter, sandier soil mix in the higher, drier areas.
Step 6: Planting Your Herbs
Now that your herb spiral is built and filled with soil, it’s time to start planting. The key to a successful herb spiral is placing the right herbs in the right spots.
- Top of the Spiral: Plant drought-tolerant herbs like rosemary, thyme, and oregano at the top of the spiral, where the soil is driest.
- Middle of the Spiral: In the midsection, plant herbs that prefer moderate moisture, such as sage, parsley, and basil.
- Bottom of the Spiral: Plant moisture-loving herbs like mint, chives, and coriander at the bottom of the spiral, where the soil stays more moist.
By positioning your herbs according to their water and sunlight needs, you’ll create a thriving, self-sustaining herb garden.
Step 7: Watering and Mulching
Water your newly planted herbs thoroughly after planting. In the following weeks, monitor the moisture levels in the soil, adjusting your watering routine based on the needs of each herb. The design of the spiral helps retain moisture at the base, reducing the need for frequent watering.
To help retain moisture and suppress weeds, add a layer of mulch around your herbs. Organic mulch, such as straw or wood chips, is ideal as it will decompose over time, adding nutrients to the soil.
Step 8: Maintaining Your Herb Spiral
Maintenance is essential to keep your herb spiral productive and healthy. Regularly prune your herbs to encourage growth and prevent overcrowding. Remove any weeds that may sprout, and replenish the soil with compost as needed. Over time, the soil may settle, so you may need to add more soil to maintain the spiral’s height and shape.
Conclusion
Building a herb spiral is a rewarding project that offers both practical benefits and visual appeal. By following these steps, you can create a flourishing herb garden that provides fresh, flavorful herbs for your kitchen all year round. Whether you’re limited on space or simply want to try something new in your garden, a herb spiral is a fantastic way to grow a diverse range of herbs in a small, manageable area.
Get Started: Are you ready to build your own herb spiral? Share your plans and progress with us, and let’s grow together!