
Introduction
Ginger (Zingiber officinale) is one of the most widely used spices in the world, cherished for its culinary, medicinal, and aromatic properties. Whether you want to flavor your meals, brew a health-boosting tea, or use it as a natural remedy, growing ginger at home can provide you with a fresh and organic supply all year round.
Many people assume that ginger requires large garden spaces to thrive, but the reality is that ginger is one of the easiest crops to grow in small spaces, including containers, grow bags, and vertical gardens. With the right method, you can cultivate an abundant harvest of ginger roots in your home, balcony, or even indoors.
This guide will walk you through step-by-step instructions for growing ginger successfully in compact spaces, ensuring healthy and flavorful roots.
Understanding Ginger Growth
Before you begin, it is essential to understand how ginger grows. Unlike typical plants that grow from seeds, ginger is propagated from rhizomes—thick underground stems that sprout new shoots and roots. When planted in the right conditions, these rhizomes develop into lush, leafy plants while expanding beneath the soil to form new ginger roots.
Ideal Growing Conditions for Ginger:
✅ Temperature: Warm and humid (21–25°C / 70–77°F)
✅ Soil: Loose, nutrient-rich, and well-draining
✅ Water: Consistently moist but never soggy
✅ Light: Partial shade (direct sunlight can scorch leaves)
✅ Space: Wide, shallow containers (ginger spreads horizontally)
By providing these optimal conditions, you can maximize your ginger yield in small spaces.
Step-by-Step Guide to Growing Ginger in Compact Spaces
Step 1: Choosing the Right Ginger Rhizomes
Your success in growing ginger starts with high-quality rhizomes. Instead of using seeds, purchase fresh, organic ginger from a local grocery store, farmer’s market, or garden center.
🔹 Look for plump, firm rhizomes with visible growth buds (small eye-like points).
🔹 Avoid shriveled, moldy, or chemically treated ginger, as they may not sprout.
🔹 If possible, select locally grown organic ginger, as commercial varieties are sometimes treated with growth inhibitors.
Step 2: Preparing the Rhizomes for Planting
Once you have selected your ginger rhizomes, prepare them properly for planting:
1️⃣ Cut the ginger into sections – Each piece should be about 1–2 inches long, with at least one “eye” or growth bud.
2️⃣ Cure the cut pieces – Let the cut sections dry for 24–48 hours in a warm place. This helps form a callus, preventing rot after planting.
3️⃣ Soak (Optional) – If you’re unsure whether your ginger has been treated with chemicals, soak it in warm water overnight to remove any inhibitors.
Step 3: Choosing the Right Container and Soil
✅ Container Selection: Choose a wide and shallow container (at least 12–16 inches in diameter and 8–10 inches deep). Ginger grows horizontally, so a wide base is better than deep pots. Grow bags and raised beds also work well.
✅ Soil Preparation: Use light, nutrient-rich, and well-draining soil to ensure healthy growth. A mix of coco peat, compost, and sand (in equal parts) provides the perfect balance of aeration and moisture retention.
✅ Drainage: Ensure the container has drainage holes to prevent waterlogging.
Step 4: Planting the Ginger Rhizomes
🔹 Fill your container with moist soil, leaving about 2 inches of space from the top.
🔹 Place the ginger rhizomes horizontally, bud-side facing up, about 2 inches apart.
🔹 Cover them with 1–2 inches of soil and water lightly.
Step 5: Providing the Right Growing Conditions
✅ Watering – Keep the soil consistently moist but not waterlogged. Overwatering can cause root rot.
✅ Light & Shade – Place the container in a warm, partially shaded area. Ginger thrives with filtered sunlight rather than direct exposure.
✅ Humidity – If growing indoors, mist the plant occasionally to maintain humidity.
✅ Temperature – Ginger prefers a warm environment above 20°C (68°F). Avoid cold drafts.
Step 6: Caring for Your Ginger Plants
🔹 Mulching – Adding a layer of mulch (straw or dry leaves) helps retain moisture and suppress weeds.
🔹 Fertilizing – Every 3–4 weeks, feed your ginger with organic fertilizer, compost tea, or diluted seaweed extract.
🔹 Weeding & Pruning – Keep the area around the plant free from weeds, and prune dead leaves to encourage growth.
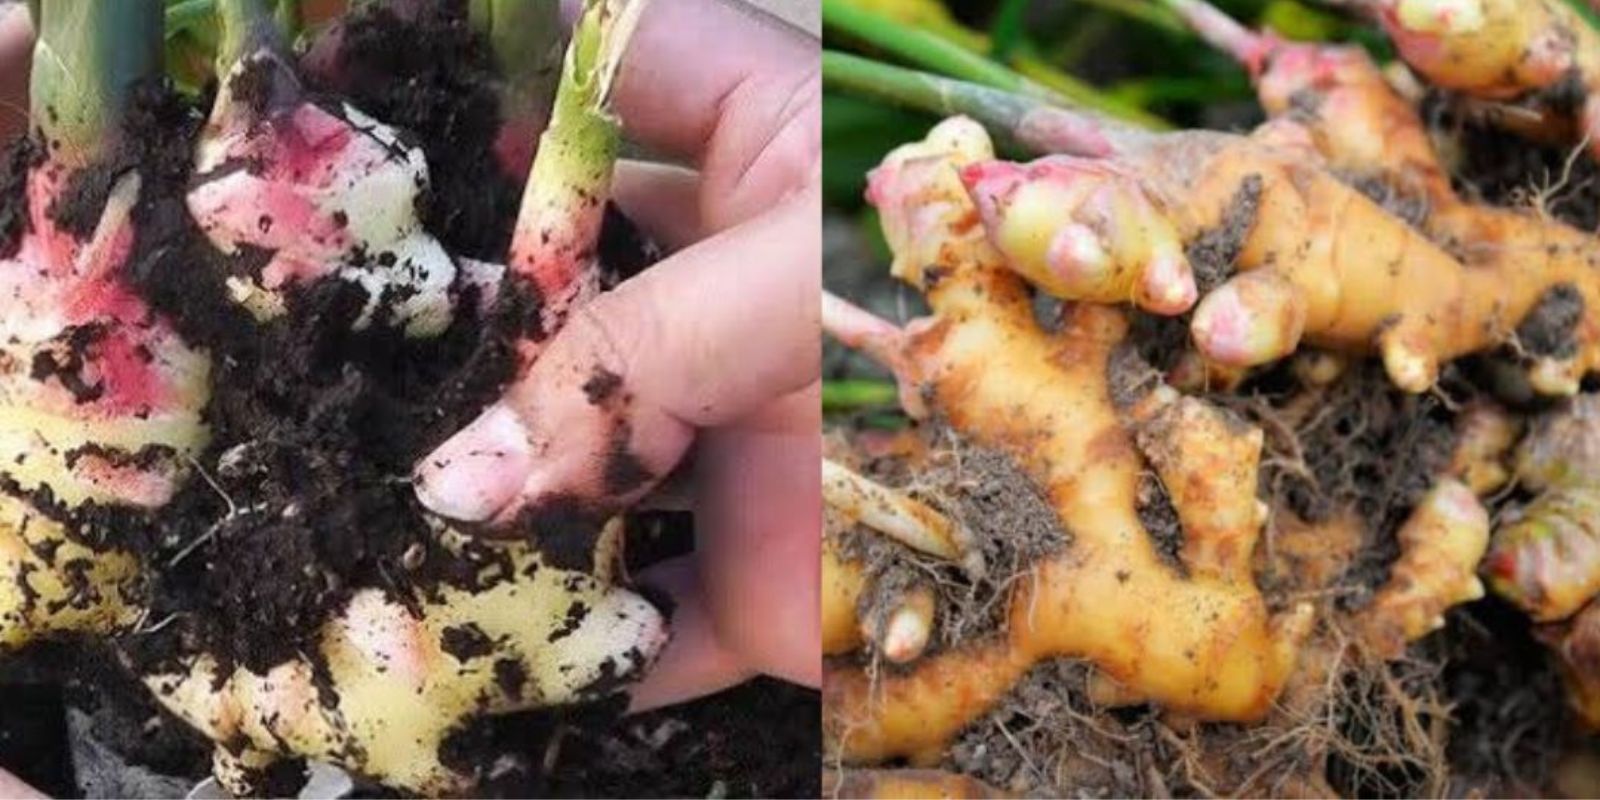
Step 7: Harvesting Your Ginger
✅ Early Harvest (for baby ginger): After 4–5 months, you can carefully dig up some rhizomes while leaving the rest to grow.
✅ Full Harvest: After 8–10 months, the leaves will turn yellow and dry out—a sign that your ginger is mature and ready for harvest.
To harvest, carefully dig around the rhizomes and pull them out. Rinse and dry before storing.
How to Maximize Your Ginger Harvest in Small Spaces
🌱 Use Vertical Grow Bags – Hanging fabric grow bags allow better drainage and save space.
🌱 Regrow Ginger from Harvested Pieces – Keep some healthy rhizomes for the next planting cycle.
🌱 Grow Ginger Indoors During Winter – If you live in a cold climate, move the container indoors near a sunny window.
🌱 Companion Planting – Grow ginger alongside plants like turmeric, garlic, or basil to maximize space and deter pests.
Common Mistakes to Avoid
❌ Overwatering – Too much moisture can cause rhizomes to rot.
❌ Planting Too Deep – Ginger should be just below the soil surface for easy sprouting.
❌ Not Providing Enough Warmth – Ginger stops growing in cold temperatures.
❌ Using Heavy or Clayey Soil – Compact soil prevents rhizomes from expanding.
Benefits of Growing Ginger at Home
🌿 Organic & Chemical-Free – No pesticides or artificial additives.
🌿 Cost-Effective – Fresh ginger can be expensive, but growing your own is free!
🌿 Sustainable & Continuous Supply – Regrow ginger from previous harvests.
🌿 Multipurpose Use – Use fresh ginger in cooking, teas, skincare, and home remedies.
Conclusion
Growing ginger in compact spaces is surprisingly easy and rewarding. Whether you have a small balcony, a kitchen garden, or a tiny indoor space, you can cultivate plentiful, flavorful ginger with minimal effort.
By following these simple steps and avoiding common mistakes, you’ll enjoy a continuous supply of fresh, aromatic ginger straight from your home.
💬 Have you tried growing ginger at home? Share your experience in the comments! 👇
🌿 For the full guide, check the first comment! 💬👀