
Gardening is a rewarding hobby that connects us with nature and provides fresh produce for our tables. However, managing weeds, soil moisture, and fertility can often be challenging. If you’re looking for an eco-friendly solution that addresses these common gardening issues, look no further than cardboard mulching. This technique not only improves your vegetable garden’s health but also reduces waste, making it a win-win for both gardeners and the environment. In this article, we will explore the benefits of cardboard mulching, the step-by-step process to implement it, and tips for maintaining a thriving garden.
Understanding Cardboard Mulching
What is Cardboard Mulching?
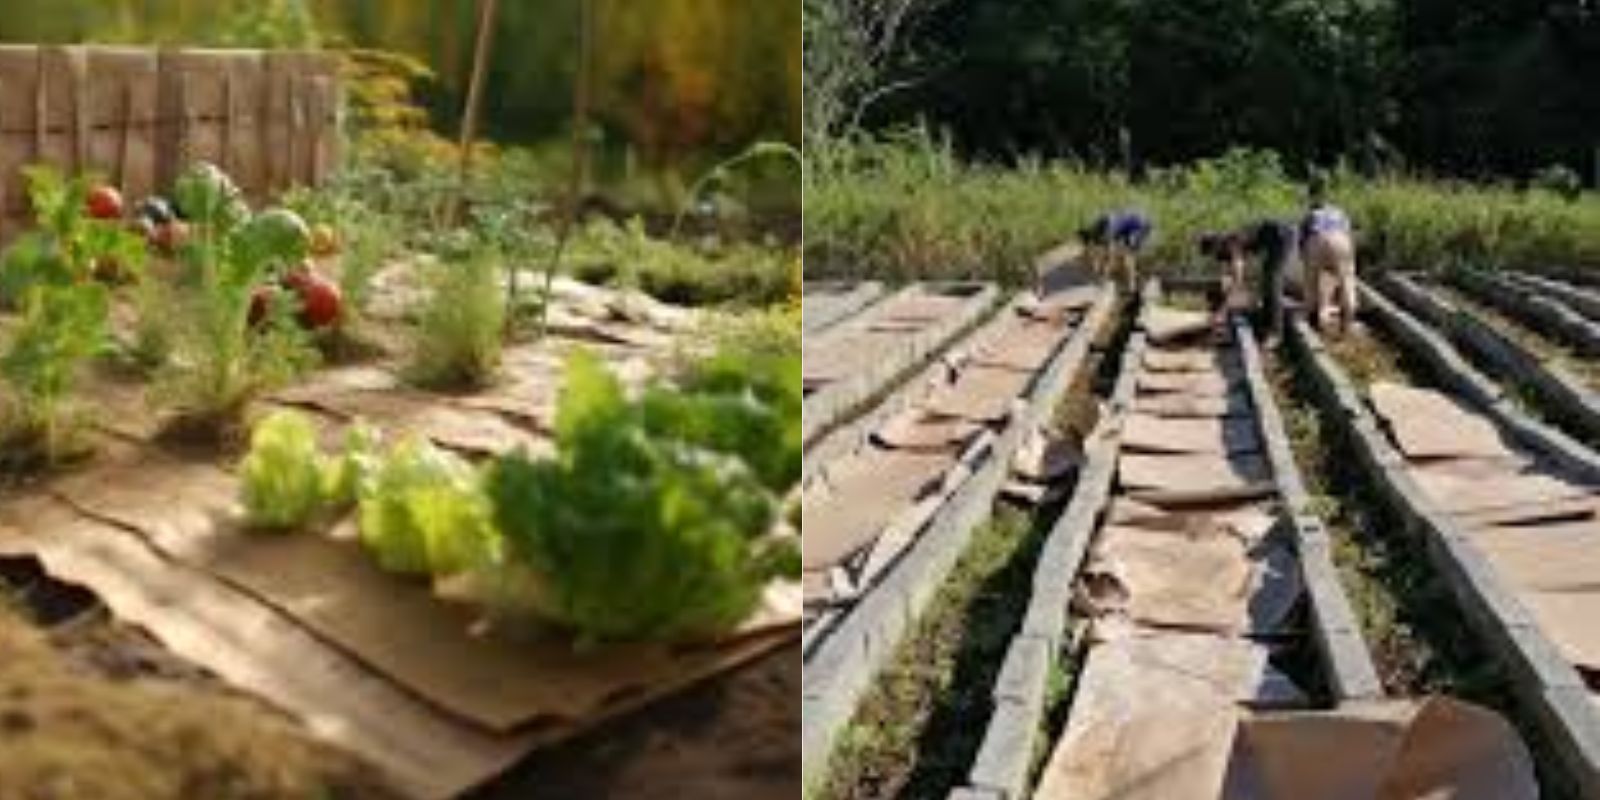
Cardboard mulching involves laying down sheets of cardboard on top of garden soil to suppress weeds, retain moisture, and improve soil health. As the cardboard breaks down, it adds organic matter to the soil, enriching it and creating a better environment for plant growth.
Why Use Cardboard?
- Weed Suppression: Cardboard effectively blocks sunlight from reaching weed seeds, preventing them from germinating and growing. This means less time spent weeding and more focus on nurturing your plants.
- Moisture Retention: Cardboard helps retain soil moisture by reducing evaporation. This is especially beneficial during hot, dry spells, ensuring your plants have the water they need to thrive.
- Soil Improvement: As cardboard decomposes, it adds valuable organic matter to the soil, improving its structure and fertility. This can enhance soil aeration and water-holding capacity, creating a healthier growing environment for your plants.
- Eco-Friendly: Utilizing cardboard that would otherwise be discarded helps reduce landfill waste. It’s a sustainable practice that contributes to a healthier planet.
- Cost-Effective: Cardboard is often free and readily available, making it a budget-friendly option for gardeners looking to improve their garden without spending a fortune.
Step-by-Step Guide to Cardboard Mulching
Now that you understand the benefits of cardboard mulching, let’s dive into the steps to implement this technique in your vegetable garden.
Step 1: Gather Materials
Start by collecting clean, uncoated cardboard. Look for boxes from deliveries, packaging materials, or even discarded moving boxes. Ensure the cardboard is free from plastic, tape, or glossy finishes, as these materials will not decompose properly. Aim for a mix of different cardboard types, such as corrugated boxes and flat sheets.
Step 2: Prepare the Garden Bed
Before laying down cardboard, prepare your garden bed:
- Clear the Area: Remove any existing weeds, grass, or debris from the garden bed. This step is crucial to prevent weeds from pushing through the cardboard and establishing themselves.
- Loosen the Soil: Use a garden fork or tiller to loosen the top few inches of soil. This will help improve drainage and allow for better interaction between the cardboard and soil.
Step 3: Lay Down the Cardboard
Place the cardboard sheets directly on the prepared soil. Here are some tips for effective placement:
- Overlap the Edges: Make sure to overlap the edges of the cardboard sheets by at least six inches to create a continuous barrier. This will help prevent weeds from sneaking through gaps.
- Cut to Fit: If your cardboard pieces are too large, cut them down to size. You want to ensure full coverage of the area where you plan to plant.
Step 4: Moisten the Cardboard
Once the cardboard is laid down, it’s important to moisten it:
- Water Thoroughly: Use a garden hose or watering can to lightly soak the cardboard. This helps it stay in place and initiates the decomposition process. Moist cardboard is also less likely to blow away in the wind.
Step 5: Add Organic Material
To enhance the effectiveness of your cardboard mulch, add a layer of organic material on top:
- Choose Your Mulch: Options include straw, grass clippings, wood chips, or shredded leaves. Aim for a layer that is about 2-4 inches thick.
- Benefits of Organic Mulch: This additional layer not only improves moisture retention but also adds nutrients to the soil as it breaks down. It can also provide habitat for beneficial organisms that improve soil health.
Step 6: Plant Through the Cardboard
When you’re ready to plant, you can do so through the cardboard:
- Cut Holes for Plants: Using a sharp knife or scissors, cut X-shaped slits in the cardboard where you want to plant your seeds or seedlings.
- Dig Into the Soil: Pull back the cardboard flaps and dig into the soil beneath to create holes for your plants. Place your seeds or seedlings in these holes, then cover them back up with soil and fold the cardboard flaps back down.
Step 7: Water and Maintain
After planting, make sure to water your garden well:
- Water Regularly: Check the moisture level of the soil and water as needed, especially during dry spells. The cardboard will help retain moisture, but young plants still require consistent watering.
- Monitor Growth: Keep an eye on your plants as they grow. If you notice any signs of stress, adjust your watering and check for pests or diseases.
Tips for Success with Cardboard Mulching
To maximize the effectiveness of your cardboard mulching, consider the following tips:
- Timing Matters: Implement cardboard mulching in the spring before planting or in the fall to prepare the bed for the next growing season. This gives the cardboard time to decompose and improve the soil before planting.
- Rotate Crops: Practice crop rotation to maintain soil health. Avoid planting the same crops in the same spot each year, as this can lead to nutrient depletion and pest problems.
- Use with Other Mulching Techniques: Combine cardboard mulching with other techniques like straw or wood chip mulching for added benefits.
- Check for Pests: Regularly inspect your garden for pests. While cardboard can help deter some weeds and pests, it’s important to stay vigilant.
- Be Patient: Cardboard takes time to decompose, so don’t expect immediate results. However, over time, you’ll notice improved soil quality and healthier plants.
Conclusion
Cardboard mulching is a simple yet effective gardening technique that offers numerous benefits for your vegetable garden. By suppressing weeds, retaining moisture, and enriching the soil, you can create a thriving environment for your plants while reducing waste. With just a few steps, you can transform your garden into a sustainable haven that produces healthy and delicious crops.
So, why not give cardboard mulching a try? Embrace this eco-friendly gardening technique and enjoy the rewards of a bountiful harvest while doing your part for the environment. Share your successes and tips with fellow gardeners, and together, let’s cultivate a greener world.
Get involved and share your gardening journey with hashtags like #CardboardMulching, #EcoFriendlyGardening, #SustainableLiving, and #GardenTips!