
Butternut squash is a favorite in many kitchens, loved for its creamy texture and sweet, nutty flavor. While it’s traditionally grown in sprawling garden beds, did you know that you can grow butternut squash right in containers? This method is ideal for those with limited space, like apartment dwellers or urban gardeners. With a little planning and attention to detail, growing butternut squash in containers can yield an abundant harvest, right on your balcony or patio.
In this comprehensive guide, we’ll explore the step-by-step process of container gardening for butternut squash, from selecting the right container to caring for your plant and harvesting it. Whether you’re a gardening newbie or an experienced green thumb looking for a new challenge, this approach will allow you to enjoy homegrown squash all season long.
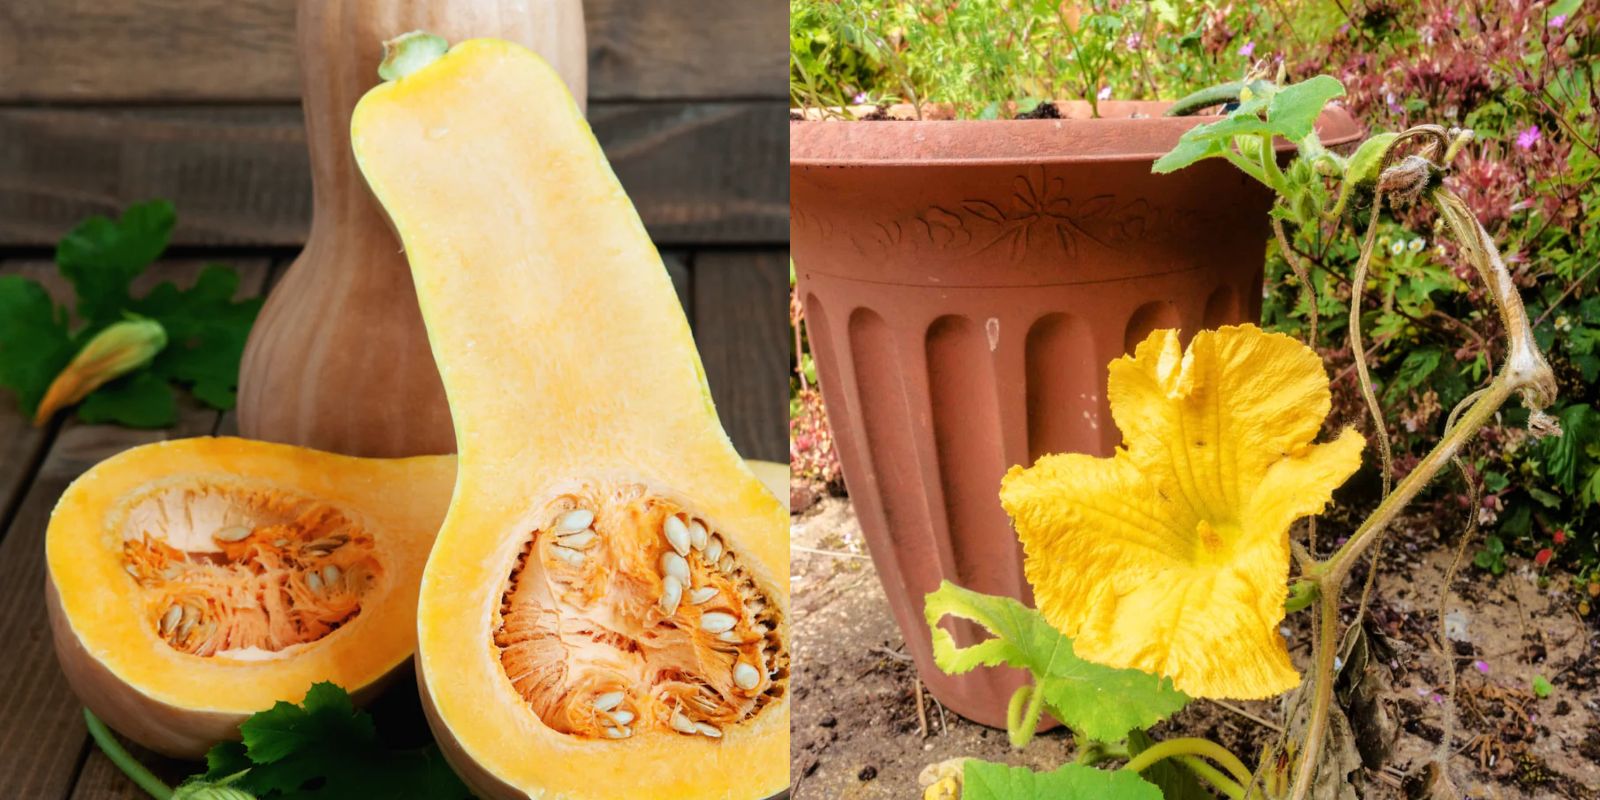
Why Grow Butternut Squash in Containers?
Butternut squash is a type of winter squash that’s known for its hard skin and long storage life. It’s a versatile vegetable, used in soups, stews, roasted dishes, and even desserts. Growing it in containers not only saves space but also allows for better control over soil quality and watering. Containers can be moved as needed to ensure your squash gets enough sunlight, which is essential for healthy growth. Plus, container gardening helps reduce pests and diseases that often plague traditional garden beds.
Step-by-Step Guide to Growing Butternut Squash in Containers
1. Choose the Right Container
The first and most crucial step in growing butternut squash in containers is selecting the right pot. Since butternut squash plants have a large root system, you’ll need a container that’s at least 18-24 inches in diameter and 18 inches deep. This gives the roots ample room to spread and ensures that the plant has access to enough nutrients. You can use plastic, ceramic, or even fabric pots, as long as they have good drainage.
Pro Tip: Use containers with drainage holes at the bottom to prevent water from pooling and causing root rot.
2. Select the Right Variety of Butternut Squash
Not all butternut squash varieties are ideal for container gardening. Look for bush or semi-bush varieties, which are more compact and better suited for limited space. Some popular options for container gardening include ‘Honeynut’ and ‘Butterbush,’ which are smaller but just as delicious as their larger counterparts.
3. Prepare the Potting Mix
Butternut squash thrives in well-draining, nutrient-rich soil. Regular garden soil is often too dense for container plants, so it’s best to use a high-quality potting mix specifically designed for vegetables. You can also mix in compost or aged manure to add organic matter and boost the soil’s fertility.
Ingredients for a Good Potting Mix:
- 50% potting soil
- 25% compost
- 25% perlite or vermiculite for drainage
Adding organic material to the soil ensures that your squash has a slow release of nutrients throughout the growing season. Compost or worm castings can be mixed in to improve the texture and nutrient content of your potting mix.
4. Planting Your Seeds or Seedlings
You can start butternut squash from either seeds or seedlings. If starting from seed, plant the seeds about 1 inch deep in the soil, placing 2-3 seeds per container. If all seeds sprout, you’ll need to thin the seedlings to leave only the strongest one.
If using seedlings, carefully transplant them into the container, making sure to plant them at the same depth they were in their original pots.
Timing Tip: Plant your seeds or seedlings after the last frost date in your area, as butternut squash is a warm-season crop that doesn’t tolerate frost.
5. Watering Requirements
Squash plants need consistent moisture to thrive, but overwatering can be just as harmful as under-watering. The soil should be kept moist, but not soggy. Water the plant deeply, ensuring that the water reaches the roots. In the heat of summer, you may need to water daily or every other day.
Watering Tip: Mulch around the base of the plant to help retain moisture and reduce the frequency of watering.
6. Support the Vines
Butternut squash plants can grow large and vine-like, even in containers. To save space and support healthy growth, it’s important to provide a trellis or stake for the vines to climb. This not only saves space but also keeps the fruit off the ground, reducing the risk of pests and diseases.
You can use a simple bamboo trellis or even a DIY structure made from garden stakes and string. Gently train the vines to climb the support as they grow.
7. Fertilize Regularly
Since container plants have limited access to nutrients, regular fertilization is key to healthy growth. Use a balanced organic vegetable fertilizer every 2-3 weeks to keep the plant nourished. Look for a fertilizer that is rich in potassium and phosphorus, which are essential for fruit production.
Pro Tip: Liquid seaweed or fish emulsion can be used as a foliar spray to give your squash an extra nutrient boost.
8. Pollination
Butternut squash plants produce both male and female flowers, and for the fruit to develop, the female flowers need to be pollinated. If you’re growing squash in an area with few bees, you may need to hand-pollinate the flowers. To do this, simply transfer pollen from a male flower to a female flower using a small brush or cotton swab.
How to Identify Male and Female Flowers:
- Male flowers: Appear first and have a straight stem.
- Female flowers: Have a small fruit at the base of the flower.
9. Pest and Disease Management
While container gardening reduces the risk of many pests and diseases, you still need to keep an eye out for common issues like powdery mildew, aphids, and squash bugs. Regularly inspect your plants and remove any pests you see by hand. If you notice signs of disease, treat the plant with an organic fungicide or insecticidal soap.
Prevention Tip: Water the soil, not the leaves, to avoid creating a humid environment that encourages fungal growth.
10. Harvesting Your Butternut Squash
Butternut squash takes around 90-120 days to mature. You’ll know it’s time to harvest when the skin turns a deep beige color, and the stem hardens. Use a sharp knife or garden shears to cut the squash from the vine, leaving a few inches of stem attached to the fruit.
After harvesting, allow the squash to cure in a warm, dry place for about 10 days. This helps harden the skin and improve the flavor.
Benefits of Growing Butternut Squash in Containers
Growing butternut squash in containers offers numerous advantages:
- Space Efficiency: Perfect for gardeners with limited space.
- Portability: Containers can be moved to optimize sunlight exposure.
- Control Over Soil and Watering: You can easily monitor and adjust soil quality and moisture levels.
- Pest Reduction: Growing in containers helps minimize exposure to ground-based pests.
Final Thoughts
Growing butternut squash in containers is a rewarding way to enjoy fresh, homegrown vegetables without needing a large garden. With the right container, soil, and care, you can produce a bountiful harvest of this nutritious winter squash right on your patio. Whether you’re a beginner or a seasoned gardener, container gardening offers a convenient and efficient way to cultivate your favorite plants.
Start your butternut squash container garden today, and experience the joy of homegrown produce with minimal effort!
Interact with us! Share your container gardening tips below! 🌿🍂
Hashtags: #ContainerGardening #ButternutSquash #HomeGrown #UrbanGardening #GrowYourOwnFood #VegetableGardening #GardeningHacks #SustainableLiving #GardenTips