
Raised bed gardening has gained popularity among gardeners of all levels, offering numerous advantages such as improved soil quality, better drainage, and ease of access. Whether you’re looking to grow vegetables, flowers, or herbs, a raised bed can provide a controlled environment that promotes healthy plant growth. This article provides a step-by-step guide to building a simple raised bed, ensuring you can start your gardening journey with confidence.
Why Choose a Raised Bed?
Raised beds are a versatile and practical solution for gardening. Here are some of the key benefits:
- Improved Soil Quality: By filling your raised bed with high-quality soil, you can overcome issues with poor native soil, such as clay, sand, or contamination.
- Better Drainage: Raised beds allow excess water to drain more effectively, reducing the risk of waterlogging and root rot.
- Enhanced Accessibility: Raised beds are easier to access, reducing the need for bending and kneeling, making them ideal for those with mobility issues.
- Pest and Weed Control: The defined boundaries of a raised bed can help limit the spread of weeds and make it easier to manage pests.
- Extended Growing Season: The soil in raised beds warms up more quickly in the spring, allowing for an earlier start to the growing season.
Materials and Tools Needed
Before you begin building your raised bed, gather the necessary materials and tools. Here’s a basic list:
Materials:
- Untreated wood planks (cedar or redwood are durable options)
- Corner brackets or screws
- Landscape fabric (optional)
- Soil mix (garden soil, compost, and other organic matter)
Tools:
- Saw (if cutting wood to size)
- Drill or screwdriver
- Tape measure
- Level
- Shovel
Step-by-Step Guide to Building a Raised Bed
1. Choose the Location
Select a location for your raised bed that receives at least 6-8 hours of sunlight per day, as most plants require full sun to thrive. Ensure the spot has good drainage and is away from large tree roots, which can compete with your plants for nutrients and water.
2. Select and Cut the Materials
For a simple raised bed, a common size is 4×4 or 4×8 feet, with a height of 10-12 inches. These dimensions provide enough space for plants to grow and are easy to manage. Use untreated wood, as treated wood can contain chemicals that may leach into the soil. Cedar and redwood are excellent choices due to their natural resistance to rot.
Cut the wood planks to the desired lengths for your bed. For example, for a 4×8 bed, you’ll need two 8-foot planks and two 4-foot planks.
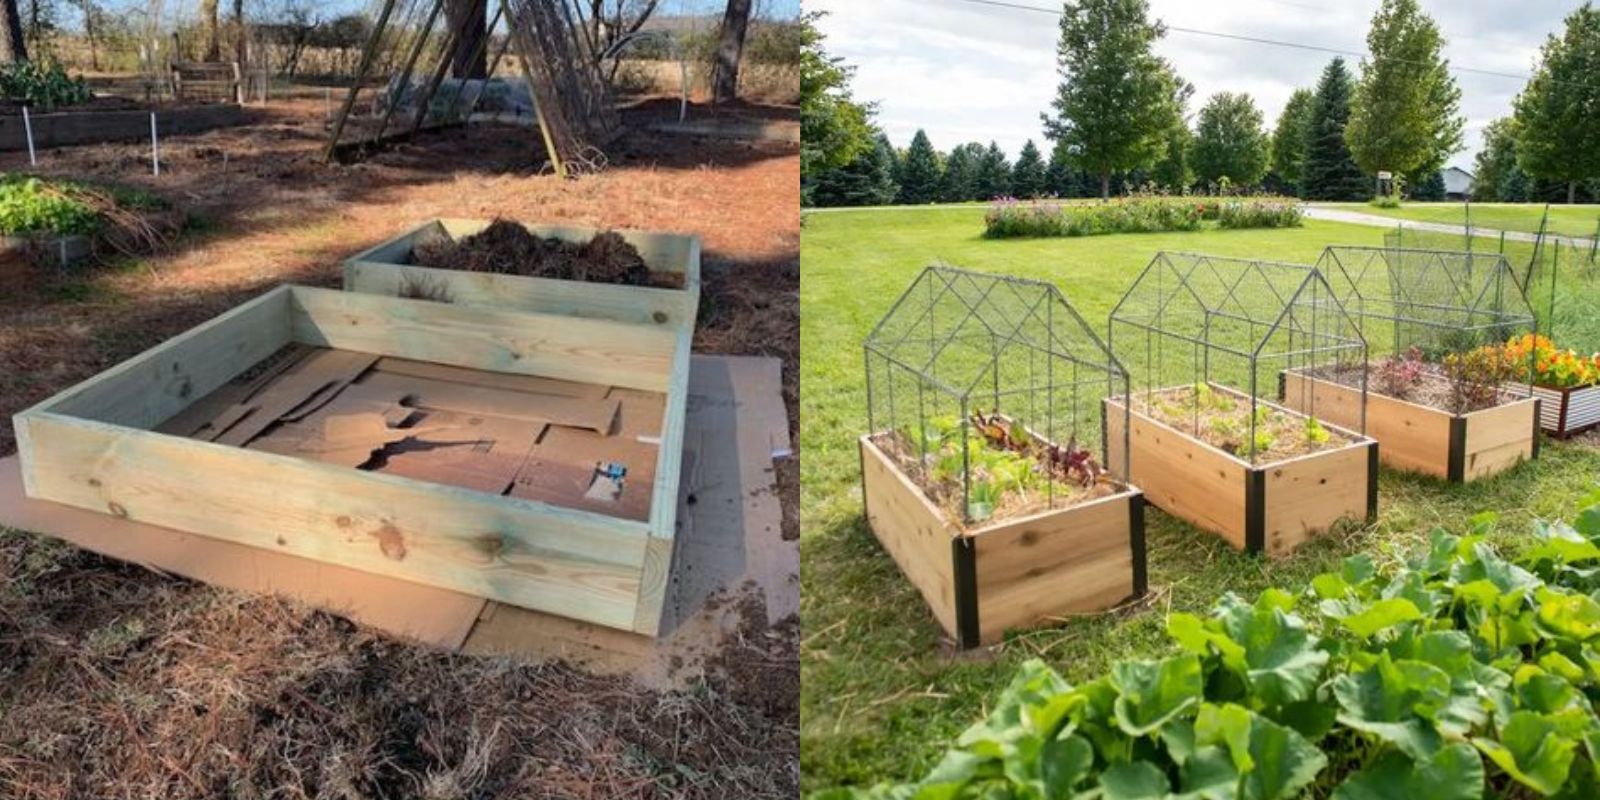
3. Assemble the Frame
Assemble the wood planks into a rectangular frame, using corner brackets or screws to secure the corners. Ensure that the corners are square and the sides are level. If you’re using screws, pre-drill holes to prevent the wood from splitting.
4. Prepare the Ground
Clear the area where you’ll place the raised bed, removing any grass, weeds, or debris. You can lay down landscape fabric to further prevent weeds from growing up into your bed. If you opt for landscape fabric, cut it to fit the bottom of the bed and secure it in place.
5. Fill the Bed with Soil
Fill the raised bed with a quality soil mix. A good blend includes garden soil, compost, and other organic matter like peat moss or aged manure. This mix provides essential nutrients and promotes healthy root development. The soil should be loose and well-draining.
Fill the bed to the top, as the soil will settle over time. Lightly tamp down the soil to remove air pockets, but avoid compacting it too much, as this can restrict root growth.
6. Planting Your Raised Bed
Once your raised bed is filled with soil, it’s time to plant. Consider your climate and the plants you want to grow. You can grow a wide variety of vegetables, herbs, and flowers in a raised bed. Plan your layout, keeping in mind the space requirements and sunlight needs of each plant.
For a productive vegetable garden, try planting crops like tomatoes, peppers, lettuce, and herbs. Companion planting, where certain plants are grown together for mutual benefits, can also be a great strategy in a raised bed.
Maintenance and Tips for Success
- Watering: Raised beds can dry out faster than in-ground gardens, so regular watering is essential. Consider installing a drip irrigation system or soaker hoses for efficient watering.
- Mulching: Apply a layer of mulch on top of the soil to help retain moisture, suppress weeds, and regulate soil temperature.
- Fertilizing: While raised beds start with nutrient-rich soil, adding compost or organic fertilizers throughout the growing season can boost plant health and yield.
- Pest Management: Keep an eye out for pests and diseases. Use natural pest control methods like row covers or organic pesticides if necessary.
- Seasonal Care: In the off-season, consider planting cover crops or adding mulch to protect and enrich the soil.
Conclusion
Building a simple raised bed is a rewarding project that can enhance your gardening experience and increase your crop yields. With careful planning and the right materials, you can create a thriving garden space that is easy to maintain and accessible. Whether you’re a beginner or an experienced gardener, raised beds offer flexibility and control over your growing conditions, allowing you to cultivate a variety of plants successfully.
Have you built a raised bed for gardening? Share your tips, experiences, or questions below! Let’s grow together and make the most of our garden spaces.