
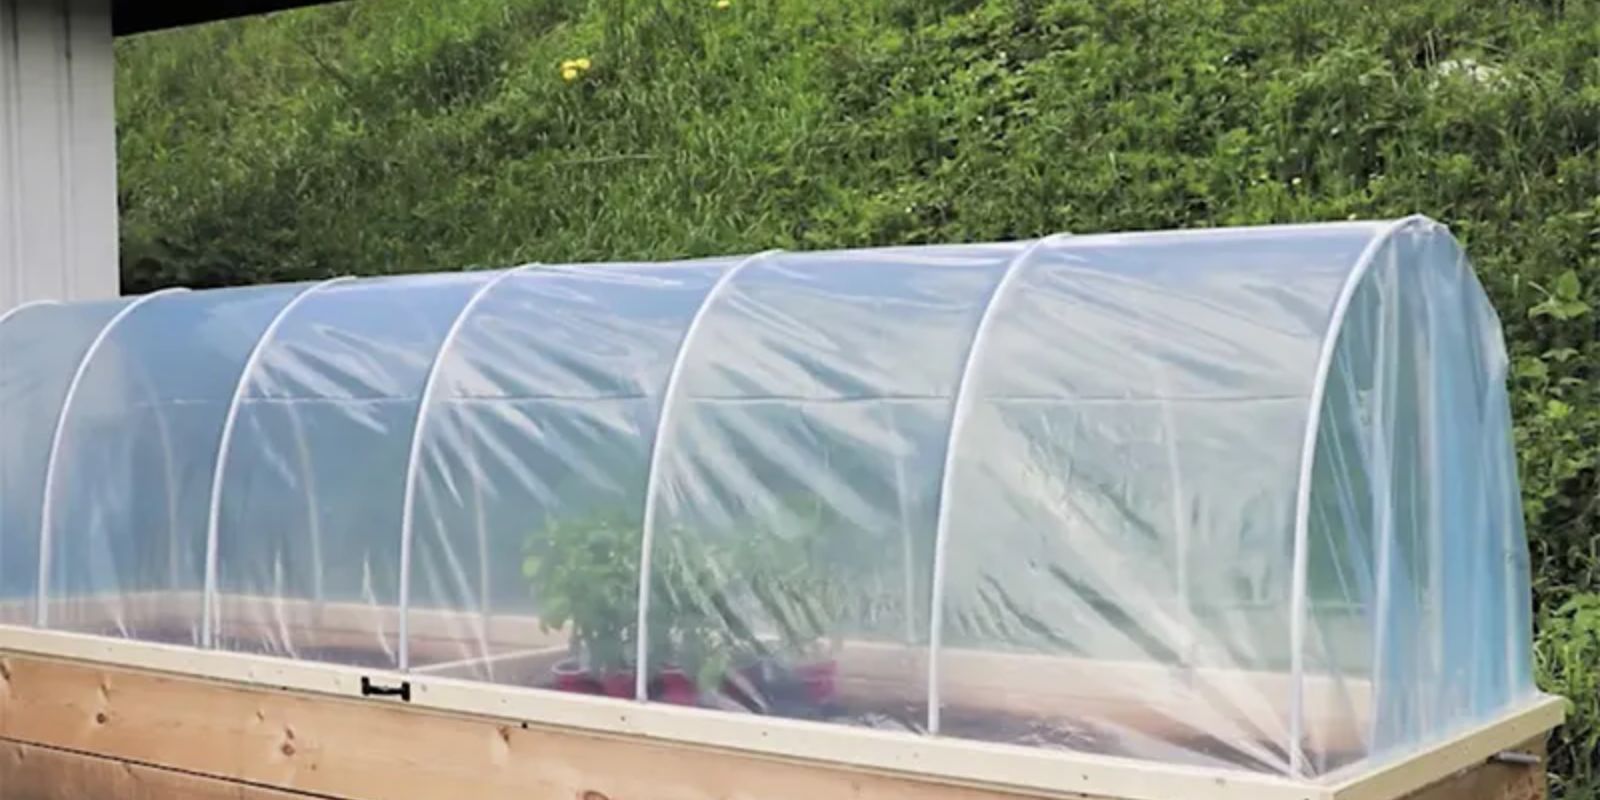
Gardening can be a year-round activity when you know how to protect your plants from fluctuating weather conditions, pests, and other natural elements. One of the most effective solutions for this is constructing a hinged hoophouse for your raised bed garden. A hoophouse acts as a mini greenhouse, providing the ideal growing conditions while allowing easy access for maintenance and harvesting.
This guide will walk you through everything you need to know about building a hinged hoophouse for your raised bed garden. With detailed steps, necessary materials, and some tips, you’ll have a functional structure that extends your growing season, boosts plant health, and shields your crops from pests. Let’s dive into it!
Why Build a Hinged Hoophouse?
A hinged hoophouse offers several advantages for the home gardener:
- Extended Growing Season: A hoophouse helps maintain a warmer environment for your plants, enabling you to grow crops earlier in the spring and later into the fall or even winter.
- Plant Protection: It shields your plants from harsh weather conditions like frost, wind, or heavy rain, ensuring your crops stay healthy throughout their growing cycle.
- Pest Control: With a cover over your plants, you’re able to keep pests such as insects, birds, and larger animals at bay, allowing your crops to flourish without chemical interventions.
- Accessibility: Thanks to the hinged design, you can easily open the hoophouse whenever you need to water, prune, or harvest, making it incredibly practical.
Now that you know why a hoophouse is such a great idea, let’s get into the steps of building one for your raised bed garden.
Materials You’ll Need
Before starting the build, gather all your materials. Here’s what you’ll need:
- PVC Pipes: These flexible, lightweight pipes are used to create the arches of the hoophouse.
- Pipe Clamps: Metal clamps to attach the PVC pipes to the wooden frame of the raised bed.
- Hinges: Two or more sturdy hinges to attach the hoophouse frame to the raised bed, allowing easy opening and closing.
- Wooden Frame: For additional structure, you’ll need to build a simple wooden frame for the hoophouse cover.
- Plastic Cover or Frost Cloth: This will cover the hoophouse, providing insulation while allowing light to pass through.
- Screws and a Drill: Necessary for attaching the hinges and pipe clamps.
- Zip Ties or Clips: To secure the plastic cover over the PVC pipes.
Step-by-Step Instructions
Step 1: Measure Your Raised Bed
Before building your hoophouse, you need to know the dimensions of your raised bed. Measure the length and width of the bed carefully. This will determine the length of the PVC pipes and the size of the wooden frame that will support the plastic covering.
Step 2: Build the Wooden Frame
The wooden frame will act as the base of your hoophouse. This frame should sit on top of your raised bed, providing a secure foundation for the PVC pipes and the plastic covering. To build the frame:
- Use treated wood (such as 2x4s) for durability.
- Cut the wood to match the dimensions of your raised bed.
- Attach the pieces together with screws to form a rectangular frame.
Step 3: Install the PVC Hoops
The PVC pipes are going to form the curved “hoop” structure of your hoophouse. For most raised beds, you’ll need 3-5 pipes depending on the length. Here’s how to install the PVC pipes:
- Cut the PVC Pipes: Cut the PVC pipes to the desired length so that they’ll form an arch over the raised bed.
- Attach Pipes to the Bed: Secure the base of each pipe to the inside edges of the raised bed using pipe clamps. The clamps should be positioned about 6-12 inches apart along the frame to ensure a sturdy structure.
- Space the Hoops Evenly: The PVC pipes should be spaced evenly along the length of the raised bed for even support.
Step 4: Attach Hinges to the Wooden Frame
Now it’s time to make your hoophouse “hinged” for easy access. Here’s what to do:
- Attach 2-3 sturdy metal hinges to one of the long sides of the wooden frame, making sure they are evenly spaced.
- Use screws and a drill to fasten the hinges securely. This will allow the hoophouse structure to lift like a lid, giving you convenient access to your plants without needing to remove the entire cover.
Step 5: Cover the Hoophouse
The plastic cover or frost cloth will protect your plants from the elements while still letting sunlight reach them. To cover your hoophouse:
- Drape the Cover: Lay the plastic sheeting or frost cloth over the PVC hoops, ensuring there’s enough material to cover the entire structure and hang down the sides.
- Secure the Cover: Use zip ties or clips to attach the cover to the PVC pipes. Ensure that the cover is tight but not stretched to the point where it could tear.
- Leave Access Points: If desired, you can leave the ends of the hoophouse open for ventilation, or attach fabric flaps that can be easily lifted when needed.
Step 6: Secure the Hoophouse to the Raised Bed
Once your hoophouse is built, you want to ensure it’s securely attached to the raised bed so that it doesn’t blow away in strong winds. You can do this by:
- Adding Additional Clips: Attach the cover to the raised bed using additional clips or fasteners.
- Bracing with Weights: For extra stability, you can use small sandbags or stones at the edges of the plastic cover to keep it in place during windy conditions.
Tips for Success
- Ventilation: On particularly warm days, be sure to open the hoophouse to prevent your plants from overheating.
- Watering: You can water your plants without fully opening the hoophouse by using drip irrigation systems or a watering wand inserted under the plastic cover.
- Seasonal Adjustments: Swap out your plastic cover for a lighter material like shade cloth during hot summer months to prevent overheating.
Plants That Thrive in a Hoophouse
With your hinged hoophouse in place, you can grow a variety of plants that might otherwise struggle in cooler or unpredictable climates. Some excellent options include:
- Cool-season Crops: Spinach, lettuce, kale, and other leafy greens will thrive in the protected environment of a hoophouse.
- Root Vegetables: Carrots, radishes, and beets are great choices for early spring or late fall planting inside your hoophouse.
- Tender Perennials: Herbs like parsley, cilantro, and rosemary can be grown in a hoophouse, where they’ll be protected from frost and cold winds.
Conclusion: Unlock Year-Round Gardening
Building a hinged hoophouse for your raised bed garden is one of the best ways to extend your growing season, protect your plants, and get more out of your garden. The ease of access provided by the hinged design makes it incredibly practical for everyday gardening tasks. Plus, it’s a cost-effective solution for keeping your plants healthy and productive through challenging weather conditions.
Whether you’re growing cool-season vegetables or simply want to protect your crops from pests and storms, a hinged hoophouse is an excellent addition to any garden setup.
Start building your hinged hoophouse today and enjoy gardening no matter the season!
Hashtags: #HingedHoophouse #GardenProtection #YearRoundGardening #RaisedBedGarden #DIYGardening #GrowYourOwnFood #HoophouseTips #GreenhouseGardening #VegetableGarden