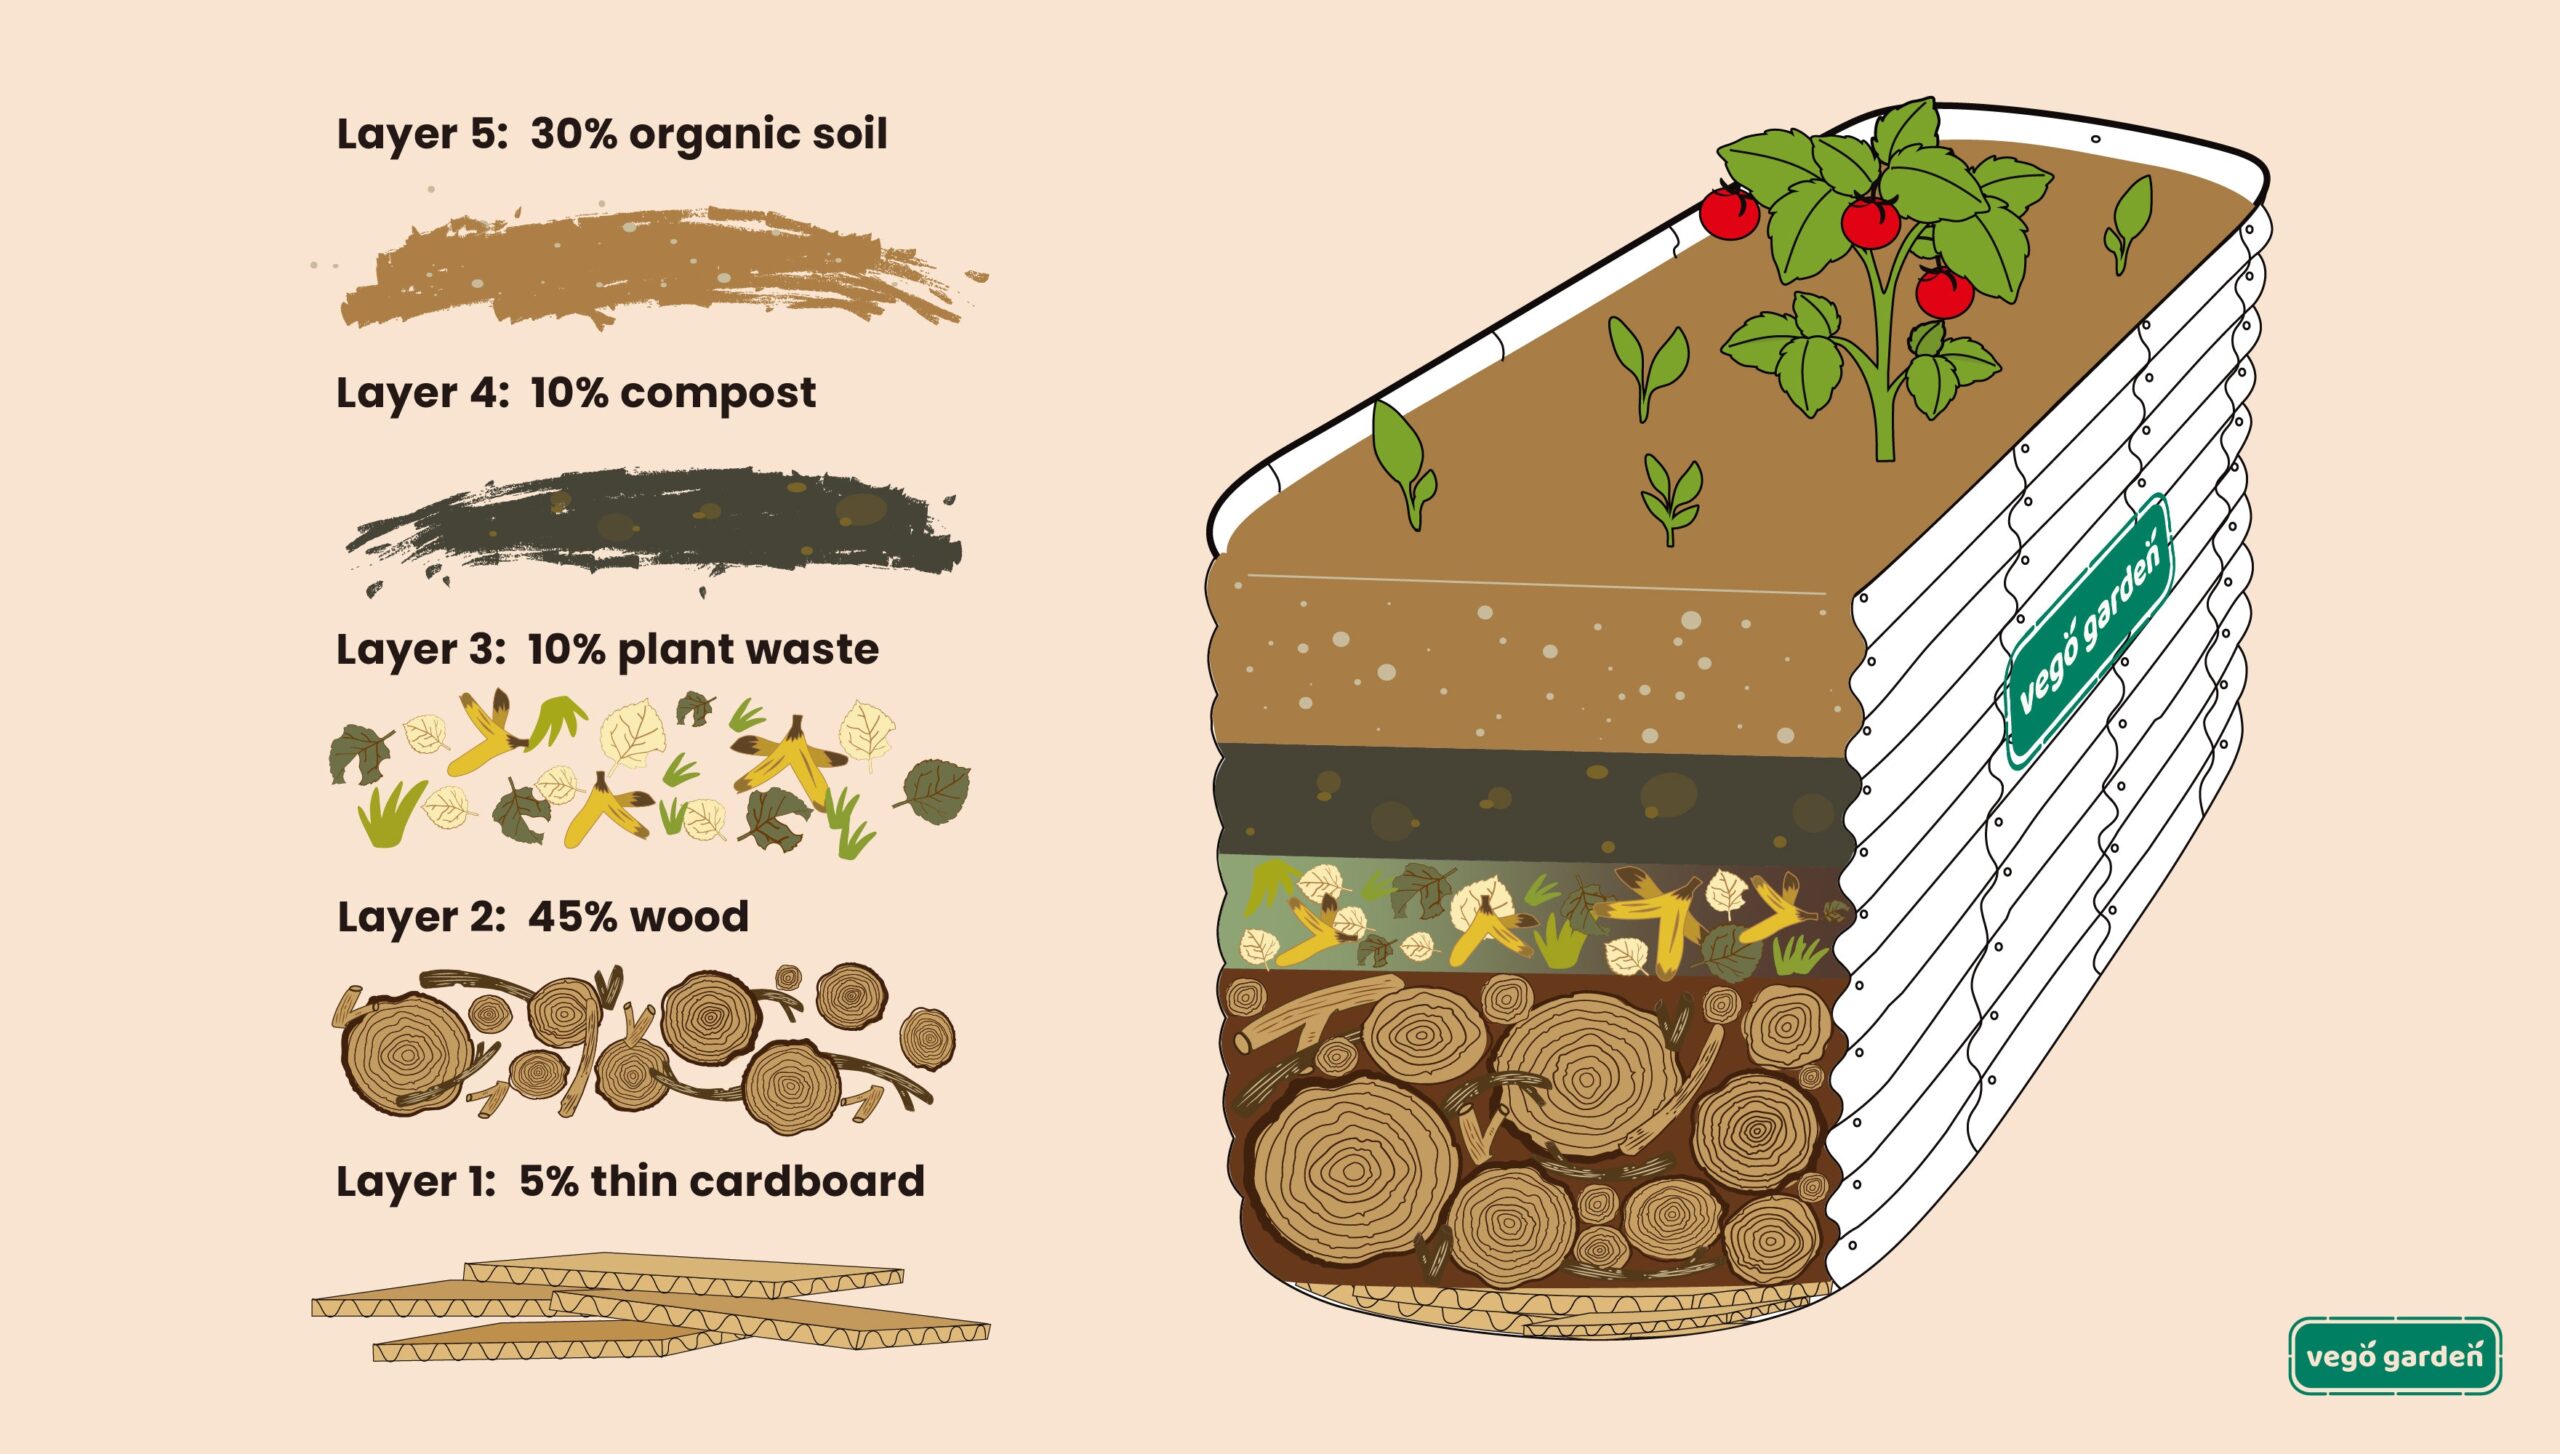
A raised hugelkultur garden bed is a smart, sustainable way to grow healthier plants while recycling natural materials. Rooted in traditional European gardening, hugelkultur (pronounced hoo-gul-culture) uses layers of wood, organic matter, and soil to create a self-fertilizing, moisture-retaining garden bed. Over time, the buried wood decomposes, feeding the soil, improving drainage, and reducing how often you need to water.This layer-by-layer guide walks you through exactly how to build a raised hugelkultur bed that lasts for years—perfect for gardeners in the United States, United Kingdom, and Canada.🌿 What Is a Hugelkultur Bed?Hugelkultur is a gardening method where logs, branches, and organic waste are buried under soil to form a raised planting area. As the wood breaks down, it acts like a sponge, holding moisture and releasing nutrients slowly.Key benefits include:Improved soil fertilityBetter water retentionReduced need for irrigationProductive garden beds that last 5–10 years🪵 Why Choose a Raised Hugelkultur Bed?A raised hugelkultur bed combines the advantages of raised beds and hugel beds:Easier on your back and kneesWarmer soil in springFaster drainage in wet climatesIdeal for poor or compacted soil🧰 Materials You’ll NeedUntreated logs or thick branchesSmaller sticks and twigsLeaves, straw, or dried grassKitchen scraps or compostManure (aged, optional)Topsoil and compost mixRaised bed frame (wood, stone, or metal – optional)❌ Avoid treated lumber, black walnut, or diseased wood.🧱 Build a Raised Hugelkultur Garden Bed (Layer by Layer)🪵 Layer 1: Large Logs (The Foundation)Place large logs or thick branches at the bottom of the bed.Why this layer matters:Acts as a long-term nutrient sourceImproves drainageStores moisture like a sponge👉 Tip: Water the logs before adding the next layer.🌿 Layer 2: Smaller Branches & TwigsFill gaps between logs with smaller sticks and woody debris.Benefits:Speeds up decompositionAdds airflowStabilizes the structure🍂 Layer 3: Carbon-Rich Organic MaterialAdd dry leaves, straw, shredded cardboard, or wood chips.Purpose:Balances nitrogenFeeds beneficial microbesPrevents soil compaction🍎 Layer 4: Nitrogen-Rich Green MaterialAdd grass clippings, kitchen scraps, fresh plant matter, or aged manure.Why it’s important:Activates decompositionPrevents nitrogen depletionFuels soil life🌱 Layer 5: CompostAdd a thick layer of finished compost.Benefits:Introduces beneficial bacteria and fungiProvides immediate nutrients for plants🌍 Layer 6: TopsoilFinish with 6–10 inches (15–25 cm) of high-quality topsoil or soil-compost mix.This is where your plants will grow during the first season.💧 Water ThoroughlyOnce all layers are in place, water deeply. This helps settle the materials and jumpstarts microbial activity.🌸 What to Plant in a Hugelkultur BedBest first-year plants:Squash, zucchini, cucumbersTomatoesBeans and peasSunflowersLater seasons:Leafy greensRoot vegetablesHerbs and perennials🌞 Placement TipsChoose full sun (6–8 hours daily)Align beds east–west for even lightIn dry climates, place beds slightly lower to capture rain🛠️ Practical Tips for SuccessExpect some settling—top up soil after the first seasonMulch heavily to retain moistureAvoid planting nitrogen-hungry crops immediately if using very fresh woodHugelkultur beds improve every year🌎 Environmental BenefitsReduces yard wasteBuilds carbon-rich soilConserves waterEncourages beneficial insects and microbes✅ ConclusionBuilding a raised hugelkultur garden bed layer by layer is one of the most rewarding ways to garden sustainably. With minimal inputs and long-term benefits, this method creates rich, living soil that supports vigorous plant growth while conserving water and recycling natural materials.Once established, your hugelkultur bed becomes a low-maintenance, high-yield garden that improves with time—nature doing most of the work for you 🌱✨