
Starting your own garden from seeds is one of the most rewarding ways to grow plants, whether you’re aiming for vibrant flowers, fresh vegetables, or a luscious herb garden. However, purchasing pre-made seed-starting kits can be costly and unnecessary when you can create your own affordable, sustainable alternatives at home. This guide will show you how to make super cheap seed starters using materials you likely already have. It’s a win-win for your wallet and the environment!
Why Use DIY Seed Starters?
Homemade seed starters are more than just a cost-effective gardening solution—they’re also environmentally friendly. By repurposing items like egg cartons, toilet paper rolls, and newspaper, you reduce waste while giving new life to materials that might otherwise end up in the trash. Plus, these biodegradable options often make transplanting easier, as they break down naturally in the soil.
Materials You’ll Need
Most DIY seed starters can be made with items readily available in your home. Here are some great options to get started:
- Egg cartons: Perfect for holding soil and seeds.
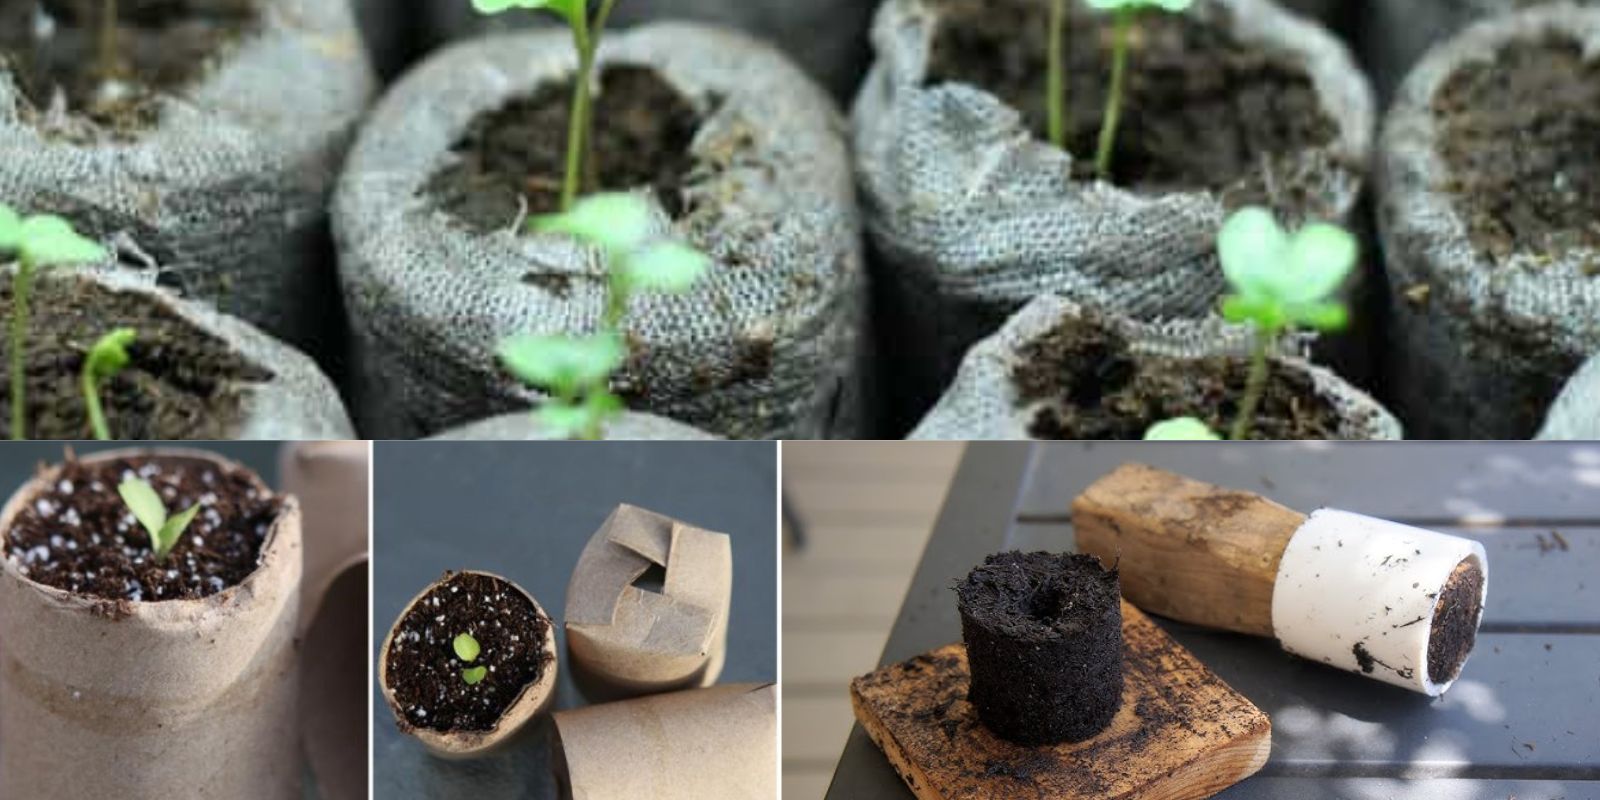
- Toilet paper rolls: Easy to cut into smaller sections for individual seed pods.
- Newspaper: Flexible and moldable into pot shapes.
- Plastic containers: Reuse yogurt cups or takeout containers with drainage holes added.
- Tin cans: Great for larger seeds, just add drainage holes.
- Used tea bags or eggshells: Natural and compostable.
Step-by-Step Guide to Making Seed Starters
1. Choose Your Base Material
Decide which recycled item you want to use. Each has its advantages:
- Egg cartons: Compact and easy to handle; great for smaller seeds.
- Toilet paper rolls: Fully biodegradable and customizable in size.
- Newspaper pots: Ideal for those looking for flexibility and minimal waste.
2. Prepare the Containers
- Egg cartons: Cut off the lid and poke small holes in the bottom of each cup for drainage.
- Toilet paper rolls: Cut each roll into smaller pieces, about 2 inches high, and fold the bottom to create a closed base.
- Newspaper pots: Fold and roll the newspaper into small cups, securing the sides with tape or by folding.
For plastic containers or tin cans, ensure you add drainage holes at the bottom using a sharp tool.
3. Fill with Soil
Use a nutrient-rich, lightweight potting soil. Fill each container about three-quarters full, leaving space to cover the seeds after planting. If you’re starting with eggshells or tea bags, they naturally enrich the soil and need only a bit of soil on top.
4. Plant the Seeds
Follow the seed packet’s instructions regarding depth and spacing. Typically, place one or two seeds in each starter and cover lightly with soil.
5. Water Lightly
Use a spray bottle or gently pour water to moisten the soil without overwatering. Ensure the soil stays damp but not soggy during germination.
6. Set Up Proper Growing Conditions
Place your seed starters in a warm, sunny spot, such as a windowsill. Alternatively, use grow lights if natural light is limited. Covering the starters with plastic wrap or a clear lid can create a greenhouse effect, retaining moisture and warmth.
7. Monitor Growth
Check daily to ensure the soil remains moist and watch for germination. Once the seedlings sprout, remove any covering and make sure they receive adequate light to prevent them from becoming leggy.
8. Transplanting
When the seedlings develop a few true leaves and are strong enough to handle, transplant them into your garden or larger pots. Biodegradable starters like newspaper, eggshells, or toilet paper rolls can go directly into the soil, where they’ll decompose and nourish the plants.
Tips for Success
- Label Your Starters
If you’re growing multiple types of seeds, label each starter to avoid confusion. You can use popsicle sticks, masking tape, or write directly on the containers. - Don’t Overcrowd Seeds
Avoid planting too many seeds in one starter, as overcrowding can stunt growth and make transplanting difficult. - Use Quality Seeds
Choose fresh, high-quality seeds for better germination rates and healthier plants. - Repurpose Water
Collect rainwater or reuse cooled leftover water from boiling vegetables to water your seedlings. This adds nutrients while reducing waste. - Consider Fertilizer
Once seedlings sprout, add a diluted organic fertilizer every two weeks to promote healthy growth.
Creative Ideas for Seed Starters
- Eggshells: Crack eggs carefully, use the shells as mini seed pots, and plant them directly into the soil when ready.
- Citrus peels: Use hollowed-out lemon or orange halves as biodegradable seed pots.
- Ice cube trays: Repurpose old trays as reusable seed-starting containers.
- Milk cartons: Cut them in half for larger seeds or create a mini greenhouse by leaving the top intact.
Benefits of DIY Seed Starters
- Cost Savings
Store-bought seed starters and kits can add up, but using recycled materials eliminates this expense entirely. - Environmental Impact
Repurposing waste helps reduce your carbon footprint, making your gardening practices more sustainable. - Customization
DIY options let you create starter sizes and shapes tailored to your specific plants and space. - Ease of Use
Most DIY materials are biodegradable, simplifying the transplanting process and reducing transplant shock for seedlings.
Conclusion
Creating super cheap seed starters at home is a fantastic way to save money, reduce waste, and enjoy the satisfaction of growing plants from seed. With just a bit of creativity and effort, you can transform everyday items into effective gardening tools.
Not only will your garden thrive, but you’ll also inspire others to embrace sustainable gardening practices. So, what are you waiting for? Start collecting those recyclable materials and get planting!
#DIYSeedStarters #SustainableGardening #BudgetGardening #EcoFriendlyGarden #GardeningHacks #HomeGardenIdeas #GrowYourOwnFood #UpcycledGardening