
Begonias are a beloved and versatile plant that adds color and vibrancy to any garden or home. Whether you’re a seasoned gardener or just starting out, begonias are relatively easy to care for and can be propagated quickly. One surprising yet incredibly effective way to propagate begonias is by using a banana peel—yes, a simple banana! This method of propagation is not only affordable but also sustainable, as it repurposes a common kitchen waste item to help your plants thrive.
In this article, we’ll walk you through the step-by-step guide on how to propagate begonias with a banana peel and explain the science behind why this method works so well. You’ll learn how to multiply your begonias effortlessly and make your garden even more lush and vibrant. Plus, we’ll share some essential tips to help your cuttings grow faster and stronger. So, let’s dive in and discover how one banana can revolutionize your gardening practice!
Why Use a Banana for Propagating Begonias?
Before we jump into the steps, it’s important to understand why this method works so well. The secret lies in the natural nutrients found in a banana peel. Bananas are rich in essential minerals such as potassium, phosphorus, and magnesium. These nutrients are crucial for promoting root development and overall plant health. When you use a banana peel to propagate your begonia cuttings, the peel provides a natural, nutrient-rich environment that encourages faster root growth.
In addition to nutrients, banana peels are known to contain natural hormones, such as auxins, which promote root growth. Auxins are a type of plant hormone that helps plants grow roots, so placing your begonia cuttings in contact with the banana peel gives them the perfect boost for quick propagation.
Now that we know why this method works, let’s break it down into simple steps for you to follow.
Step-by-Step Guide to Propagating Begonias with a Banana Peel
Step 1: Gather Your Supplies
Before you start propagating your begonias, make sure you have all the necessary tools and materials on hand. Here’s what you’ll need:
- A healthy begonia cutting with at least two nodes (the small bumps where leaves or roots grow).
- A banana (preferably organic if you can).
- A sharp knife or scissors to make clean cuts.
- A small container (such as a pot or seed tray) to place the cutting.
- Potting soil (optional, but can help anchor the cutting and encourage growth).
- A plastic bag or plastic wrap (to create a humid environment).
Make sure your cutting tools are clean and sterilized to avoid transferring any potential diseases to the plant.
Step 2: Prepare the Begonia Cutting
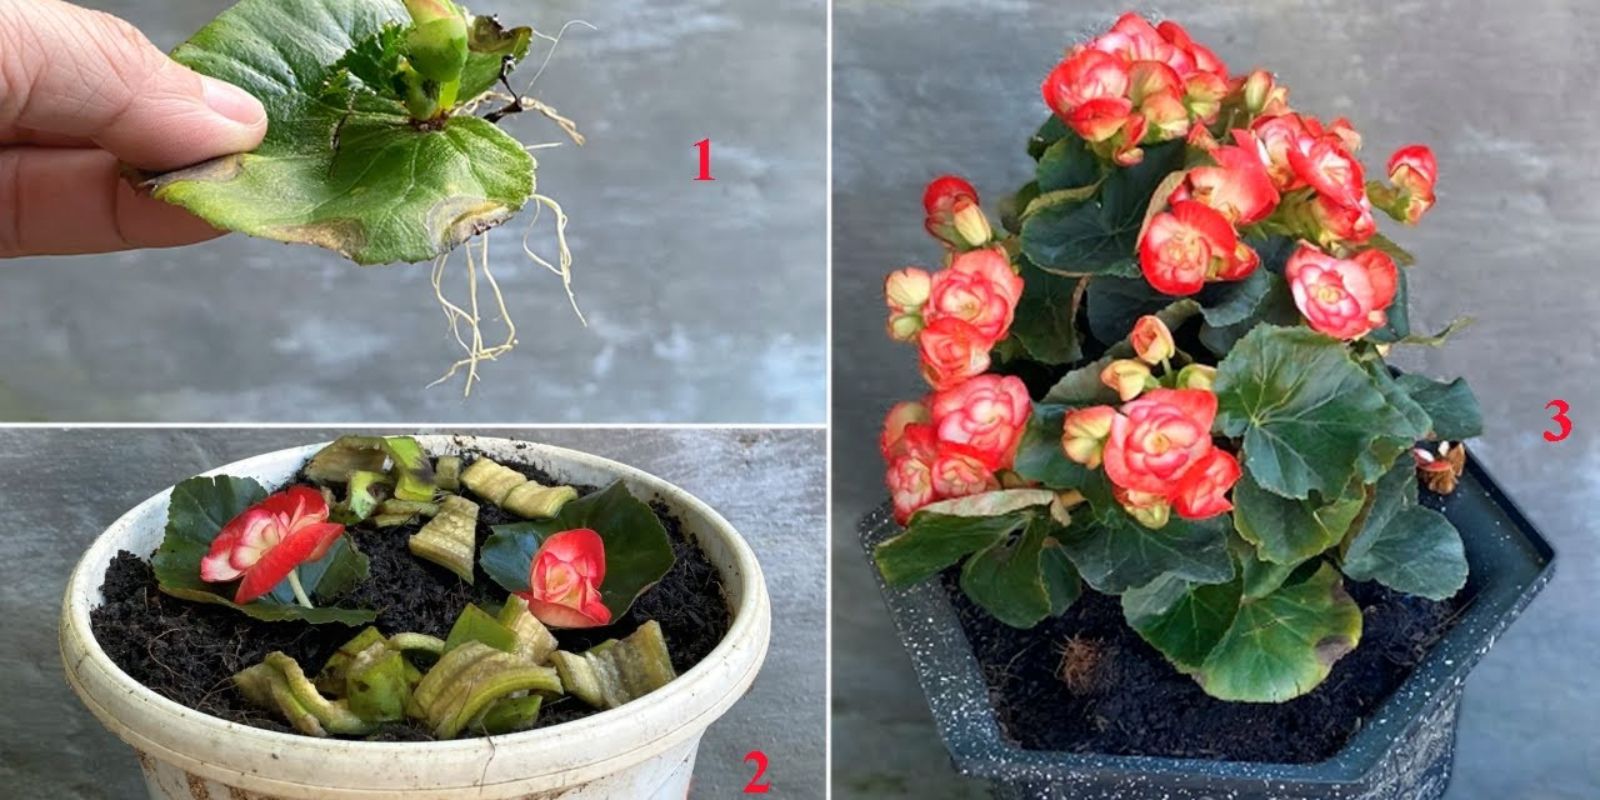
The first step is to choose a healthy begonia plant and select a cutting. The best cuttings are those taken from the tips of the stems. Look for stems that are firm and free from disease or pests. A healthy cutting should be about 4 to 6 inches long and should have at least two nodes (the small bumps where roots and leaves grow).
Using your sharp knife or scissors, make a clean cut at a slight angle just below a node. It’s essential that the cutting has a node because this is where the roots will develop. After cutting, remove any leaves from the lower part of the stem to prevent them from rotting in the soil.
Step 3: Peel the Banana and Cut It
Now, take a ripe banana and peel it. The banana peel is the key element for propagating your begonia, so don’t throw it away just yet! Slice the peel into two or three pieces—depending on the size of your container and how many cuttings you want to propagate. Each piece of banana peel should be large enough to fully support the base of the cutting.
You’ll notice that the inside of the banana peel is moist and rich in nutrients, making it perfect for encouraging root growth.
Step 4: Prepare the Pot and Soil
Choose a small container that is deep enough to accommodate your begonia cutting. Ideally, you’ll want a container that has drainage holes to allow excess water to escape. If you’re using soil, fill the container with a good quality potting mix, leaving enough space at the top to add the banana peel pieces.
If you’re not using soil and want to try this method with just the banana peel, that’s fine too. Simply place the banana peel pieces at the bottom of the container.
Step 5: Insert the Begonia Cutting into the Banana Peel
Now that you have your banana peel pieces ready, place one of the slices in the bottom of the container. You’ll want to insert the base of the cutting directly into the banana peel so that the node is in contact with the peel. The banana peel will provide a nourishing base for the cutting, allowing it to absorb essential nutrients and moisture, speeding up the rooting process.
Once the cutting is securely placed in the banana peel, cover the cutting with a bit of potting soil, if using. The banana peel will act as a natural rooting medium, while the soil helps anchor the cutting.
Step 6: Create a Humid Environment
After planting your cutting in the banana peel, it’s important to maintain a humid environment to encourage root growth. You can achieve this by covering the container with a plastic bag or plastic wrap. This creates a mini greenhouse effect, trapping moisture and warmth to help the cutting root quickly.
Place the container in a warm location with indirect sunlight. Keep an eye on the humidity inside the bag and make sure the cutting doesn’t dry out. Check the soil periodically to ensure it stays moist but not soggy. You want the environment to be humid, but not excessively wet, as that could lead to rot.
Step 7: Wait for Roots to Form
Now comes the exciting part—waiting for your begonia cutting to root! Depending on the temperature and the health of your cutting, roots can begin to form in as little as one to two weeks. During this time, the cutting will begin to absorb nutrients from the banana peel, which helps it develop strong roots.
Once you start to see roots emerging from the cutting, it’s time to carefully transplant it into a larger pot with potting soil. The banana peel can be removed at this point, as the cutting should now have a healthy root system.
Step 8: Transplant and Care for Your New Begonia Plant
Once your begonia cutting has developed strong roots, carefully transplant it into a larger container filled with good-quality potting soil. Water it gently and continue to care for it as you would any other begonia plant. Make sure it receives the right amount of sunlight, water, and nutrients.
Tips for Success
- Use a healthy cutting: The better the cutting, the better the chances of successful propagation.
- Keep the cutting in a warm, bright spot: While begonias don’t like direct sunlight, they do thrive in bright, indirect light.
- Avoid overwatering: Too much moisture can cause the cutting to rot. Keep the soil slightly moist but not soggy.
- Be patient: Rooting may take a few weeks, so be patient and let nature do its work.
Conclusion
Propagating begonias using a banana peel is a simple, natural, and highly effective way to multiply your plants. With just a few supplies and a little patience, you can have new begonias growing in no time. This method leverages the power of nature’s nutrients and hormones found in banana peels to boost root growth, making it one of the most sustainable and rewarding ways to propagate your favorite plants.
By reusing something as simple as a banana peel, you’re not only promoting healthy plant growth but also reducing waste and making your gardening practice more eco-friendly. Give it a try, and you’ll soon see your begonias flourishing in abundance!
Let us know how your propagation goes, and share your experiences with fellow gardeners! 🌱