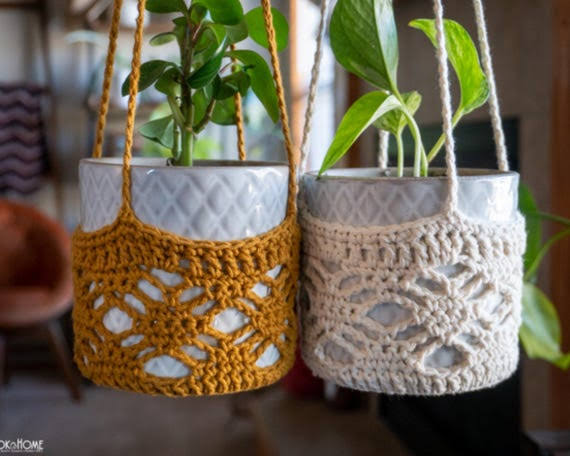
Crochet isn’t just for scarves, blankets, or cozy winter hats anymore. In recent years, it’s found its way into modern home décor—adding warmth, texture, and personality to living spaces. One of the trendiest and most charming projects? Crocheting a hanging plant holder. Not only is this project functional, but it’s also stylish and budget-friendly, making it the perfect DIY craft for beginners and advanced crocheters alike.In this guide, we’ll explore step-by-step instructions, essential materials, creative variations, and insider tips to help you master how to crochet a hanging plant done right. Whether you’re looking to decorate your home, gift a handmade treasure, or add a pop of greenery to small spaces, this project is clever, simple, and endlessly customizable.🌿 Why Crochet a Hanging Plant Holder?Before diving into the how-to, let’s talk about why this craft is worth your time:Affordable Décor: Skip pricey store-bought plant hangers by making your own.Handmade Touch: Adds character and charm to your home.Customizable: Choose your favorite yarn, colors, and patterns to match your décor.Space-Saving: Perfect for small apartments or maximizing vertical space.Sustainable: Handmade means less reliance on mass-produced décor.By learning how to crochet a hanging plant done right, you get a décor piece that’s both stylish and practical.🧶 Materials You’ll NeedBefore you start, gather these essentials:Yarn: Cotton yarn is ideal—strong, durable, and holds shape well. Choose a thickness that matches your plant size.Crochet Hook: Usually size 5mm–6mm (H or J hook), depending on yarn weight.Scissors: For trimming yarn ends.Stitch Marker: Helps track rounds.Plant Pot: Lightweight pots (plastic or resin) work best for crochet hangers.Optional Beads or Wooden Rings: For decorative flair and stability.👌 Step-by-Step: How to Crochet a Hanging Plant HolderHere’s a beginner-friendly method to get you started:Step 1: Start with a Magic RingCreate a magic ring and crochet 6 single crochets (sc) into the loop.Pull tight to close the circle—this forms the base of your holder.Step 2: Build the BaseRound 2: Crochet 2 sc into each stitch (12 stitches).Round 3: 1 sc, 2 sc in next stitch—repeat (18 stitches).Continue increasing until the circle matches the size of your pot’s bottom.Step 3: Form the SidesOnce the base is the right size, work single crochet stitches in each stitch around without increasing.This builds up the sides of the holder.Continue until your work reaches about halfway up your pot.Step 4: Create the NettingSwitch to chain stitches (ch).Example: Ch 4, skip 2 stitches, sc into next stitch—repeat around.This creates a mesh/net-like design that holds the plant securely.Step 5: Add Hanging StrapsOnce the holder is tall enough, crochet 3–4 long chains (about 15–20 inches each).Attach them evenly around the top edge.Gather the chains and secure them to a wooden ring or knot at the top for hanging.Step 6: Finishing TouchesWeave in loose yarn ends with a yarn needle.Add decorative beads, tassels, or fringe for extra style.That’s it—you’ve just crocheted a handmade plant hanger! 🌿🌟 Clever Tips for Crochet Plant Hanger SuccessHere are some pro tricks to do it right the first time:Choose Cotton Over AcrylicCotton yarn holds weight better and won’t stretch out as much.Match Pot SizeTest the fit as you go to ensure the base and sides hug the pot securely.Balance the StrapsUneven straps = lopsided plants. Measure chains carefully.Keep It LightweightUse lightweight pots and avoid overwatering to reduce strain on yarn.Experiment with StitchesTry half-double crochets (hdc), puff stitches, or shell patterns for unique textures.Play with ColorUse ombré yarn for a modern gradient look or combine contrasting shades.🎨 Creative Variations to TryOnce you master the basics, here are fun ways to elevate your crochet plant hangers:Macramé-Inspired Look: Use long chains and knotting techniques for a boho vibe.Two-Tone Design: Switch yarn colors halfway for stylish contrast.Beaded Hanger: Add beads to the chains for a chic finish.Fringe Bottom: Leave yarn tassels dangling for extra flair.Mini Hangers: Perfect for succulents and small cacti.🏡 Where to Use Crochet Plant HangersThese clever creations fit in almost any home space:Living Room: Add greenery without cluttering shelves.Kitchen: Perfect for herbs like basil, rosemary, or mint.Bedroom: Soft textures bring coziness and calm.Balcony/Porch: Use outdoor-safe yarn for weather resistance.Office/Workspace: Small plant hangers brighten up your desk.❌ Common Mistakes to AvoidEven simple projects have pitfalls—avoid these for stress-free success:Using stretchy yarn that sags with weight.Forgetting to test strap lengths, causing uneven hang.Making the base too small—pot may slip out.Choosing heavy clay pots (opt for plastic or resin).Skipping reinforcement knots at the strap connection.🌿 Eco-Friendly Bonus IdeaWant to take it further? Try crocheting your hanger with recycled yarn or t-shirt yarn. Not only does it look trendy, but it also reduces waste—making your plant hanger as eco-friendly as it is beautiful.ConclusionLearning how to crochet a hanging plant done right is a rewarding, creative, and surprisingly easy DIY project. With just a hook, some yarn, and a bit of patience, you can transform any room into a cozy, plant-filled haven. From simple, minimalist designs to colorful, decorative variations, your crochet plant hanger will be as unique as you are.So grab your yarn, choose your favorite plant, and start crocheting—your home is about to get a handmade upgrade that’s both clever and stylish. 🌿✨