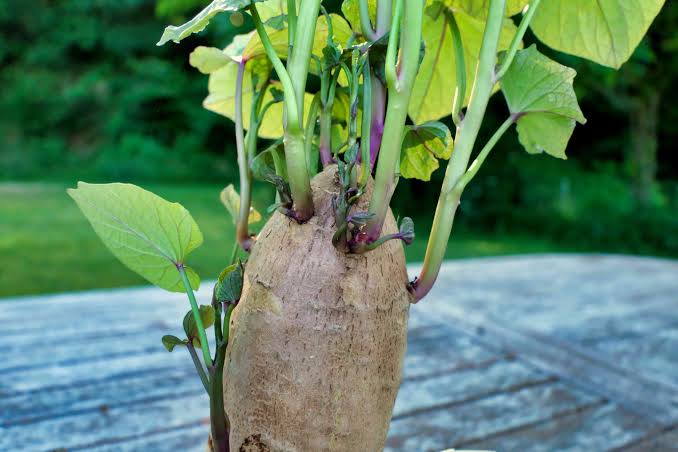
Sweet potatoes aren’t just a delicious and nutritious root vegetable—they’re also incredibly rewarding to grow. With their lush, heart-shaped leaves, vibrant vines, and nutrient-rich tubers, sweet potatoes add both beauty and bounty to your garden. The key to success lies in learning how to plant sweet potato slips , the young sprouts grown from mature sweet potatoes.Whether you’re a seasoned gardener or a beginner, planting sweet potato slips can transform your garden’s look while giving you a healthy harvest. This guide will show you, step by step, how to plant and care for sweet potato slips so you can enjoy amazing results at home.What Are Sweet Potato Slips?Unlike traditional potatoes, sweet potatoes are grown from slips rather than seed potatoes. Slips are shoots that sprout from a mature sweet potato when it’s placed in water or soil.Each slip, once separated and rooted, becomes a new plant capable of producing multiple sweet potatoes. Growing them yourself is economical, sustainable, and surprisingly simple.Why Plant Sweet Potato Slips?Nutritious Harvest – Sweet potatoes are rich in fiber, vitamins A and C, and antioxidants.Decorative Value – Their trailing vines and lush leaves make gardens more vibrant.High Yield – One slip can produce several sweet potatoes.Versatility – Grow in garden beds, raised beds, or large containers.Satisfaction – Growing your own food connects you to the soil and provides fresh produce at your fingertips.🌱 Step 1: Growing Sweet Potato SlipsIf you don’t buy slips from a nursery, you can grow them yourself. Here’s how:Choose a Healthy Sweet Potato – Organic varieties sprout best.Prepare It – Cut the sweet potato in half and suspend each half in a jar of water using toothpicks, leaving half submerged.Wait for Sprouts – Place the jar in a warm, sunny window. In 2–4 weeks, sprouts will begin to grow.Separate Slips – Once sprouts are about 6 inches long, gently twist them off the potato.Root Them – Place slips in water until roots develop, usually within a week.Now you’re ready to plant.🌿 Step 2: Preparing the SoilSweet potatoes thrive in loose, well-draining soil . Heavy or compact soil restricts tuber growth.Ideal pH: Between 5.5 and 6.5.Soil Prep: Work in compost or well-rotted manure for nutrients.Raised Beds: A great option if your native soil is clay-heavy.Pro tip: Sweet potatoes prefer sandy loam—fluffy soil allows roots to expand easily.🌞 Step 3: Planting Sweet Potato SlipsTiming and placement are crucial for healthy growth.When to Plant: After the last frost, when soil temperature reaches at least 60°F (15°C).Spacing: Plant slips 12 inches apart, with rows about 3 feet apart.Depth: Bury slips up to their top leaves, ensuring roots are well covered.Sunlight: Choose a location with full sun (6–8 hours daily).💧 Step 4: Watering and MulchingWater is key in the early stages:First 2 Weeks: Keep soil consistently moist to help slips establish roots.After Establishment: Water deeply once a week; increase during hot, dry spells.Mulching: Apply straw or shredded leaves to retain moisture, suppress weeds, and keep soil warm.✂️ Step 5: Maintenance and CareTo maximize growth:Weeding: Remove weeds early; sweet potato vines spread quickly to shade them out.Training Vines: Let vines sprawl or guide them along trellises for a tidy look.Fertilizing: Use a balanced fertilizer but avoid too much nitrogen, which promotes leaves over tubers.🍠 Step 6: Harvesting Sweet PotatoesPatience pays off when growing sweet potatoes.Harvest Time: Typically 90–120 days after planting, depending on variety.Signs of Readiness: Yellowing leaves and cooler weather.Method: Use a garden fork to gently lift tubes, being careful not to damage them.After harvest, cure sweet potatoes by storing them in a warm, humid spot (85°F / 29°C) for 7–10 days. This improves flavor and shelf life.🌿 Pro Tips for Amazing ResultsRotate Crops – Avoid planting sweet potatoes in the same spot yearly to prevent disease.Companion Planting – Pair with beans, thyme, or dill for natural pest control.Container Growing – Use a 20-gallon pot or larger for best results.Decorative Use – Ornamental sweet potato vines add beauty to patios and garden beds, even if not grown for food.Troubleshooting Common ProblemsYellow Leaves: May indicate overwatering or nutrient deficiency.Poor Tuber Development: Soil may be too compact or nitrogen-heavy.Pests: Watch for wireworms and sweet potato weevils. Use crop rotation and organic controls.Transform Your Garden and Your LookSweet potato vines aren’t just edible—they’re stunning. Their vibrant foliage can transform your garden’s look, spilling beautifully over containers or raised beds. Even indoors, ornamental sweet potato vines add a touch of elegance to home décor.By learning how to plant sweet potato slips , you’ll not only enjoy a healthy harvest but also create a visually stunning green space that makes your home or garden feel alive and vibrant.ConclusionGrowing sweet potatoes from slips is one of the most rewarding gardening experiences. From sprouting slips in a jar to harvesting hearty tubes months later, the process is simple, affordable, and highly satisfying.Now that you know how to plant sweet potato slips step by step, you can grow your own food, enhance your garden’s beauty, and enjoy the satisfaction of harvesting delicious sweet potatoes right from your backyard.So grab a few sweet potatoes, start sprouting slips, and get ready to transform your look with how to plant sweet potato slips – amazing results!SEO ExtrasSEO Title: 🍽️ Transform Your Look with How to Plant Sweet Potato Slips – Amazing Results!Meta Description: Learn how to plant sweet potato slips step by step. Simple, effective guide for soil prep, planting, watering, and harvesting—get amazing results at home!Keyword List:how to plant sweet potato slipsgrowing sweet potatoes from slipsplanting sweet potato vineswhen to plant sweet potato slipssweet potato slip careharvest sweet potatoesgrow sweet potatoes in containers